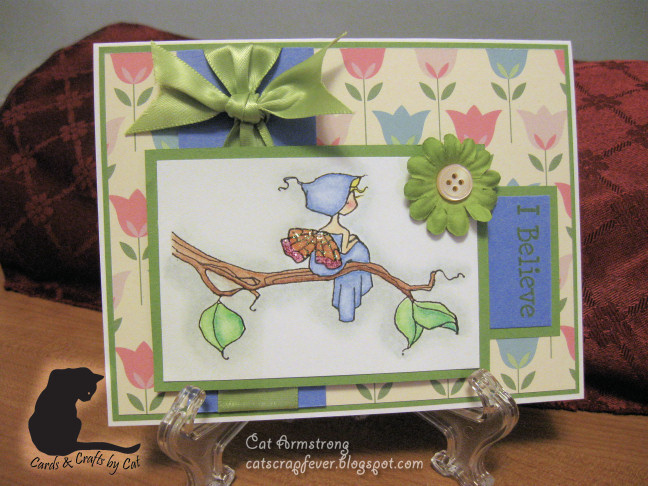
Hi everyone! Its time again for another great new release from A Day for Daisies and another new challenge starts today on the blog. The challenge this time is to Go Green! It will be a lot of fun, so hop over to the blog and join the activities. You will get a chance to win a great image from ADFD and there is an awesome freebie this time to get you going.
Here's a little sneak peek of what in new in store today at the ADFD store:
I also want to congratulate Wendy C. She is the winner of our last challenge. Way to go Wendy!
So, here's the card I made for this new release and challenge. I love love love peacock images. They give you the chance to use so many beautiful colours and just dress them up however you like.
Supplies:
Stamps: Peacock Fairy (A Day For Daisies)
Papers: patterned paper (Amy Buttler Belle collection - K&Company), cardstock (Recollections, Bazzil, Wausau Exact Index 110#)
Tools & Embellishments: Pencil crayons (Roseart, Crayola), oms, glitter (Jones Tones), glue pen (Zig), Floral Vine deep edge punch (Martha Stewart), Leave it to Weaver edge punch (Fiskars), striped grosgrain ribbon (Michaels)
That's it for now. I'll be back later with a couple different posts. :)
Cat
Showing posts with label ADFD Challenges. Show all posts
Friday, March 18, 2011
Friday, March 11, 2011
ADFD New Release Cards
I'm a blogging fool this week. :) I think I've made 4 or 5 posts this week. Well, here I am again to show you the card I made with this week's new release from A Day for Daisies. This new release is, without doubt, one of the cutest Tammy has put out. Here's a peek of what she has for you in the store today:
Aren't they adorable? You can get them in the new ADFD shop. AND, just for the grand re-opening of the store, there is 10% off all digital stamps now till March 14! How great is that? Also, don't forget about the challenge going on at the ADFD blog. You could win an image from ADFD and there is a free image so you can play along (if you don't already have soooo many of Tammy's creations already like me.).
So without any further dilly-dallying, here is the card I made for this week:
Supplies:
Stamps: Little Fish Child 2 (A Day for Daisies), Pretty Sea Shells Collection (A Day for Daisies)
Papers: patterned papers (unknown), blue cardstock (Stampin Up), white cardstock (Wausau Exact Index 110#), craft cardstock (The Paper Company)
Tools & Embellishments: CraftRobo, Silhouette fern cutting file, Dimensional Magic (Plaid - Mod Podge), white Liquid Pearls, Stardust Stickles, copics, Scalloped Scallop edge punch (EK Success), Quick Dry Tacky Glue (Aileen's)
The ruffled flowers that are so much the craze these days inspired me to create the large scallop shell that the baby mermaid sits in. I used a scallop edge punch along a strip of paper (2" wide), then fan folded it at each scallop. I opened it to create a 1/2 circle and glued that to a piece of scrap cardstock so it would keep its shape. It was quick and a lot easier than it looks. The trick is using a glue that will dry quickly so that it doesn't pull apart. I like the Aileen's quick dry tacky glue, but you could use a glue gun too.
Well, that's all for now. I'll be back again soon with something else.
Cat
Aren't they adorable? You can get them in the new ADFD shop. AND, just for the grand re-opening of the store, there is 10% off all digital stamps now till March 14! How great is that? Also, don't forget about the challenge going on at the ADFD blog. You could win an image from ADFD and there is a free image so you can play along (if you don't already have soooo many of Tammy's creations already like me.).
So without any further dilly-dallying, here is the card I made for this week:
Supplies:
Stamps: Little Fish Child 2 (A Day for Daisies), Pretty Sea Shells Collection (A Day for Daisies)
Papers: patterned papers (unknown), blue cardstock (Stampin Up), white cardstock (Wausau Exact Index 110#), craft cardstock (The Paper Company)
Tools & Embellishments: CraftRobo, Silhouette fern cutting file, Dimensional Magic (Plaid - Mod Podge), white Liquid Pearls, Stardust Stickles, copics, Scalloped Scallop edge punch (EK Success), Quick Dry Tacky Glue (Aileen's)
The ruffled flowers that are so much the craze these days inspired me to create the large scallop shell that the baby mermaid sits in. I used a scallop edge punch along a strip of paper (2" wide), then fan folded it at each scallop. I opened it to create a 1/2 circle and glued that to a piece of scrap cardstock so it would keep its shape. It was quick and a lot easier than it looks. The trick is using a glue that will dry quickly so that it doesn't pull apart. I like the Aileen's quick dry tacky glue, but you could use a glue gun too.
Well, that's all for now. I'll be back again soon with something else.
Cat
Friday, February 18, 2011
A Day For Daisies First Ever BLOG HOP!!!
Hey everyone. Its the ADFD first ever blog hop. We're going to send you along an exciting trail to see some great works from the design team. You have a week to work your way through all the blogs, so take your time and visit (& comment) along the way. :)
Make sure you leave a comment at each stop. Anyone who leaves a comment at all the participant stops will be entered to win a set of images from the new releases today! Yay! And they are fantastic as usual. There are three sets to choose from. Here's a peek of this week's new images:
Aren't they great!? Don't forget that today also marks the start of a new challenge on the ADFD blog - Very Vintage. This is the card I made with the Vintage Rose Blooming image (available now in the ADFD shop).
Supplies:
Stamps: Vintage Rose Blooming (A Day For Daisies), Hanging by a Thread set (stitching around edge - Technique Tuesday), How Do I Love Thee digital paper (CatScrapFever Designs)
Papers: Recollections cardstock, Domtar coated 200# ivory cardstock (base), Matte finish brochure paper (Staples), Wausau Exact Index 110# (main image printed on this)
Tools & Embellishments: CraftRobo, rhinestone corner sticker (Dollar Store), gold glitter glue (Studio G), homemade glimmer mist (DecoArts paint - Rich Espresso), crotchet ribbon (Dollar Store), ivory satin ribbon (Michaels), white Liquid Pearls, pencil crayons (Martha Stewart), oms, heat gun, black Stazon ink
The card itself is fairly simple in design. However, the little embellishments are where all the work was. I made the little roses out of scrap cardstock. I researched about 50 different ways they were done on different tutorials and you-tube videos. Once I figured I knew what I needed to do I created a cut file and cut them with my CraftRobo. I sprayed some of my homemade glimmer mist onto a piece of sponge and sponged the edges of all the flower pieces, let them try, and then assembled the flowers. They really are easy and once I get my craft room cleaned up, I want to do up a little video tutorial to show you how easy they are. The corner pieces were also cut on my CraftRobo. (I found the cut file on ukscrappers.com. They have thousands of free files there if you have a CraftRobo/Wishblade/Silhoulette. Its a great resource for cutting files.) Once cut from cream cardstock, I put gold glitter glue all over. I was impatient and used my heat gun to dry the glitter glue and it made the glitter glue bubble which was kind of a happy mishap because it gave it a really cool texture that you can't see in the picture. I hand cut the main image out after I coloured it using my Martha Stewart pencil crayons and oms. Again, I could have used my CraftRobo, but I already had the image printed, so I didn't want to reprint it with the cut&print feature on my CR because it uses more paper and I don't like to waste paper - even if it is fairly inexpensive. The Nestability shapes were cut on my CR and I used my "faux nestability" templates to emboss the edges to make them look even more like the real thing. I used my How Do I Love Thee valentine paper for the top layer just because it has a nice vintage look to it and it worked well with my colour scheme. I used the sponge again with my homemade glimmer mist around the edges to give it a little distressed look and some glimmer. I put small pearls on the scallops using white Liquid Pearls.
TIP: To get the Liquid Pearls to dome properly without the little "horns", I flicked the backside of the paper gently and that gets rid of those pesky little "horns".
Once the Liquid Pearls was dry, I used pop dots to adhere the image to the centre of the nestability shapes, and pop-dotted the focal piece to the cardfront.
I should mention that I also used the sponge and glimmer mist around the edges of the "stitched" cardstock as well. I love this colour of homemade glimmer mist - Rich Espresso. The "stitching" was done with a stamp and black stazon ink.
If you're following along the path of the blog hop, you should have arrived here from the talented Candy's blog. The next stop on the hop is the amazing Jen's blog. Don't forget to leave your comments along the way to be entered for the grand prize. :) If you miss a stop or get lost, you can head back to the ADFD blog and the list of participants for the blog hop will be posted there.
Have fun everyone!
Cat
Make sure you leave a comment at each stop. Anyone who leaves a comment at all the participant stops will be entered to win a set of images from the new releases today! Yay! And they are fantastic as usual. There are three sets to choose from. Here's a peek of this week's new images:
Aren't they great!? Don't forget that today also marks the start of a new challenge on the ADFD blog - Very Vintage. This is the card I made with the Vintage Rose Blooming image (available now in the ADFD shop).
Supplies:
Stamps: Vintage Rose Blooming (A Day For Daisies), Hanging by a Thread set (stitching around edge - Technique Tuesday), How Do I Love Thee digital paper (CatScrapFever Designs)
Papers: Recollections cardstock, Domtar coated 200# ivory cardstock (base), Matte finish brochure paper (Staples), Wausau Exact Index 110# (main image printed on this)
Tools & Embellishments: CraftRobo, rhinestone corner sticker (Dollar Store), gold glitter glue (Studio G), homemade glimmer mist (DecoArts paint - Rich Espresso), crotchet ribbon (Dollar Store), ivory satin ribbon (Michaels), white Liquid Pearls, pencil crayons (Martha Stewart), oms, heat gun, black Stazon ink
The card itself is fairly simple in design. However, the little embellishments are where all the work was. I made the little roses out of scrap cardstock. I researched about 50 different ways they were done on different tutorials and you-tube videos. Once I figured I knew what I needed to do I created a cut file and cut them with my CraftRobo. I sprayed some of my homemade glimmer mist onto a piece of sponge and sponged the edges of all the flower pieces, let them try, and then assembled the flowers. They really are easy and once I get my craft room cleaned up, I want to do up a little video tutorial to show you how easy they are. The corner pieces were also cut on my CraftRobo. (I found the cut file on ukscrappers.com. They have thousands of free files there if you have a CraftRobo/Wishblade/Silhoulette. Its a great resource for cutting files.) Once cut from cream cardstock, I put gold glitter glue all over. I was impatient and used my heat gun to dry the glitter glue and it made the glitter glue bubble which was kind of a happy mishap because it gave it a really cool texture that you can't see in the picture. I hand cut the main image out after I coloured it using my Martha Stewart pencil crayons and oms. Again, I could have used my CraftRobo, but I already had the image printed, so I didn't want to reprint it with the cut&print feature on my CR because it uses more paper and I don't like to waste paper - even if it is fairly inexpensive. The Nestability shapes were cut on my CR and I used my "faux nestability" templates to emboss the edges to make them look even more like the real thing. I used my How Do I Love Thee valentine paper for the top layer just because it has a nice vintage look to it and it worked well with my colour scheme. I used the sponge again with my homemade glimmer mist around the edges to give it a little distressed look and some glimmer. I put small pearls on the scallops using white Liquid Pearls.
TIP: To get the Liquid Pearls to dome properly without the little "horns", I flicked the backside of the paper gently and that gets rid of those pesky little "horns".
Once the Liquid Pearls was dry, I used pop dots to adhere the image to the centre of the nestability shapes, and pop-dotted the focal piece to the cardfront.
I should mention that I also used the sponge and glimmer mist around the edges of the "stitched" cardstock as well. I love this colour of homemade glimmer mist - Rich Espresso. The "stitching" was done with a stamp and black stazon ink.
If you're following along the path of the blog hop, you should have arrived here from the talented Candy's blog. The next stop on the hop is the amazing Jen's blog. Don't forget to leave your comments along the way to be entered for the grand prize. :) If you miss a stop or get lost, you can head back to the ADFD blog and the list of participants for the blog hop will be posted there.
Have fun everyone!
Cat
Saturday, February 05, 2011
ADFD - New Release & a New Challenge
Its that time again. ADFD has released some more awesome images. With spring (hopefully) around the corner, the images are perfect for getting ready for gardening, flowers, and warner weather in general. Here's a peek at what is up for new images this week:
I'm still in the Valentine mode, so I wanted to incorporate some of these images into some of the cards I needed to make to send to family & friends for Valentine's Day. Then all of a sudden, two cosmic forces came together: this week's stamp releases and a new movie release. There is a new movie being released called "Gnomeo & Juliette". Fabulous! Just the quote I needed to get my idea off the ground. Here it is:
Supplies:
Stamps: Daisy Gnome, Mushroom Gnome, Potted Gerber Daisies (A Day for Daisies)
Papers: Recollections cardstock (red & pink), Wausau Exact Index 110# (white), Bazzil (yellow), Angel Mother digital paper collection (Summertime Designs - printed on brochure paper), matte finish brochure paper (Staples)
Tools & Embellishements: CraftRobo, Doily edge punch (Martha Stewart), Edwardian Script font (sentiment), ribbon (Michaels), copics, Lace Heart edge punch (Martha Stewart)
I used my CraftRobo to cut the circle, scalloped circle, and oval shapes. I created my "faux" nestie templates to make the embossed rims around the circle and scalloped circle. The main image is coloured with my copics. The little boy gnome's wheelbarrow originally had mushrooms in it, but I thought he should be hauling a load of hearts to his sweetie for Valentine's. I used the lace heart edge punch to get all the little hearts since I didn't have a single punch small enough. Other than that the card is very straight forward. You can get any of the new released images in the ADFD shop along with all the other fabulous images for sale there.
The next card is one I created for the new challenge running Challenge #11 - "Heavy Metal Rocks". The challenge is to use "metal" in your creations. The image I chose for my card is an image that was offered as a freebie a while ago. Its such a sweet image and I have plans to use it again when Stampede rolls around here in Calgary. Here is the card I created for the challenge:
Supplies:
Stamps: My Little Cowboy (A Day For Daisies)
Papers: Stampin' Up (black cardstock), Angel Mother digital paper collection (Summertime Designs - printed on brochure paper), brushed gold cardstock (Dollar Store), shiny gold cardstock (Dollar Store), matte finish brochure paper (Staples)
Tools & Embellishments: Scroll Lace edge punch (Martha Stewart), Sheriff's badge image (coloring-pages-kids.com), flat back pearls (Dollar Store), embossing stylus, copic markers, black sharpie marker
The hardest thing to create on this card was the sheriff's badge. I found a free colouring page and printed it off in mirror image. Then I taped it to the back of my shiny gold cardstock, and followed the lines on the image with my stylus so that it would emboss the image through to the front of the cardstock. Once, I had the image completely embossed, I cut it out, then I traced over the lettering with a thin black sharpie. The image is matted with a scrap of black SU! cardstock, and then with a piece of brushed gold cardstock. I seem to be on this theme of simple cards lately and this one fits into that category.
I hope you join in on the challenge. Its a lot of fun and as usual, Tammy has a great free image for you to play along. You can also win an image of your choice from the store for playing, so join in.
Talk to you later...
Cat
I'm still in the Valentine mode, so I wanted to incorporate some of these images into some of the cards I needed to make to send to family & friends for Valentine's Day. Then all of a sudden, two cosmic forces came together: this week's stamp releases and a new movie release. There is a new movie being released called "Gnomeo & Juliette". Fabulous! Just the quote I needed to get my idea off the ground. Here it is:
Supplies:
Stamps: Daisy Gnome, Mushroom Gnome, Potted Gerber Daisies (A Day for Daisies)
Papers: Recollections cardstock (red & pink), Wausau Exact Index 110# (white), Bazzil (yellow), Angel Mother digital paper collection (Summertime Designs - printed on brochure paper), matte finish brochure paper (Staples)
Tools & Embellishements: CraftRobo, Doily edge punch (Martha Stewart), Edwardian Script font (sentiment), ribbon (Michaels), copics, Lace Heart edge punch (Martha Stewart)
I used my CraftRobo to cut the circle, scalloped circle, and oval shapes. I created my "faux" nestie templates to make the embossed rims around the circle and scalloped circle. The main image is coloured with my copics. The little boy gnome's wheelbarrow originally had mushrooms in it, but I thought he should be hauling a load of hearts to his sweetie for Valentine's. I used the lace heart edge punch to get all the little hearts since I didn't have a single punch small enough. Other than that the card is very straight forward. You can get any of the new released images in the ADFD shop along with all the other fabulous images for sale there.
The next card is one I created for the new challenge running Challenge #11 - "Heavy Metal Rocks". The challenge is to use "metal" in your creations. The image I chose for my card is an image that was offered as a freebie a while ago. Its such a sweet image and I have plans to use it again when Stampede rolls around here in Calgary. Here is the card I created for the challenge:
Supplies:
Stamps: My Little Cowboy (A Day For Daisies)
Papers: Stampin' Up (black cardstock), Angel Mother digital paper collection (Summertime Designs - printed on brochure paper), brushed gold cardstock (Dollar Store), shiny gold cardstock (Dollar Store), matte finish brochure paper (Staples)
Tools & Embellishments: Scroll Lace edge punch (Martha Stewart), Sheriff's badge image (coloring-pages-kids.com), flat back pearls (Dollar Store), embossing stylus, copic markers, black sharpie marker
The hardest thing to create on this card was the sheriff's badge. I found a free colouring page and printed it off in mirror image. Then I taped it to the back of my shiny gold cardstock, and followed the lines on the image with my stylus so that it would emboss the image through to the front of the cardstock. Once, I had the image completely embossed, I cut it out, then I traced over the lettering with a thin black sharpie. The image is matted with a scrap of black SU! cardstock, and then with a piece of brushed gold cardstock. I seem to be on this theme of simple cards lately and this one fits into that category.
I hope you join in on the challenge. Its a lot of fun and as usual, Tammy has a great free image for you to play along. You can also win an image of your choice from the store for playing, so join in.
Talk to you later...
Cat
Friday, January 21, 2011
A New Challenge & A New Release at ADFD
This week starts another new challenge on the A Day For Daisies blog. The new challenge is "Organic Soul" - use something organic in your creation. You can use pressed flowers, handmade paper, pieces of twigs... Whatever you want. There is also another great new release of images this week and they are, as usual, simply great. Here's a peek at the new images:
You can find these images in the ADFD shop. Remember, there is a freebie on the blog for you to play along with the challenge. So check it out. :)
I'm always delighted with the images Tammy puts out week after week. They're so easy to create with. The card I made this week just sort of popped into my head when I saw the images. Here's a look at the card I made with one of the new images:
Supplies:
Stamps: Making Friends (A Day For Daisies)
Papers: patterned paper (DCWV), Recollections cardstock, Wausau Exact Index 110# cardstock
Tools & Embellishments: Copics, 3-in-1 Classic Butterfly punch (Martha Stewart), glitter (Craft Decor & Glitter Ritz), Lace corner punch (Dollar Store), pressed flowers (Recollections), ribbon (Michaels), Tulip large edge punch (EK Success), Zig glue pen, Zip Dry glue
Again, another straight forward card. The dried flowers are a little tricky to work with. If you decided to use dried flowers or leaves, remember they are quite brittle. You will need to use a pair of tweezers to handle them since they are so fragile. I used my Zig glue pen to put small dots of glue down where I wanted the little fern and then used Zip Dry to attached the other flowers.
I hope you join in on the challenge. Not only do you get a free image to play along with, but you could win another image of your choice from the shop. Its going to be fun. :)
Thanks for stopping by today.
Talk to you later...
Cat
You can find these images in the ADFD shop. Remember, there is a freebie on the blog for you to play along with the challenge. So check it out. :)
I'm always delighted with the images Tammy puts out week after week. They're so easy to create with. The card I made this week just sort of popped into my head when I saw the images. Here's a look at the card I made with one of the new images:
Supplies:
Stamps: Making Friends (A Day For Daisies)
Papers: patterned paper (DCWV), Recollections cardstock, Wausau Exact Index 110# cardstock
Tools & Embellishments: Copics, 3-in-1 Classic Butterfly punch (Martha Stewart), glitter (Craft Decor & Glitter Ritz), Lace corner punch (Dollar Store), pressed flowers (Recollections), ribbon (Michaels), Tulip large edge punch (EK Success), Zig glue pen, Zip Dry glue
Again, another straight forward card. The dried flowers are a little tricky to work with. If you decided to use dried flowers or leaves, remember they are quite brittle. You will need to use a pair of tweezers to handle them since they are so fragile. I used my Zig glue pen to put small dots of glue down where I wanted the little fern and then used Zip Dry to attached the other flowers.
I hope you join in on the challenge. Not only do you get a free image to play along with, but you could win another image of your choice from the shop. Its going to be fun. :)
Thanks for stopping by today.
Talk to you later...
Cat
Friday, January 07, 2011
New Release and a New Challenge at ADFD
Its time again for a new release and a new challenge over at ADFD. This week's new images are spectacular. Here's a sneak peek of them, and you can purchase any one of them (or all) at the ADFD store.
Don't forget the $2.00 release image. This week is it the ballerina slippers and is a super deal for $2.00
We are also starting a new challenge at ADFD - Challenge #9 - "A Fresh Coat of Paint". So get creative, get messy. Its a lot of fun. And congratulations to the winner of our last Challenge: Sabina. You can see her entry here.
This week I got to play with some acrylic scrapbooking paints that I've had in my stash for a very long time. In fact, I've had them so long (and not used them) they were drying out and came out about the consistency of toothpaste. I was annoyed with myself for not using them since they're such pretty colours and letting them get to this state, I tried to look on the bright side. Now instead of just coating my paper with colour, they were also going to give it some texture. :) First I'll show you my card, then I tell you how I made it.

Don't forget the $2.00 release image. This week is it the ballerina slippers and is a super deal for $2.00
We are also starting a new challenge at ADFD - Challenge #9 - "A Fresh Coat of Paint". So get creative, get messy. Its a lot of fun. And congratulations to the winner of our last Challenge: Sabina. You can see her entry here.
This week I got to play with some acrylic scrapbooking paints that I've had in my stash for a very long time. In fact, I've had them so long (and not used them) they were drying out and came out about the consistency of toothpaste. I was annoyed with myself for not using them since they're such pretty colours and letting them get to this state, I tried to look on the bright side. Now instead of just coating my paper with colour, they were also going to give it some texture. :) First I'll show you my card, then I tell you how I made it.
Supplies:
Stamps: Delicate Dancer (A Day for Daisies), You've Got Flair sentiment (You've Got Flair set, Close to My Heart)
Papers: cardstock (Recollections & Bazzil), watercolour paper (Canson 100#)
Tools & Embellishments: scrapbooking paints (Making Memories - Anthology collection), plastic stencil (Pebbles - Fancy Frills set), fancy tags shapeabilities dies (Spellbinders), ribbon (Michaels), classic ink (SU - Night of Navy), Stickles, paper flower (unknown), brad (Michaels), Iridescent medium (Windsor & Newton), sponges, rhinestone (Recollections), watercolour paints (Loew Cornell), Twinkling H20s
So, to make the background paper, I took a piece of grey cardstock and painted some of the green shade of paint in streaks on it leaving some of the grey showing through. Then I took a stencil and put that in the corner and used some of the blue paint and stencilled the shape. Since the paint is really thick, the stencil really stands up off the page and the streaks make the paper look aged. Once the paint was dry, I took a few drops of Night of Navy ink and mixed that with some iridescent medium and sponged it on the part of the card front opposite the stencil. I let that dry and then sponged over the entire card front with the iridescent medium again. To use up the left over ink mixture, I sponged it on the petals of the paper flower. While all that was drying, I cut my tag with my Spellbinder die and stamped the sentiment with Night of Navy classic ink. I had to stamp each word separately and mask the other words since the sentiment wouldn't fit the way it is and I only had room to put it on the left side of the tag.
For the focal image, I printed it on watercolour paper and used regular watercolour paints on her body and the bodice of her dress. For the skirt, I used my long neglected Twinkling H20s. Once the image was dry, I put dark blue stickles on all the flowers. I decided since my background was kind of aged looking that I would take my distressing tool to the edges of it and the edges of the main image.
I matted the ballerina on dark blue Bazzil cardstock, ran some navy blue satin ribbon through the tag and attached it all to the card front. The main image is adhered with pop-dots.
I had a lot of fun making this card. I got really messy and used some products I hadn't used yet. My only problem with the process is that I just got a set of gel nails the day before I made this card. Now my nice pretty french manicure is stained Night of Navy blue. Most of it came off in the shower and the shampoo really takes ink off your fingers well, so its all good. I had fun and that's the most important part.
I really hope you all join in and get messy with your paints for this new challenge.
Talk to you later...
Cat
Sunday, January 02, 2011
Just a Reminder...
The A Day for Daisies challenge is still open until Thursday night and then the new challenge starts on Friday. Make sure you get in on the current challenge though. There is a great free image for you to use to play along, and you could win another image of your choice from the ADFD store.
So lets see those beautiful creations! I know you can do it!
Cat
So lets see those beautiful creations! I know you can do it!
Cat
Friday, December 17, 2010
New Release & New Challenge at ADFD
Today is a good day at ADFD. There are two new events going on: a new release with some gorgeous images, and a new challenge. The new challenge is Tinsel & Tags. This challenge is really great for this time of year since, in my experience, this is the time that I use a lot of tags. I really liked the process of planning and making all the elements for tag. Here's my tag for the challenge:
Supplies:
Image: Tina, Trina, & Tim: A Day for Daisies digital stamp
Paper: Cougar smooth white 130# card stock (base), brown kraft mailing wrapping paper, patterned paper (K&Company), DCWV card stock, Recollections card stock
Tools & Embellishments: MS branch punch, Family Treasures corner punch, 1/8" circle punch, small corner rounder (EK Success), Ribbon (Michaels), chip board shape (Making Memories), Brads (Michaels), Scalloped Daisy border punch (Fiskars), EZ Cutter knife & oval template, gold gel pen, black gel pen, Tim Holtz distress inks (fired brick, bundles sage, walnut stain), iridescent medium (Windsor & Newton), Embossing pen (Making Memories), red & gold glitter embossing powder (Stampendous), red Stickles, Prisma pencil crayons, oms, mini tinsel pompoms (Dollar Store), Create-a-shade pearl paint (Close to my Heart)
I wanted the chipboard piece to shimmer, so I used the Create-a-shade pearl paint by CTMH. It gave it a nice shimmery silver finish. I popped the coloured image onto this, then I added the tinsel pompoms as the furry trim to the sock. I bought some iridescent medium about 2 weeks ago and I am loving that stuff. I've been using it on everything, so I had to use it on this project too. For the background of the tag, I had some brown paper left over from wrapping up parcels I was sending through the mail. I took a piece larger than my tag and crumpled it up a few times so that I would get it really wrinkled. I adhered it to my tag and cut off the excess. Then I used the walnut stain distress ink and went around the edge of the tag. Next, I mixed some iridescent medium with water & a couple drops of fired brick distress ink in one container, and in the other I changed the ink to bundled sage. This made some nice "glimmer mist" that I painted onto my tag. I put red on the top half and green on the bottom half. I used my heat gun to dry the paper since I'm too impatient to let it sit long enough to air dry. Then I took my embossing pen and drew swirlies on the top halve and covered it with green glitter embossing powder, then I did the same on the bottom half with red glitter embossing powder. The tree on the tag isn't hard to make. I took some scrap green cardstock and just punched about 30 branches with my MS branch punch. I also cut a triangle out of the same scrap cardstock. Then, starting at the bottom, I glued the branches onto the triangle, working across then up the triangle, making sure my little branches hung over the edges a little bit. I did two layers like this because I didn't want the base to show through. One that was done, I put little red stickle baubles all over the tree and used a star shaped brad with the prongs cut off and used pop dots to adhere it to the tag. I didn't have a small enough stamp and I really didn't want to fuss with the computer and printing for the sentiment, so I just cut a piece of scrap white cardstock with my EZ Cutter knife & oval template and hand wrote the sentiment. I used a gold gel pen to go around the edge of the oval, then I used the red homemade "glimmer mist" and painted over top of it to give it some sparkle. Once it was dry I attached it to the tag with pop dots.
Wow! That seems like a lot of steps, but really it wasn't that bad. I think all in all it took maybe about an hour to make the tag. I'm not excited about the way it looks in the picture, but in real life, it is very pretty and shimmery and I think a pretty good start for my first "Tim Holtz style" tag.
My next project is a scrapbook page using one of the new release images. These new images pulled at my heart because we have a little dog that is pure joy for us. She is so sweet natured and affectionate and we just love her to death. Here is my layout:
Supplies:
Image: Family Pet (or Good Dog) - A Day for Daisies digital stamp
Papers: Pets paper stack (Imagine That), Exact Index 110# white cardstock (Wausau), corregated cardboard, matte photo paper (Kodak)
Tools & Embellishements: Dog theme stickers (Dollar Store), Ribbon (Dollar store), Brad (Michaels), Letter stickers (Paperbilities), Floral vine deep edge punch (Martha Stewart), Iridescent medium (Windsor & Newton), Red brick distress ink (Tim Holtz)
For the layout, I wanted to get as many cute pictures of our little baby as I could fit in the middle of the heart, so I made a collage of her pictures and printed it out on 8 1/2 x 11 matte photo paper. To make the heart frame, I cut a piece of cardboard to the size and shape I wanted (about 7"x8") and then ripped off as much of the top layer of paper to reveal the corregated paper underneath. Then I took the homemade glimmer mist in red and sponged that onto the heart frame. (here's a close up pic)
While the cardboard was still damp, I distressed it a bit more by rolling up some of the edged and tearing it a little bit as you can see in the picture above, but here's another close up pic:
I glued the frame onto the printout in the spot that got as many of the pictures I really wanted. I then trimmed away the excess photo. I took about 12" of grosgrain ribbon and tied a bow in the middle of it and added a brad by bending the prongs and putting them through the knot in the centre of the bow. I cut off the bits of the prongs that stuck out past the knot. I used Aileen's fast grab tacky glue to glue the ribbon to the frame. I like this glue because it really does live up to its name. Since I was folding the ribbon over and scrunching it up, I needed a glue that would hold it in place and this glue is one of the best I've found for this (other than glue dots which I'm out of right now).
To make the lacy mat for the background, I took a piece of 9" x 9" paper and puched around it with the MS floral vine deep edge punch. I wish there was a corner punch for this punch, or if there is one I haven't seen it in the stores around here, so I just went to the edge and just let whatever happened to the corners happen.
For the Good Boy image, I first coloured it digitally in my Paintshop Pro program, then I printed it out 3 times. I cut the various layers of the image and used pop dots to make the image 3D, kind of like making a paper tole image with it. Here's a close up of that detail:
The title for the layout was done with letter stickers I've had in my stash forever. I think I bought the package when I first started scrapbooking about 6 years ago. I've only used them on this layout and one other layout. They're usually not my style, and I usually use my CraftRobo to create titles for my pages, but the colours seemed to go with my layout and they're convenient.
So other than the couple of doggie dollar store stickers I added, that's it for my layout. I had fun creating all the different elements I did for this layout. And, of course, I love doing layouts about my little doggie. She takes such cute pictures.
Thats it for today. Talk to you later...
Cat
Supplies:
Image: Tina, Trina, & Tim: A Day for Daisies digital stamp
Paper: Cougar smooth white 130# card stock (base), brown kraft mailing wrapping paper, patterned paper (K&Company), DCWV card stock, Recollections card stock
Tools & Embellishments: MS branch punch, Family Treasures corner punch, 1/8" circle punch, small corner rounder (EK Success), Ribbon (Michaels), chip board shape (Making Memories), Brads (Michaels), Scalloped Daisy border punch (Fiskars), EZ Cutter knife & oval template, gold gel pen, black gel pen, Tim Holtz distress inks (fired brick, bundles sage, walnut stain), iridescent medium (Windsor & Newton), Embossing pen (Making Memories), red & gold glitter embossing powder (Stampendous), red Stickles, Prisma pencil crayons, oms, mini tinsel pompoms (Dollar Store), Create-a-shade pearl paint (Close to my Heart)
I wanted the chipboard piece to shimmer, so I used the Create-a-shade pearl paint by CTMH. It gave it a nice shimmery silver finish. I popped the coloured image onto this, then I added the tinsel pompoms as the furry trim to the sock. I bought some iridescent medium about 2 weeks ago and I am loving that stuff. I've been using it on everything, so I had to use it on this project too. For the background of the tag, I had some brown paper left over from wrapping up parcels I was sending through the mail. I took a piece larger than my tag and crumpled it up a few times so that I would get it really wrinkled. I adhered it to my tag and cut off the excess. Then I used the walnut stain distress ink and went around the edge of the tag. Next, I mixed some iridescent medium with water & a couple drops of fired brick distress ink in one container, and in the other I changed the ink to bundled sage. This made some nice "glimmer mist" that I painted onto my tag. I put red on the top half and green on the bottom half. I used my heat gun to dry the paper since I'm too impatient to let it sit long enough to air dry. Then I took my embossing pen and drew swirlies on the top halve and covered it with green glitter embossing powder, then I did the same on the bottom half with red glitter embossing powder. The tree on the tag isn't hard to make. I took some scrap green cardstock and just punched about 30 branches with my MS branch punch. I also cut a triangle out of the same scrap cardstock. Then, starting at the bottom, I glued the branches onto the triangle, working across then up the triangle, making sure my little branches hung over the edges a little bit. I did two layers like this because I didn't want the base to show through. One that was done, I put little red stickle baubles all over the tree and used a star shaped brad with the prongs cut off and used pop dots to adhere it to the tag. I didn't have a small enough stamp and I really didn't want to fuss with the computer and printing for the sentiment, so I just cut a piece of scrap white cardstock with my EZ Cutter knife & oval template and hand wrote the sentiment. I used a gold gel pen to go around the edge of the oval, then I used the red homemade "glimmer mist" and painted over top of it to give it some sparkle. Once it was dry I attached it to the tag with pop dots.
Wow! That seems like a lot of steps, but really it wasn't that bad. I think all in all it took maybe about an hour to make the tag. I'm not excited about the way it looks in the picture, but in real life, it is very pretty and shimmery and I think a pretty good start for my first "Tim Holtz style" tag.
My next project is a scrapbook page using one of the new release images. These new images pulled at my heart because we have a little dog that is pure joy for us. She is so sweet natured and affectionate and we just love her to death. Here is my layout:
Supplies:
Image: Family Pet (or Good Dog) - A Day for Daisies digital stamp
Papers: Pets paper stack (Imagine That), Exact Index 110# white cardstock (Wausau), corregated cardboard, matte photo paper (Kodak)
Tools & Embellishements: Dog theme stickers (Dollar Store), Ribbon (Dollar store), Brad (Michaels), Letter stickers (Paperbilities), Floral vine deep edge punch (Martha Stewart), Iridescent medium (Windsor & Newton), Red brick distress ink (Tim Holtz)
For the layout, I wanted to get as many cute pictures of our little baby as I could fit in the middle of the heart, so I made a collage of her pictures and printed it out on 8 1/2 x 11 matte photo paper. To make the heart frame, I cut a piece of cardboard to the size and shape I wanted (about 7"x8") and then ripped off as much of the top layer of paper to reveal the corregated paper underneath. Then I took the homemade glimmer mist in red and sponged that onto the heart frame. (here's a close up pic)
While the cardboard was still damp, I distressed it a bit more by rolling up some of the edged and tearing it a little bit as you can see in the picture above, but here's another close up pic:
I glued the frame onto the printout in the spot that got as many of the pictures I really wanted. I then trimmed away the excess photo. I took about 12" of grosgrain ribbon and tied a bow in the middle of it and added a brad by bending the prongs and putting them through the knot in the centre of the bow. I cut off the bits of the prongs that stuck out past the knot. I used Aileen's fast grab tacky glue to glue the ribbon to the frame. I like this glue because it really does live up to its name. Since I was folding the ribbon over and scrunching it up, I needed a glue that would hold it in place and this glue is one of the best I've found for this (other than glue dots which I'm out of right now).
To make the lacy mat for the background, I took a piece of 9" x 9" paper and puched around it with the MS floral vine deep edge punch. I wish there was a corner punch for this punch, or if there is one I haven't seen it in the stores around here, so I just went to the edge and just let whatever happened to the corners happen.
For the Good Boy image, I first coloured it digitally in my Paintshop Pro program, then I printed it out 3 times. I cut the various layers of the image and used pop dots to make the image 3D, kind of like making a paper tole image with it. Here's a close up of that detail:
The title for the layout was done with letter stickers I've had in my stash forever. I think I bought the package when I first started scrapbooking about 6 years ago. I've only used them on this layout and one other layout. They're usually not my style, and I usually use my CraftRobo to create titles for my pages, but the colours seemed to go with my layout and they're convenient.
So other than the couple of doggie dollar store stickers I added, that's it for my layout. I had fun creating all the different elements I did for this layout. And, of course, I love doing layouts about my little doggie. She takes such cute pictures.
Thats it for today. Talk to you later...
Cat
Friday, December 03, 2010
New Released Images & a New Challenge at ADFD
Just when I thought Tammy's images couldn't get any cuter, she releases some more fantastic digi stamps. The image I chose to work with for this release is sooooo cute. There is something about babies that just melts my heart. Its probably because I don't have any human babies of my own, that I just adore little baby pictures. Here's the card I made with the Tub Time image available now in the ADFD store.
Supplies:
Image: Tub Time - A Day For Daisies digital stamps
Paper: SU! tempting turqoise card stock, patterned paper (unknown)
Tools & Embellishments: Copics, Ribbon (Michaels), Glitter thread, quilling tool & quilling paper, Marvy Uchida Southwest corner punch, Fiskars corrugated wave paper crimper, Fiskars wave edge scissors, Mod Podge Dimensional Magic
Here are a couple close up photos of the detail on the bubbles and the little fish.
The next card was made for the current ADFD challenge. You all should head on over to the challenge page for ADFD (here). Tammy has a really super cute image for you so you can play along. The challenge this week is "All About the Wrapping" - in other words, you need to incorporate wrapping paper somewhere in your design. I have this beautiful purple foil wrapping paper that I've been hording for the last couple years. Its so pretty that I haven't wanted to use too much of it because I wanted it to last. So I decided to use it for the background on my challenge card. I think you'll agree that its gorgeous paper.
Supplies:
Image: Dressed up for Christmas - A Day For Daisies digital stamps
Paper: Wausau Exact Index 110#, SU Elegant eggplant
Tools & Embellishments: Copics, Ribbon (Michaels), ribbon (Michaels), purple & gold stickles, EK Success Venetian Corner Punch, Glittertex mica flakes
So, hopefully, we'll see your entries into this week's challenge. Its a lot of fun and as always, Tammy will have a little something special for one lucky person as a reward at the end of the challenge. Check out the new images too! You'll love them.
Talk to you later...
Cat
Supplies:
Image: Tub Time - A Day For Daisies digital stamps
Paper: SU! tempting turqoise card stock, patterned paper (unknown)
Tools & Embellishments: Copics, Ribbon (Michaels), Glitter thread, quilling tool & quilling paper, Marvy Uchida Southwest corner punch, Fiskars corrugated wave paper crimper, Fiskars wave edge scissors, Mod Podge Dimensional Magic
Here are a couple close up photos of the detail on the bubbles and the little fish.
The next card was made for the current ADFD challenge. You all should head on over to the challenge page for ADFD (here). Tammy has a really super cute image for you so you can play along. The challenge this week is "All About the Wrapping" - in other words, you need to incorporate wrapping paper somewhere in your design. I have this beautiful purple foil wrapping paper that I've been hording for the last couple years. Its so pretty that I haven't wanted to use too much of it because I wanted it to last. So I decided to use it for the background on my challenge card. I think you'll agree that its gorgeous paper.
Supplies:
Image: Dressed up for Christmas - A Day For Daisies digital stamps
Paper: Wausau Exact Index 110#, SU Elegant eggplant
Tools & Embellishments: Copics, Ribbon (Michaels), ribbon (Michaels), purple & gold stickles, EK Success Venetian Corner Punch, Glittertex mica flakes
So, hopefully, we'll see your entries into this week's challenge. Its a lot of fun and as always, Tammy will have a little something special for one lucky person as a reward at the end of the challenge. Check out the new images too! You'll love them.
Talk to you later...
Cat
Monday, November 22, 2010
ADFD Challenge #6 - Attitude of Gratitude
With Thanksgiving coming up for our US friends, this week's challenge at ADFD is all about gratitude. The catch to the challenge is that you must create your own sentiment for the challenge - and of course use an ADFD image. There are so many great images in the store that could be used for this challenge. I'll admit I had to "force" myself to get into the Thanksgiving frame of mind again, since we have our Thanksgiving a month earlier here in Canada. But, with all the beautiful images Tammy has available, it wasn't that hard once I came up with my sentiment. Here is the card I created for this challenge.
Supplies:
Stamps: Roast Turkey & Flowers
Papers: Digital Paper (300dpi.com), SU Close to Cocoa cardstock, Recollections cardstock, Wausau Exact Index 110#, Staples brand matte finish brochure paper (used to print the digi paper)
Inks: Coffee Dye Ink (StampCraft), Walnut Stain distress ink (Ranger - Tim Holtz)
Tools & Embellishments: Ribbon (American Crafts), Copics, Brads (dollar store), Vivaldi font (sentiment), CraftRobo
This card is actually a half fold card so it measures 8.5" x 5.5". I didn't want to lose any of the detail of the stamp on the different layers when the card was put together, so I decided to make it as large as I could (and still fit in the premade envelopes I have on hand). You may not notice it in the picture, but the focal image is 3 layers. I used the print & cut feature of my CraftRobo to cut the layers because of the intricate cuts around some of the flowers. That is another reason I love digi stamps. I don't have to hand cut them. The paper printed out a little lighter than I had anticipated, so I used some distress ink & coffee coloured ink to go around the edges to darken it a little bit and to match the colour of the turkey. I think I need to re-calibrate my monitor, because it looked like the perfect shade of golden/beige on my screen but printed too light.
Well, I hope you get on over to ADFD and get in on the challenge (here's the link: ADFD Challenge #6.) Tammy has provided a great free image to use if you don't already have some of her images. Take a peek at the new releases too while you're there. They're fabulously retro kinda art nouveau - they remind of me of the starlets from the 1920's Hollywood. You can see her new releases here in the store.
Talk to all later...
Cat
Supplies:
Stamps: Roast Turkey & Flowers
Papers: Digital Paper (300dpi.com), SU Close to Cocoa cardstock, Recollections cardstock, Wausau Exact Index 110#, Staples brand matte finish brochure paper (used to print the digi paper)
Inks: Coffee Dye Ink (StampCraft), Walnut Stain distress ink (Ranger - Tim Holtz)
Tools & Embellishments: Ribbon (American Crafts), Copics, Brads (dollar store), Vivaldi font (sentiment), CraftRobo
This card is actually a half fold card so it measures 8.5" x 5.5". I didn't want to lose any of the detail of the stamp on the different layers when the card was put together, so I decided to make it as large as I could (and still fit in the premade envelopes I have on hand). You may not notice it in the picture, but the focal image is 3 layers. I used the print & cut feature of my CraftRobo to cut the layers because of the intricate cuts around some of the flowers. That is another reason I love digi stamps. I don't have to hand cut them. The paper printed out a little lighter than I had anticipated, so I used some distress ink & coffee coloured ink to go around the edges to darken it a little bit and to match the colour of the turkey. I think I need to re-calibrate my monitor, because it looked like the perfect shade of golden/beige on my screen but printed too light.
Well, I hope you get on over to ADFD and get in on the challenge (here's the link: ADFD Challenge #6.) Tammy has provided a great free image to use if you don't already have some of her images. Take a peek at the new releases too while you're there. They're fabulously retro kinda art nouveau - they remind of me of the starlets from the 1920's Hollywood. You can see her new releases here in the store.
Talk to all later...
Cat
Friday, November 05, 2010
ADFD Challenge #5 - Please Pass the Traditions
A new challenge has started on the A Day For Daisies site. This one was a real treat to work on. I got to brush up on some of my digital graphics design skills. The challenge is to create a project with, of course, one of the ADFD images, and your favourite recipe. I saw a couple of Tammy's images that just invoked this sort of remembrance of my heritage. It was a real toss up as to which image I was going to use for this challenge, but in the end "Leaf Girl" won out. I love the look on her face and the leafs in her hair reminded me of feathers a young indian princess would wear. I was quite involved in the Aboriginal community for a long time. Unfortunately, I haven't been in about the last 10 years. I really enjoyed my work with the non-profit organization I use to be involved with. The organization was called CASTS - Canadian Aboriginal Science & Technology Society - and I sat on the Board of Directors as Chairperson for a few years. The goal of the organization is to promote education in the Aboriginal communities, and in particular, in the science fields. Sadly, I have lost contact with the people I worked with on the board and involved with the organization, which I must admit is my doing and had nothing to do with the fine and hardworking people involved in CASTS.
But I digress, back to what this post is about - ADFD challenge #5. I started this whole paper crafting thing when I started on digital scrapbooking. I still love using digital elements in my crafting. One thing I really love doing is making my own patterned papers. For this challenge I needed something that was more uniquely "Canadian Aboriginal" than southwestern or "US Native American", so I had to design it myself. I created a design that reminded me of a dream catcher. Then I had to choose colours that are prevalent in the aboriginal arts - a deep red, almost blood colour, tan, and turquise. Once I coloured the digital image, and put my design together, I realized I needed another element, so what better than to create an actual dream catcher for the project. So, it finally all came together and this is the results - a digital scrapbook page with my recipe:
Supplies:
Stamp Image: A Day For Daisies - Leaf Girl
Font on recipe card: Bradley Hand
Leaf image on recipe card from Ask a Biologist website
All other elements created by CatScrapFever Designs (background paper, dream catcher, recipe card)
This recipe is the one my mother taught me. Bannock was a real treat when I was younger, especially with hamburger soup. When I was little, I loved it with butter and jam when it was still hot and the butter and jam would melt and make my fingers and face all sticky. Once in a while, my Mom would fry the bannock, and then when it was still hot, roll it in sugar, or sugar and cinnamon. Kind of like Indian donuts. :) This bread is very very easy and quick. I often will make a bannock if I'm out of bread and too lazy to go to the store. I hope you try it. Its really good.
And, of course, I hope you enter into the ADFD challenge. It is running from today, November 5th through to November 18th. You can find the links on the right hand side in my side bar. Show us your favourite recipes.
I'm hungry!
Before I sign off, I just want to say:
HAPPY BIRTHDAY MOM! Wish I could be with you to celebrate!
Talk to you later...
Cat
But I digress, back to what this post is about - ADFD challenge #5. I started this whole paper crafting thing when I started on digital scrapbooking. I still love using digital elements in my crafting. One thing I really love doing is making my own patterned papers. For this challenge I needed something that was more uniquely "Canadian Aboriginal" than southwestern or "US Native American", so I had to design it myself. I created a design that reminded me of a dream catcher. Then I had to choose colours that are prevalent in the aboriginal arts - a deep red, almost blood colour, tan, and turquise. Once I coloured the digital image, and put my design together, I realized I needed another element, so what better than to create an actual dream catcher for the project. So, it finally all came together and this is the results - a digital scrapbook page with my recipe:
Supplies:
Stamp Image: A Day For Daisies - Leaf Girl
Font on recipe card: Bradley Hand
Leaf image on recipe card from Ask a Biologist website
All other elements created by CatScrapFever Designs (background paper, dream catcher, recipe card)
This recipe is the one my mother taught me. Bannock was a real treat when I was younger, especially with hamburger soup. When I was little, I loved it with butter and jam when it was still hot and the butter and jam would melt and make my fingers and face all sticky. Once in a while, my Mom would fry the bannock, and then when it was still hot, roll it in sugar, or sugar and cinnamon. Kind of like Indian donuts. :) This bread is very very easy and quick. I often will make a bannock if I'm out of bread and too lazy to go to the store. I hope you try it. Its really good.
And, of course, I hope you enter into the ADFD challenge. It is running from today, November 5th through to November 18th. You can find the links on the right hand side in my side bar. Show us your favourite recipes.
I'm hungry!
Before I sign off, I just want to say:
HAPPY BIRTHDAY MOM! Wish I could be with you to celebrate!
Talk to you later...
Cat
Wednesday, October 06, 2010
A Couple Cards & a Product Review
Hi all. I want to show you some cards I made for a challenge over at Crafter's Digital Art Centre being sponsored by A Day for Daisies. The challenge starts tomorrow, so don't miss it. It is a sketch challenge that is quite easy to work with (if I can do it, you all can do it I'm sure). You will also get an amazing free image to work with. How great is that eh? Here are the cards I made. The first one is using the Fall Fun image (this will be the image Tammy is offering for the challenge - its so fun!).
Supplies
Stamps: Fall Fun - A Day for Daisies digital stamp (main image), Inky Antics (sentiments)
Papers: Wausau 80# Exact Index cardstock, Recollections, Cat Scrap Fever Designs (me - patterned paper)
Inks: Studio G pigment ink
Embellishments: Paper flower, brads, rafia, & silk leaves - dollar store, button & ribbon - Michaels
Tools: Craft Robo, pencil crayons (prisma & crayola), oms
I used pencil crayons & oms to colour the main image. I also used my Craft Robo to design and cut the pumpkin and leaves. The little tendrils are created by putting some scrap cardstock in the cutter and then cutting very thin slivers of the cardstock. They will curl on their own, but I wrapped these ones around a pencil and shaped them. I don't think they'll stay nice and springy once they've been in an envelope and gone through the mail. Its a shame because they look so cute.
This next picture is another card using the same sketch, but in a Halloween theme.
Supplies
Stamps: Pretty Witch by A Day for Daisies (digital stamp - focal image), Studio G (sentiments)
Papers: Wausau 80# Exact Index cardstock, Recollections, K&Company (patterned paper)
Inks: Studio G pigment ink
Embellishments: Paper flower, rhinestones, & brads - dollar store, buttons - Michaels, black & green stickles
Tools: pencil crayons (prisma & crayola), oms
This card is pretty straight forward. I coloured the image with pencil crayons & oms. Other than that, the only thing "special" is that I glued rhinestones into the buttons because I couldn't find my black embroidery floss to thread into the holes. I also put glitter glue on the hat ribbon & black stickles on the cat on the witch's lap.
I really like this next card because the image is so cute. Again, I really didn't do anything spectacular for this card, but I did add glitter glue to the wings because all fairies wings sparkle. :)
Supplies
Stamps: Little Nimph by A Day for Daisies (digital stamp - focal image), Studio G (sentiments)
Papers: Wausau 80# Exact Index cardstock, Recollections, S.E.I. (patterned paper)
Inks: Studio G pigment ink
Embellishments: Paper flower, ribbon, & button - Michaels, pink & orange glitter glue - Studio G
Tools: pencil crayons (prisma & crayola), oms
PRODUCT REVIEW - STUDIO G CRAFT INK
So, I found a new ink that I'm really liking for my clear stamps - especially the cheap Studio G stamps. A lot of people have problems getting these stamps to ink up properly and problems getting a good image from them. I haven't had too much of a problem myself, but sometimes the image isn't just so. I bought some Studio G ink cubes quite a while ago and just used them the other day - on the cards I just showed you and some Halloween cards I made for my craft show (I didn't have time to take pics before the craft show, but I have one left that I'll post later - maybe tomorrow). Since my Halloween cards have a lot of black cardstock, I thought I would try out the white Studio G ink cube. This ink is really really good for a white ink. If you look at the Halloween card I posted above, the white is bright and crisp. Most any other white ink I've tried soaks into the paper and doesn't stay nice and bright unless you emboss it. Also, what is so great about this ink is that it dries completely! Yes, within minutes I was able to rub my finger over the stamped image without smearing it. A lot of the other craft inks I've tried always take forever to dry (if they ever even dry) and once they're dry they will still smear. Another thing that I like about these is the price - $1.50 in Canada (they'll be in the $1 bins in the US). Plus, they have $1.50 glitter glue to match the ink colours. Aaaannnd, (I know - it keeps going) it also matches some of the new recollections card stocks. If you look at the first card, the ink I used for the sentiment matches the rusty coloured cardstock, and on the last card the ink for the sentiment matches the green cardstock (although its hard to tell since I stamped it on blue cards stock - but I did test it out to see how closely it matched). The only thing is that I haven't seen a black ink cube yet. If I ever do, I'll be snatching up one of those too. I'm contemplating going back and picking up a couple more white cubes I like it that much. So if you see these at a Michaels store near you, give them a try. I don't think you'll be disappointed - especially at this price point. Just so you know what you're looking for, here's a picture of what the cubes look like:
Well, that's it for today. Make sure you get over to CDAC and check out the sketch challenge ADFD is sponsoring tomorrow. It will be fun and you get a great image to boot!
Talk to you later...
Cat
Supplies
Stamps: Fall Fun - A Day for Daisies digital stamp (main image), Inky Antics (sentiments)
Papers: Wausau 80# Exact Index cardstock, Recollections, Cat Scrap Fever Designs (me - patterned paper)
Inks: Studio G pigment ink
Embellishments: Paper flower, brads, rafia, & silk leaves - dollar store, button & ribbon - Michaels
Tools: Craft Robo, pencil crayons (prisma & crayola), oms
I used pencil crayons & oms to colour the main image. I also used my Craft Robo to design and cut the pumpkin and leaves. The little tendrils are created by putting some scrap cardstock in the cutter and then cutting very thin slivers of the cardstock. They will curl on their own, but I wrapped these ones around a pencil and shaped them. I don't think they'll stay nice and springy once they've been in an envelope and gone through the mail. Its a shame because they look so cute.
This next picture is another card using the same sketch, but in a Halloween theme.
Supplies
Stamps: Pretty Witch by A Day for Daisies (digital stamp - focal image), Studio G (sentiments)
Papers: Wausau 80# Exact Index cardstock, Recollections, K&Company (patterned paper)
Inks: Studio G pigment ink
Embellishments: Paper flower, rhinestones, & brads - dollar store, buttons - Michaels, black & green stickles
Tools: pencil crayons (prisma & crayola), oms
This card is pretty straight forward. I coloured the image with pencil crayons & oms. Other than that, the only thing "special" is that I glued rhinestones into the buttons because I couldn't find my black embroidery floss to thread into the holes. I also put glitter glue on the hat ribbon & black stickles on the cat on the witch's lap.
I really like this next card because the image is so cute. Again, I really didn't do anything spectacular for this card, but I did add glitter glue to the wings because all fairies wings sparkle. :)
Supplies
Stamps: Little Nimph by A Day for Daisies (digital stamp - focal image), Studio G (sentiments)
Papers: Wausau 80# Exact Index cardstock, Recollections, S.E.I. (patterned paper)
Inks: Studio G pigment ink
Embellishments: Paper flower, ribbon, & button - Michaels, pink & orange glitter glue - Studio G
Tools: pencil crayons (prisma & crayola), oms
PRODUCT REVIEW - STUDIO G CRAFT INK
So, I found a new ink that I'm really liking for my clear stamps - especially the cheap Studio G stamps. A lot of people have problems getting these stamps to ink up properly and problems getting a good image from them. I haven't had too much of a problem myself, but sometimes the image isn't just so. I bought some Studio G ink cubes quite a while ago and just used them the other day - on the cards I just showed you and some Halloween cards I made for my craft show (I didn't have time to take pics before the craft show, but I have one left that I'll post later - maybe tomorrow). Since my Halloween cards have a lot of black cardstock, I thought I would try out the white Studio G ink cube. This ink is really really good for a white ink. If you look at the Halloween card I posted above, the white is bright and crisp. Most any other white ink I've tried soaks into the paper and doesn't stay nice and bright unless you emboss it. Also, what is so great about this ink is that it dries completely! Yes, within minutes I was able to rub my finger over the stamped image without smearing it. A lot of the other craft inks I've tried always take forever to dry (if they ever even dry) and once they're dry they will still smear. Another thing that I like about these is the price - $1.50 in Canada (they'll be in the $1 bins in the US). Plus, they have $1.50 glitter glue to match the ink colours. Aaaannnd, (I know - it keeps going) it also matches some of the new recollections card stocks. If you look at the first card, the ink I used for the sentiment matches the rusty coloured cardstock, and on the last card the ink for the sentiment matches the green cardstock (although its hard to tell since I stamped it on blue cards stock - but I did test it out to see how closely it matched). The only thing is that I haven't seen a black ink cube yet. If I ever do, I'll be snatching up one of those too. I'm contemplating going back and picking up a couple more white cubes I like it that much. So if you see these at a Michaels store near you, give them a try. I don't think you'll be disappointed - especially at this price point. Just so you know what you're looking for, here's a picture of what the cubes look like:
Well, that's it for today. Make sure you get over to CDAC and check out the sketch challenge ADFD is sponsoring tomorrow. It will be fun and you get a great image to boot!
Talk to you later...
Cat
Friday, October 01, 2010
ADFD Challenge #3 - Layers
Well, I'm back. Things are still up in the air as far as the health issue I've been dealing with, but I'm not going to let it get to me any more. Worrying about it isn't going to make things better - will probably aggravate it if anything. So, thank you to everyone for sending their well wishes. I really appreciate it.
Today is the start of the A Day for Daisies Challenge #3. The theme this time is Layers - lot of layers. I usually don't use a whole bunch of layers so this was going to be a stretch for me - but I guess that's why its called a Challenge huh? I really wanted to use the Babe Basket image. It is so cute. I also wanted to use it on a scrapbook page. I had the perfect image for the layout - a picture of my niece I took only 12 hours after she was born. I took artistic liberties with interpreting the challenge and decided to use "layers" (= shades) of a colour. I have layers of purples and pinks in this project. Here is the layout I came up with for the challenge plus a few close up shots of some of the elements:
Supplies:
Image: Babe Basket - A Day for Daisies (printed on a Canon MP560)
Cardstock: Recollections, Wausau Exact Index 80# white
Patterned Paper: unknown
Flowers: Michaels (large pink silk flowers), unknown (paper flowers)
Buttons: Dollar Store
Brads: Unknown
Ribbon: Michaels
Studio G glitter glue, Stickles, Liquid Pearls, Tattered Angels Sherbert Glimmer Mist
EK Success Tulips Large Edger Punch, Copic Markers, Sharpie Markers , Cats Eye ink
Velum tag: Deja View
I printed the image 3 times and then cut out the various layers and popped them up on pop-dots so that the blanket and flowers would have some dimension. I used my CraftRobo to cut the butterflies and glued little rhinestones to the wings and put purple stickles on the body. I also used my CraftRobo to cut the title from the patterned paper and then used pink cardstock and cut the matting for the words. It doesn't show up in the photo, but I used glimmer mist on the purple cardstock. Once that was dry, with a pencil I lightly drew some large swirls and then used stickles, glitter glue, & liquid pearls to create some "bling" swirls on the background. I've had the vellum tag for a really long time so I thought it was time to use it. I tore the edges and then inked them with purple Cats Eye ink. Assembling the layout was pretty straight forward. The only thing I had to do was mount the layout onto a heavier piece of Domtar 130# card stock. After using the glimmer mist, the purple card stock warped a little. I cut a piece 11.75" x 11.75" and glued the layout to it so that it will lay flat.
I didn't get this next project completed on time, but want to show you a really pretty image from ADFD. I'm such a sucker for Christmas images and this one is so cute I just had to have it. Its the Christmas Elf image and its a great image to work with - so many colour possibilities. Here is a card I made with it:
Supplies:
Image: ADFD Christmas Elf A (printed on a Canon MP560)
Stamps: Studio G (sentiments)
Ink: Marvy markers, Copic markers, Sharpie markers
Cardstock: Wausau Exact Index 80# white, SU! Whisper White, Recollections
Patterned Paper: DCWV
Punches: Martha Stewart Branch, EK Success Snowflake Edge, Marvy Uchida Snowflake, Marvy Uchida
Southwestern corner punch
Ribbon: Dollar Store, DMC floss
ProvoCraft Snowflake embossing folder, stickles, glitter glue
I coloured the image with Copics and Sharpies. I then put stickles and glitter glue on the hat and pompoms to jazz it up a bit. I used the Southwestern corner punch after I double matted the image and wrapped embroidery floss around the edges through the punched corners. I punch both sides of a strip of Christmas patterned paper to make it look sort of like lace and adhered that over the embossed whisper white card stock. I punched a few branches with the Martha Stewart punch and glued them into a "swag" and glued that to the card and then glued a punch snowflake on top to hide all the glue. I put stickles and glitter glue on the swag and snowflake as well.
That's all I have for today. You should head over to ADFD and enter into the challenge (the link is in my sidebar). There is a great prize offered to one of the lucky participants of the challenge. I have another craft show this weekend and have a couple things I want to prepare for it so I will post pictures of the new items next week.
Take care & talk to you later...
Cat
Today is the start of the A Day for Daisies Challenge #3. The theme this time is Layers - lot of layers. I usually don't use a whole bunch of layers so this was going to be a stretch for me - but I guess that's why its called a Challenge huh? I really wanted to use the Babe Basket image. It is so cute. I also wanted to use it on a scrapbook page. I had the perfect image for the layout - a picture of my niece I took only 12 hours after she was born. I took artistic liberties with interpreting the challenge and decided to use "layers" (= shades) of a colour. I have layers of purples and pinks in this project. Here is the layout I came up with for the challenge plus a few close up shots of some of the elements:
Supplies:
Image: Babe Basket - A Day for Daisies (printed on a Canon MP560)
Cardstock: Recollections, Wausau Exact Index 80# white
Patterned Paper: unknown
Flowers: Michaels (large pink silk flowers), unknown (paper flowers)
Buttons: Dollar Store
Brads: Unknown
Ribbon: Michaels
Studio G glitter glue, Stickles, Liquid Pearls, Tattered Angels Sherbert Glimmer Mist
EK Success Tulips Large Edger Punch, Copic Markers, Sharpie Markers , Cats Eye ink
Velum tag: Deja View
I printed the image 3 times and then cut out the various layers and popped them up on pop-dots so that the blanket and flowers would have some dimension. I used my CraftRobo to cut the butterflies and glued little rhinestones to the wings and put purple stickles on the body. I also used my CraftRobo to cut the title from the patterned paper and then used pink cardstock and cut the matting for the words. It doesn't show up in the photo, but I used glimmer mist on the purple cardstock. Once that was dry, with a pencil I lightly drew some large swirls and then used stickles, glitter glue, & liquid pearls to create some "bling" swirls on the background. I've had the vellum tag for a really long time so I thought it was time to use it. I tore the edges and then inked them with purple Cats Eye ink. Assembling the layout was pretty straight forward. The only thing I had to do was mount the layout onto a heavier piece of Domtar 130# card stock. After using the glimmer mist, the purple card stock warped a little. I cut a piece 11.75" x 11.75" and glued the layout to it so that it will lay flat.
I didn't get this next project completed on time, but want to show you a really pretty image from ADFD. I'm such a sucker for Christmas images and this one is so cute I just had to have it. Its the Christmas Elf image and its a great image to work with - so many colour possibilities. Here is a card I made with it:
Supplies:
Image: ADFD Christmas Elf A (printed on a Canon MP560)
Stamps: Studio G (sentiments)
Ink: Marvy markers, Copic markers, Sharpie markers
Cardstock: Wausau Exact Index 80# white, SU! Whisper White, Recollections
Patterned Paper: DCWV
Punches: Martha Stewart Branch, EK Success Snowflake Edge, Marvy Uchida Snowflake, Marvy Uchida
Southwestern corner punch
Ribbon: Dollar Store, DMC floss
ProvoCraft Snowflake embossing folder, stickles, glitter glue
I coloured the image with Copics and Sharpies. I then put stickles and glitter glue on the hat and pompoms to jazz it up a bit. I used the Southwestern corner punch after I double matted the image and wrapped embroidery floss around the edges through the punched corners. I punch both sides of a strip of Christmas patterned paper to make it look sort of like lace and adhered that over the embossed whisper white card stock. I punched a few branches with the Martha Stewart punch and glued them into a "swag" and glued that to the card and then glued a punch snowflake on top to hide all the glue. I put stickles and glitter glue on the swag and snowflake as well.
That's all I have for today. You should head over to ADFD and enter into the challenge (the link is in my sidebar). There is a great prize offered to one of the lucky participants of the challenge. I have another craft show this weekend and have a couple things I want to prepare for it so I will post pictures of the new items next week.
Take care & talk to you later...
Cat
Sunday, September 19, 2010
ADFD Flower Basket Challenge #2
A Day for Daisies is having their 2nd challenge. Its running now through to the 30th of September. The theme is "Let's Celebrate" so anything goes. You can use any of the images Tammy has for sale in her store. She also has sneek peek freebies every week on Thursday, but they're only available for a very limited time, so you need to hurry over to the A Day for Daisies group on Crafters Digital Art Centre to grab the freebies. You can use the freebies if you like for the challenges as well. One lucky person will be chosen at the end of the challenge and will win a fabulous prize. You can get all the details on the prize and information where/how to upload your submissions for the challenge HERE (click to go to the challenge blog). The link to the challenge blog is also located on the right side panel if you ever need it. There are also some links to other fun places for ADFD. So let's see some of that wonderful art that I know you all do. I'll be back to post mine. I want something really special, so I need to plan it out, but I'll post soon....
Talk to you later...
Cat
Talk to you later...
Cat
Subscribe to:
Posts (Atom)