About Me

I am a techno/gadget freak. I love almost anything that has to do with computers and software. I have an engineering background, but I haven't worked in that field for over 10 years. I married my wonderful husband in September 2004 and look forward to spending every single day of the rest of my life with him. I love cats and even call myself "Cat".

Followers

Showing posts with label Product Review. Show all posts

Sunday, October 31, 2010

Can You Tell the Difference?

I was making some clear ornaments the day before and I was using my polar white Flower Soft inside to make it look like there was snow inside the balls.  All I had on hand was the one little container and I ran out of Flower Soft.  Luckily I had bought a package of the white foam balls to test out making my own Flower Soft.  If you haven't heard of this before, you take the foam balls and rub them together to grate them, and it looks and feels just like Flower Soft.  You need to use the foam that's hard and looks sparkly - not the styrofoam one like the stuff styrofoam cups are made out of.  Here's a picture of the foam balls I used:


Here's a picture of one of the ornaments with the Flower Soft inside.  I put the container from the Flower soft beside it in case you haven't seen this product yet.  Its actually filled with the grated foam and not Flower Soft.


For the ornaments, you cut a circle of acetate just slightly smaller than the diameter of your ornament (just a hair smaller). Stamp your image with Stazon ink, and then colour on the reverse side with Sharpies, Bics, or Copics.  If you colour on the same side as you stamp with the Stazon ink, your maker inks will wipe away the Stazon.  Once the inks have dried, you roll your acetate into a tube small enough to fit through the opening at the top of the ornament.  Push the acetate through and it will unroll, going across the inside of the ornament. You can put your Flower Soft, or glitter, or confetti in before or after you put your acetate in there, either way works.  I used long nose tweezers to position the image inside.

Now here's a picture of some Flower Soft and foam gratings side by side (click on the picture to open it up full size to get a good look at it).  Can you tell which one is which?  If I didn't know, I don't think I would be able to tell the difference...

Since both look pretty much exactly a like, I think I'll be using the foam balls from now on.  You can also use re-inker to custom dye the foam.  I do have one other pot of Flower Soft - Sweet Pea - which is multi-coloured, but I think you could also just make your own custom colour mixes as well.  The little pot of Polar White Flower Soft cost me $9.99 ($10.49 with tax).  My little pot of the Sweet Pea was $8.99 ($9.44 with tax).  I was able to get 6 foam balls for $4.99 ($5.24 with tax) at Walmart.  Out of 3 - 2.5" balls I got enough "Flower Soft" to fill 3 Flower Soft containers - so basically one container for every 2.5" foam ball.  That works out to about 87cents in total for a container.  Sure a lot cheaper than $10 a container...  Now, I'm not saying we shouldn't support the craft companies and buy their products.  But, this is a much more economical way to achieve the same results as Flower Soft and is great for the people with very limited budgets.

So, do you want to know which one is which?  The one on the right is the Flower Soft.  If I didn't tell you, I don't think you would be able to tell the difference.  Am I right?

That's it for today.

Talk to you later...

Cat

Saturday, October 09, 2010

So, I Caved Today....

I had a 50% off coupon for Michaels, so I used it to get:

Its not as heavy as I thought it was.  I tried a couple different ones before (a big yellow clunker) and they were really heavy and hurt my wrists when they flopped over to the side.  It could be that my wrists aren't as bad with carpal tunnel as they were before since I've been off work for so long now.  There are a couple of Michaels stores within about 15 minutes driving between stores and my house, so I think I'll take a couple more 50% off coupons and get some refills while I have the coupons.  I can't believe how much more they charge at Michaels in Canada for these things.  This gun is about $30 in the states, but was $54.99 here. That's why I never buy anything at Michaels (except the $1.50 stuff) without a coupon.  I think I'll try to limit myself now to when they offer 50% off coupons.  I had tried to put off my purchases before to when they were offering the 50% off coupons, but it seemed just as I decided to do that, they didn't have one for months and months and all they were offering were the 40% coupons.  Really, I have soooo much stuff I should be ashamed of myself for wanting to buy more and thinking I can't make another thing unless I go shopping.  Oh yeah, I bought some more card stock.  Like I need that like I need another hole in my head. :)  I've been using Tombow dry adhesive runners and, honestly, that stuff sucks the big one.  I have a card here that I made only about a month ago with the Tombow and its already fallen apart.  I had to go and re-glue a couple albums of scrapbook pages I put together using that glue.  It was getting expensive cause I had to use so much of it to get things to stick.

Well, anyway.  Wanted to share my new toy with you all.  I'll post a picture of something as soon as I use it to make something.

Talk to you later...

Cat

P.S.  Have you checked out the sketch challenge at CDAC that A Day for Daisies is sponsoring.  You have until the 20th to join in and you get a free image to work with.  Go check it out:  CDAC  You'll need to register - but that's free, then just look under the Challenges to find it.   See ya there!

Wednesday, October 06, 2010

A Couple Cards & a Product Review

Hi all. I want to show you some cards I made for a challenge over at Crafter's Digital Art Centre being sponsored by A Day for Daisies. The challenge starts tomorrow, so don't miss it.  It is a sketch challenge that is quite easy to work with (if I can do it, you all can do it I'm sure). You will also get an amazing free image to work with. How great is that eh? Here are the cards I made. The first one is using the Fall Fun image (this will be the image Tammy is offering for the challenge - its so fun!).


Supplies
Stamps:  Fall Fun - A Day for Daisies digital stamp (main image), Inky Antics (sentiments)
Papers:  Wausau 80# Exact Index cardstock, Recollections, Cat Scrap Fever Designs (me - patterned paper)
Inks:  Studio G pigment ink
Embellishments:  Paper flower, brads, rafia, & silk leaves - dollar store,  button & ribbon - Michaels
Tools:  Craft Robo, pencil crayons (prisma & crayola), oms 

I used pencil crayons & oms to colour the main image.  I also used my Craft Robo to design and cut the pumpkin and leaves.  The little tendrils are created by putting some scrap cardstock in the cutter and then cutting very thin slivers of the cardstock.  They will curl on their own, but I wrapped these ones around a pencil and shaped them.  I don't think they'll stay nice and springy once they've been in an envelope and gone through the mail.  Its a shame because they look so cute.

This next picture is another card using the same sketch, but in a Halloween theme.


Supplies
Stamps:  Pretty Witch by A Day for Daisies (digital stamp - focal image), Studio G (sentiments)
Papers: Wausau 80# Exact Index cardstock, Recollections, K&Company (patterned paper)
Inks: Studio G pigment ink
Embellishments: Paper flower, rhinestones, & brads - dollar store, buttons - Michaels, black & green stickles
Tools: pencil crayons (prisma & crayola), oms 

This card is pretty straight forward.  I coloured the image with pencil crayons & oms.  Other than that, the only thing "special" is that I glued rhinestones into the buttons because I couldn't find my black embroidery floss to thread into the holes.  I also put glitter glue on the hat ribbon & black stickles on the cat on the witch's lap.

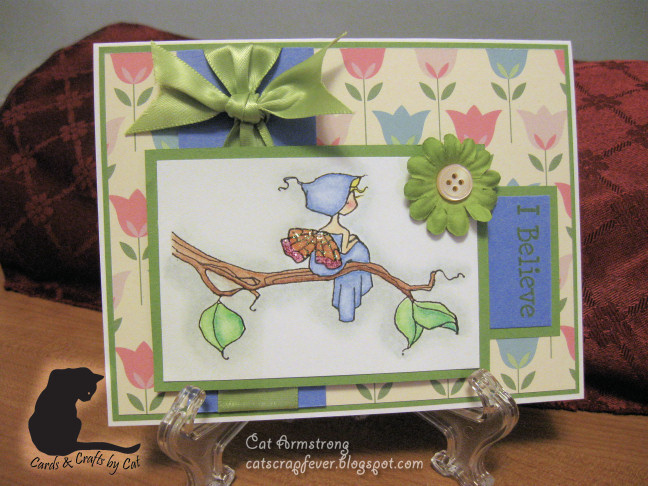
I really like this next card because the image is so cute.  Again, I really didn't do anything spectacular for this card, but I did add glitter glue to the wings because all fairies wings sparkle. :)


Supplies
Stamps:  Little Nimph by A Day for Daisies (digital stamp - focal image), Studio G (sentiments)
Papers: Wausau 80# Exact Index cardstock, Recollections, S.E.I. (patterned paper)
Inks: Studio G pigment ink
Embellishments: Paper flower, ribbon, & button - Michaels, pink & orange glitter glue - Studio G
Tools: pencil crayons (prisma & crayola), oms


PRODUCT REVIEW - STUDIO G CRAFT INK 

So, I found a new ink that I'm really liking for my clear stamps - especially the cheap Studio G stamps.  A lot of people have problems getting these stamps to ink up properly and problems getting a good image from them.  I haven't had too much of a problem myself, but sometimes the image isn't just so.  I bought some Studio G ink cubes quite a while ago and just used them the other day - on the cards I just showed you and some Halloween cards I made for my craft show (I didn't have time to take pics before the craft show, but I have one left that I'll post later - maybe tomorrow).  Since my Halloween cards have a lot of black cardstock, I thought I would try out the white Studio G ink cube.  This ink is really really good for a white ink.  If you look at the Halloween card I posted above, the white is bright and crisp.  Most any other white ink I've tried soaks into the paper and doesn't stay nice and bright unless you emboss it.  Also, what is so great about this ink is that it dries completely!  Yes, within minutes I was able to rub my finger over the stamped image without smearing it.  A lot of the other craft inks I've tried always take forever to dry (if they ever even dry) and once they're dry they will still smear.  Another thing that I like about these is the price - $1.50 in Canada (they'll be in the $1 bins in the US).  Plus, they have $1.50 glitter glue to match the ink colours.  Aaaannnd, (I know - it keeps going) it also matches some of the new recollections card stocks.  If you look at the first card, the ink I used for the sentiment matches the rusty coloured cardstock, and on the last card the ink for the sentiment matches the green cardstock (although its hard to tell since I stamped it on blue cards stock - but I did test it out to see how closely it matched).  The only thing is that I haven't seen a black ink cube yet.  If I ever do, I'll be snatching up one of those too.  I'm contemplating going back and picking up a couple more white cubes I like it that much.  So if you see these at a Michaels store near you, give them a try.  I don't think you'll be disappointed - especially at this price point.  Just so you know what you're looking for, here's a picture of what the cubes look like:


Well, that's it for today.  Make sure you get over to CDAC and check out the sketch challenge ADFD is sponsoring tomorrow.  It will be fun and you get a great image to boot!

Talk to you later...

Cat

Monday, August 16, 2010

Comparison - Sugar Beads vs. Micro Beads

So, for the last 3 weeks I've been making cards like a crazy person. I've make close to 200 - yes 200. I've booked a table at a craft show this coming weekend.  I'm pooped out and can't make another card. I figured I better get started on the altered items I want to take. They never seem to take as long to make as a card does - at least not for me. Sometimes, it can take me about 5 or 6 hours to make a card. I can whip out an altered journal in about 45 minutes. I thought I would start small and work my way up today, so I started with beaded pens. Quite some time ago I bought a jar of sugar beads from Paper Pastimes (Heritage & Elbow). They had a card on display that used them and it looked so nice. Its a pretty big jar and, like glitter, a little goes a loooong way. I don't have very much micro beads on hand, so I thought I would test out the sugar beads to see how the pens look with that. I like the look, but not quite as much as the micro beads. Using the sugar beads gives it more of a frosted look. The micro beads are bigger, so more light gets into the little bead to bounce around and makes the pen look more sparkly. Here is a picture of two of the RSVP pens side by side (the sugar beads on the left, micro beads on the right):


Here are close ups (cropped out of the picture above so they stay in proportion).  You can see the size difference of the two beads quite well:

sugar bead pen


micro bead pen

I'll use up what I have of my micro beads first, and then switch to the sugar beads. The sugar beads will make beautiful Christmas cards if you cover a winter scene with them, or covering images of fruit - a lot of things. They were very reasonably priced. I got a 4 or 5 oz jar for $5.95. The label on the jar says the brand name is Be Creative. It looks like the label was printed off a home printer, so its probably packaged and sold by a small Canadian company. I've never heard of Be Creative. I'll have google them. :)

That's all I have right now. I'm under the gun now to get all my stuff finished for the craft show, so probably won't post again until that's over. I've take photos of most of the cards (I've been doing multiples of most of the cards) and will post a few next week.

Take care...

Cat

Sunday, August 15, 2010

My First Product Review

Every once in a while I take a little stroll through the craft section at Walmart.  Usually, there isn't anything much since they've really downsized the department. Occasionally there will be the odd Martha Stewart punch on clearance (I love my edge punches), but about a month ago I found this product I hadn't seen before.  Its called Mod Podge Dimensional Magic (I'll refer to it as DM).  I have a few of these types of products already that really didn't work the way I wanted them to or the way the info claimed they would.  And for the price of this one bottle (about $3.50) I thought if it doesn't live up to its claim, then I can at least use it as glue.  Well, I'm really liking this product.  I tried it out the other day on a card with a picture of car.  I wanted to put something on the headlights so they would look like glass and thought this stuff would do the trick.  It worked just as I wanted it to.  The little headlights are little bubbles.  I was really really pleased with the results.  Here's a picture of the image laying down so you can see the dimension:


As you can see, the DM kept its shape and made little clear domes on the headlights of my little race car.  Here's a picture of a finished card with the same image (but coloured a different colour):


Supplies:
cardstock:  SU! (black), Bazzill (red), Dollar store (silver), Staples (white)
stamp:  Dollar store (sentiment), 
Car (downloaded free colouring page) coloured with Prismacolor pencil crayons & oms
brads:  SU!

Then, I started to wonder if I could make my own dew drops  (or rain drops, or skittles, or whatever they're called).  I put small drops of the DM on a piece of acetate and let it dry over night.  The one thing I noticed that, this time, wasn't a big deal, but I couldn't control the size of the drip of glue coming out of the bottle.  I wanted to try making tiny little drops.  I have this picture of a rose with dew drops and was thinking I could use this on the dew drops, but if I can't get them that small it won't work.   So, after letting the drops dry over night on the acetate, the little drops flattened out somewhat.  I think they flattened because the acetate is a little slippery, whereas paper has a more tooth to it so the DM has something to hang on to and can keep its shape better on paper. But they were nicely shaped and a nice size.  I was making another card, so I coloured a few with a copic marker to match my card.  They took the colour nicely.  I did put on two coats since it does go on a little light.  I'm sure you could use any alcohol ink - which I happen to have a few brand new bottles of that I haven't used yet so I might have a bunch of new little embellies in colours to match my cards.   Here's the card I made with the coloured dew drops:


Supplies:
cardstock & pp:  SU!, Dollar store (silver), Staples (white)
stamp:  Studio G (sentiment), 
Race Horse & Jockey (downloaded free colouring page) coloured with Copic markers


I used a teeny little bit of DM on the end of a pin to glue the dots down.  And that stuff really grabs fast and sticks well.  That's why the top one is a little crooked - I couldn't slide it over after I put it on the glue.  But that might be because its gluing to the same glue the dot is made of.  I'll see if I use a different kind of glue if I can get a little wiggle time.

So, as you might be able to tell, I'm pretty impressed with this product so far.  I've only found the few things I mentioned to be the only negatives about this product.  I think I can alleviate the problem of not being able to control the drip size by putting one of those super fine metal glue tips on the bottle.  I have a spare and will try that out sometime in the next little while and let you all know how it work.  I'm going to see if using wax paper will help it keep its shape better also when making the dew drops.

Well, that's all for now.  If you need some new stuff to add to your collection, give this stuff a try.  Just so you know what to look for when you go to get it, here's a picture of what the bottle looks like:


Talk to you later...

Cat
Related Posts Plugin for WordPress, Blogger...