About Me

I am a techno/gadget freak. I love almost anything that has to do with computers and software. I have an engineering background, but I haven't worked in that field for over 10 years. I married my wonderful husband in September 2004 and look forward to spending every single day of the rest of my life with him. I love cats and even call myself "Cat".

Followers

Saturday, August 28, 2010

Back from Camping...

We were away camping again this past week.  We were going to go out to the Drumheller area this time, but Rob really loves camping in Banff so we went to the same campground again.  We didn't do a blessed thing this time. We lazed around the campsite the whole time we were there.  The weather was absolutely perfect.  It did get a little chilly at night, but we have a honkin' big hunting heater so that kept the tent really warm.  I didn't take any pictures this time because I forgot my camera.  So part of the reason we didn't do anything and just stayed at the campsite is for that reason.  Rob said that there's no reason to go see any new sites if we can't take pictures.  I think he was quite content to nap and eat the whole time and didn't really want to admit that's all he wanted to do. I didn't mind either.  I was completely wiped out after getting ready for my craft sale.

Now, the craft sale.  It wasn't as successful as I had hoped.  I did sell a couple things, but only a couple things.  I sold $41 worth of stuff and my table fees were $35.  I haven't figured out what my material costs were yet for the stuff I sold (I do have all the info to do - just haven't yet), but I'd say I probably just broke even for the stuff I sold.  Now, all I have to do is sell the stuff I have left to make back the money I spent on supplies. I think there was probably only about 100 people (and probably 40 of them were kids and men - they don't buy stuff at these things).  For the first couple hours, I was the only one who sold anything.  That was fun.  The only other thing that sold were home dec items. One lady had a table with sofa pillows and pillow covers and she was really the only other person who sold things. I was talking to a couple other vendors at the craft sale and they said that this particular one doesn't do that well because of the location, but that there are two others in the south end that do well.  So I will be booking tables for those ones for next month.  I'll do up some Halloween and Thanksgiving items and see how well it goes.

So, here are a couple more pictures of some of the things I had up at the craft sale.  This first card is one of my favourites I made this last month.  Its a free colouring page I downloaded and coloured with copics.  I added glitter to the tail feathers.  The background cardstock is embossed using a Fiskars texture plate with a feather design.  Its a fairly simple card, but its very vibrant IRL.


Supplies:
Cardstock:  Recollections brand
Ribbon:  Dollar store
Glitter:  Craft Decor brand
Copic Markers
Fiskars feather texture plate

This next card is a variation on the previous one.  Its the same image, but I wanted something different than the typical blue/green peacock.  In person, this card is actually really nice if I do say so myself.


Supplies:
Cardstock:  Recollections and Bazzil
Pattern paper:  paper stack from Michaels 
Stamps:  Darcey Collection - Anna Griffin
Glitter:  Craft Decor brand
Copic Markers


Another card design that I really like how it turned out is this next card.  Again, its a downloaded colouring page.  I tried to make a lot of masculine cards since most of my cards tend to be very feminine.  I think this one really hit that target.


Supplies:
Cardstock:  DCWV (brown), Dollar store (foil), Office Depot (cream & white)
Pattern paper:  Graphic 45 
Stamps:  Studio G, SU!, Downloaded colouring page
Copic Markers
Fiskars Threading Water border punch

I did make a few altered items, but not that many.  Here is one of the altered journals I made (I made 6 altogether).  There is a matching pen, but I didn't take a picture of it.  Again, I tried to make it more masculine. What is interesting about the stamp I used on this item is that the stamp is actually a soap stamp.  I've been making soap for about 5 years and I was checking out the soap making supplies at Michaels one day and saw this stamp.  It works excellent as a rubber stamp.  What is also nice is that it was part of a set of 8 stamps for about $8.50.  With their usual 40% off coupon you can get it for about $5.  They have two different soap stamp sets and they both work great for stamping.


Supplies:
Cardstock:  Stampin' Up
Pattern paper:  DCWV 
Stamps:  Life of the Party soap embossing stamps
Ink:  Colourbox black pigment ink
Stampendous black detail embossing powder
Martha Stewart Arch Lattice border punch
Fiskars Threading Water border punch 
Ribbon:  Michaels 

The next cards are sets that I made using a 6"x6" One Sheet Wonder template from Verve Stamps.  I made them very simple so that I could price them reasonably in a set.  I made 4 sets in different colours, but I like this set the best:


Supplies:
Cardstock:  Stampin' Up
Pattern paper:  unknown 
Stamps:  Studio G
Ink:  Stazon black


These two next card sets were made with another 6x6 OSW template by Susan Roberts.  I only made two sets, but I made them a little more elaborate than the other ones.

Supplies:
Cardstock:  Recollections
Pattern paper:  paper stack from Michaels 
Stamps:  Lots of Thoughts - SU!
Ink:  SU! Creamy Caramel
Ribbon:  Walmart
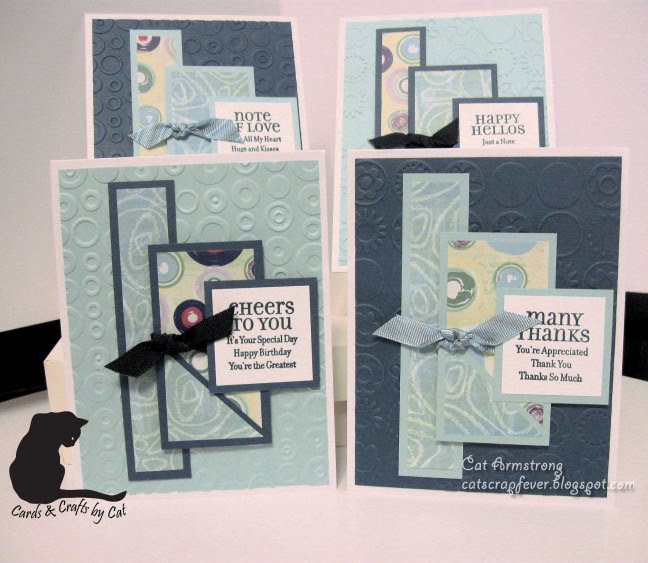

Supplies:
Cardstock:  Stampin' Up
Pattern paper:  Daisy D 
Stamps:  Lots of Thoughts - SU!
Ink:  SU! Not Quite Navy
Ribbon:  Walmart

The next altered item I made were coasters.  I made round and square.  I wanted to make tile coasters, but I didn't make it to Home Depot to see if they had the tumbled marble tiles, so I used cork ones I bought at the Dollar store and covered them with 130# coated cardstock (Domtar paper).  These are the one's I like the best.  I'm surprised at how well they actually turned out.  I used the Adirondack alcohol inks to make the background (I've never used these inks before).  I wasn't sure I'd like this colour combination, but it really looks like stone in real life.


Supplies:
Cardstock:  Domtar 130# coated 
Stamps:  Garden Delight - Inkadinkado
Ink:  Stazon black, Adirondack Alcohol inks (Butterscotch, Meadow, Slate)
Mod Podge

These next coasters are done using the same technique with the alcohol inks, but the colours came out way more intense than I had anticipated.  Even using the blending solution didn't tone them down that much.  You can just barely make it out in the picture, but I stamped dragonflies with gold ink over the background. They're kind of almost holographic looking.  It looks cool in person.  


Supplies:
Cardstock:  Domtar 130# coated 
Stamps:  Life of the Party soap embossing stamps
Ink:  Colourbox gold pigment ink, Adirondack Alcohol inks (Wild Plum, Stream, Currant)
Mod Podge

This next item was one of the items that sold at the craft sale.  I actually sold two of these (to one of the other vendors).  I made 6 of these altered note pads with a matching pen.  I think they turned out really well.  I created the cover from ideas I saw on various blogs to suit what I had for the note pads and dimensions.


Supplies:
Cardstock:  Recollections 
Patterned paper:  paper stack from Costco
Ribbon:  Michaels 
RSVP pens 
Sentiment is computer generated
Medallion designed & cut with my Craft Robo

This last item (you're probably getting bored by now) is an altered coaster/sticky note holder.  I've seen these all over the place so I just adapted my design to what I had.  I used the 130# coated cardstock as the base.  I just cut squares and used my corner rounder, then covered the base with pp and decorated; attached the sticky notes and added a big paper clip.  They were pretty easy to make and very quick, plus as an added bonus they use up your paper scraps.


 I tried taking pictures of the beaded RSVP pens I made, but the patterned paper doesn't show up very well through the beads so I'm not going to bother posting a picture right now until I can get one that shows up well. Could be that I didn't use pp with a strong/dark enough pattern.

So that's all I have for now.  I'm going to work on some Halloween & Thanksgiving stuff over the next couple weeks.  I'll post pics as I go along.

Take care & talk to you later...

Cat

Tuesday, August 17, 2010

Sugar Bead Disaster...

I'm really po'd at myself.  I've had that jar of sugar beads for at least 6 or 7 months.  I take it out yesterday to work with and don't put it back where I got it from, so what happens?  I was getting something off the shelf where I put it and knocked it down on the floor - from the top shelf - about 5 feet.  The jar broke and I had sugar beads all over the place.  So there I was at 1 o'clock in the morning vacuuming!  I lost about 1/2 the jar.  Not that they're that expensive and I can't replace them.  Not that I use them all the time.  I just need to learn to put things away in their proper place when I'm done and quit being so damn lazy.  Oh well, at least I got into the corners and around the mouldings with the vacuum - its been a while - and got the dust bunnies that I've been ignoring. My, how they grow....

Talk to you later...

Cat

Monday, August 16, 2010

Comparison - Sugar Beads vs. Micro Beads

So, for the last 3 weeks I've been making cards like a crazy person. I've make close to 200 - yes 200. I've booked a table at a craft show this coming weekend.  I'm pooped out and can't make another card. I figured I better get started on the altered items I want to take. They never seem to take as long to make as a card does - at least not for me. Sometimes, it can take me about 5 or 6 hours to make a card. I can whip out an altered journal in about 45 minutes. I thought I would start small and work my way up today, so I started with beaded pens. Quite some time ago I bought a jar of sugar beads from Paper Pastimes (Heritage & Elbow). They had a card on display that used them and it looked so nice. Its a pretty big jar and, like glitter, a little goes a loooong way. I don't have very much micro beads on hand, so I thought I would test out the sugar beads to see how the pens look with that. I like the look, but not quite as much as the micro beads. Using the sugar beads gives it more of a frosted look. The micro beads are bigger, so more light gets into the little bead to bounce around and makes the pen look more sparkly. Here is a picture of two of the RSVP pens side by side (the sugar beads on the left, micro beads on the right):


Here are close ups (cropped out of the picture above so they stay in proportion).  You can see the size difference of the two beads quite well:

sugar bead pen


micro bead pen

I'll use up what I have of my micro beads first, and then switch to the sugar beads. The sugar beads will make beautiful Christmas cards if you cover a winter scene with them, or covering images of fruit - a lot of things. They were very reasonably priced. I got a 4 or 5 oz jar for $5.95. The label on the jar says the brand name is Be Creative. It looks like the label was printed off a home printer, so its probably packaged and sold by a small Canadian company. I've never heard of Be Creative. I'll have google them. :)

That's all I have right now. I'm under the gun now to get all my stuff finished for the craft show, so probably won't post again until that's over. I've take photos of most of the cards (I've been doing multiples of most of the cards) and will post a few next week.

Take care...

Cat

Sunday, August 15, 2010

My First Product Review

Every once in a while I take a little stroll through the craft section at Walmart.  Usually, there isn't anything much since they've really downsized the department. Occasionally there will be the odd Martha Stewart punch on clearance (I love my edge punches), but about a month ago I found this product I hadn't seen before.  Its called Mod Podge Dimensional Magic (I'll refer to it as DM).  I have a few of these types of products already that really didn't work the way I wanted them to or the way the info claimed they would.  And for the price of this one bottle (about $3.50) I thought if it doesn't live up to its claim, then I can at least use it as glue.  Well, I'm really liking this product.  I tried it out the other day on a card with a picture of car.  I wanted to put something on the headlights so they would look like glass and thought this stuff would do the trick.  It worked just as I wanted it to.  The little headlights are little bubbles.  I was really really pleased with the results.  Here's a picture of the image laying down so you can see the dimension:


As you can see, the DM kept its shape and made little clear domes on the headlights of my little race car.  Here's a picture of a finished card with the same image (but coloured a different colour):


Supplies:
cardstock:  SU! (black), Bazzill (red), Dollar store (silver), Staples (white)
stamp:  Dollar store (sentiment), 
Car (downloaded free colouring page) coloured with Prismacolor pencil crayons & oms
brads:  SU!

Then, I started to wonder if I could make my own dew drops  (or rain drops, or skittles, or whatever they're called).  I put small drops of the DM on a piece of acetate and let it dry over night.  The one thing I noticed that, this time, wasn't a big deal, but I couldn't control the size of the drip of glue coming out of the bottle.  I wanted to try making tiny little drops.  I have this picture of a rose with dew drops and was thinking I could use this on the dew drops, but if I can't get them that small it won't work.   So, after letting the drops dry over night on the acetate, the little drops flattened out somewhat.  I think they flattened because the acetate is a little slippery, whereas paper has a more tooth to it so the DM has something to hang on to and can keep its shape better on paper. But they were nicely shaped and a nice size.  I was making another card, so I coloured a few with a copic marker to match my card.  They took the colour nicely.  I did put on two coats since it does go on a little light.  I'm sure you could use any alcohol ink - which I happen to have a few brand new bottles of that I haven't used yet so I might have a bunch of new little embellies in colours to match my cards.   Here's the card I made with the coloured dew drops:


Supplies:
cardstock & pp:  SU!, Dollar store (silver), Staples (white)
stamp:  Studio G (sentiment), 
Race Horse & Jockey (downloaded free colouring page) coloured with Copic markers


I used a teeny little bit of DM on the end of a pin to glue the dots down.  And that stuff really grabs fast and sticks well.  That's why the top one is a little crooked - I couldn't slide it over after I put it on the glue.  But that might be because its gluing to the same glue the dot is made of.  I'll see if I use a different kind of glue if I can get a little wiggle time.

So, as you might be able to tell, I'm pretty impressed with this product so far.  I've only found the few things I mentioned to be the only negatives about this product.  I think I can alleviate the problem of not being able to control the drip size by putting one of those super fine metal glue tips on the bottle.  I have a spare and will try that out sometime in the next little while and let you all know how it work.  I'm going to see if using wax paper will help it keep its shape better also when making the dew drops.

Well, that's all for now.  If you need some new stuff to add to your collection, give this stuff a try.  Just so you know what to look for when you go to get it, here's a picture of what the bottle looks like:


Talk to you later...

Cat

Wednesday, August 04, 2010

I'm sooo addicted to coffee...

I'm so addicted to coffee that I've had a splitting headache all day because we ran out of coffee.  I usually drink about 4 or 5 cups a day and I haven't been able to function properly all day.  I finally made it to the store and got some coffee (I forgot it on my earlier trip - d'oh!) and just poured myself a big cup.  My eyesight is still a little blurry from the headache.  I'm sure it will start to go away by my second cup.  Now, I'll just be up all night running to the bathroom.  Caffeine doesn't keep me awake anymore.  I have too high a tolerance.  Pretty sad huh?

Anyway, The Stamping Boutique has all these really cute digi stamps.  I try to snag the freebies when I can and really should buy a couple since they're so dang cute.  Well, she's having a challenge on her PCP Group and is giving away a free digi stamp.  So to enter her challenge (the prize is a bunch of her images! how cool!) I made this card.


supplies:
card base & white cardstock:  Staples 110#
colour card stock:  SU!  Tangerine Tango & Tempting Turquoise
ink:  SU! Tangerine Tango & Tempting Turquoise
patterned paper:  unknown
Stamps:  Digi stamp by The Stamping Boutique
              Harmony Classic set by Just Rite Stamps
Ribbon:  Michaels
Flowers & Brads:  unknown

Well, I just wanted to get this card done so that I could get it up for the challenge.  I think I'll go hook up an inter venous now so I can get the coffee in a get rid of this headache.

Talk to you later...
Cat

Monday, August 02, 2010

For my Friend Janet...

Just in case you pop by, this is for you Janet!

Saturday, July 31, 2010

More Camping...

I just love camping.  Its a lot of work though to set everything up and make sure everything stays clean.  On top of it, we have to basically pack almost everything up each night and lock it up in the truck.  Not because people will steal it, but because of the animals getting into the food - mostly bears.  But to see some of the most amazing scenery around is worth the extra effort it takes.  The second day we were camping is really the only day we had to go out site seeing.  We decided to take a short drive to Johnston's Canyon (correction from yesterday.  I called it Johnson's canyon) - about 1/2hr outside of Banff on Hwy 1A going to Lake Louise.  There are two falls on the river that runs through the canyon.  Since neither Rob or myself are in any kind of physical condition to hike in the mountains, we decided that we would take the short 1 mile (round trip) hike to the lower falls.  It was so beautiful, but of course there were tons of people there also. We had hoped being the middle of the week there wouldn't be that many people, but of course, it being the middle of summer, there are thousands of people from all over the world visiting Banff and Lake Louise.  Rob is very uncomfortable in crowds, so that is another reason we decided that we would take the short hike.

This first picture is at the start of the trail. I took it on a small foot bridge crossing from the tourist parking lot to the parking lot for a lodge at the foot of the trail.  The water is so clear it almost looks like you could drink it (but I wouldn't).  And the next picture is just a little further up the trail.  They had a walkway with metal handrails so you can't go over the edge, unless you're an idiot and go off the trail.

(click on the pictures if you want to see them full size)


The next picture I took of Rob and Mitzy walking up the walkway.  Rob has these recurring nightmares of being on balconies or ledges with railings that give way and he is hanging there holding on for dear life.  So needless to say, this little hike was somewhat unnerving for him.  On top of all the people pushing to get by in some spots because its so narrow.  He made it through though without any melt downs.  Mitzy loved it.  So many new smells and she met a few other dogs on the walk.


The next picture is of the canyon wall.  At the point that I took the picture, it was probably about 60-70 feet to the water level.


The next picture is a mini rapids in the river and where it starts to climb up to the falls.  I can't believe the colour of the water.  Its such a beautiful turquoise colour.  I bet its darn cold though.  Its fed from the glaciers in the mountains.


Finally, we reached the lower falls.  It was just gorgeous.  The falls spilled into this large pool carved out in the rocks.  The colour of the water was amazing and the pool looked really really deep - and very dangerous if you happened to go over the railing into it.  I don't think you'd come out of there alive if that happened.


There was a foot bridge going across the stream to a little tunnel that had been carved out by the water.  It was really cool.  The tunnel is big enough to walk through and there is a little ledge on the other side where you can stand and get an amazing view of the falls.


The next picture is a picture of the falls on the other side of the tunnel.  The picture after that is a shot across the falls on the other side of the canyon wall.  There is another tunnel carved out by the water.


I got Rob to take a picture of me and Mitzy at the tunnel entrance on our way out.  I never have pictures of me when we go places because Rob just can't figure out how to work the stupid cameras.  It really annoys me sometimes cause its not rocket science.  Just point and click.  How hard can it be??  Oh well, it may be just as well, cause the shape I'm in I really don't want too many pictures....


The next picture is so cute.  The chipmunks along the trail were practically tame.  You're not suppose to feed the wildlife (against the law in the national parks), but people always give them food and they'll come right up to you looking for a hand out.  This little chipmunk was on the trail and both Mitzy and the little critter were curious about each other.  They actually touched noses checking each other out.  I couldn't get the camera in there quick enough, because of course, there were people in the way.  This picture was taken just before they touched noses.  As soon as I was able to get to were I could get a decent shot, the little chipmunk took off.  It was sooo cute though to see that.


I was just testing out my macro setting on my camera on the next shot.  There are wildflowers all over the place and these are just some wild daisies.  They're very pretty and I thought the photo might make a nice background for a scrapbook page.


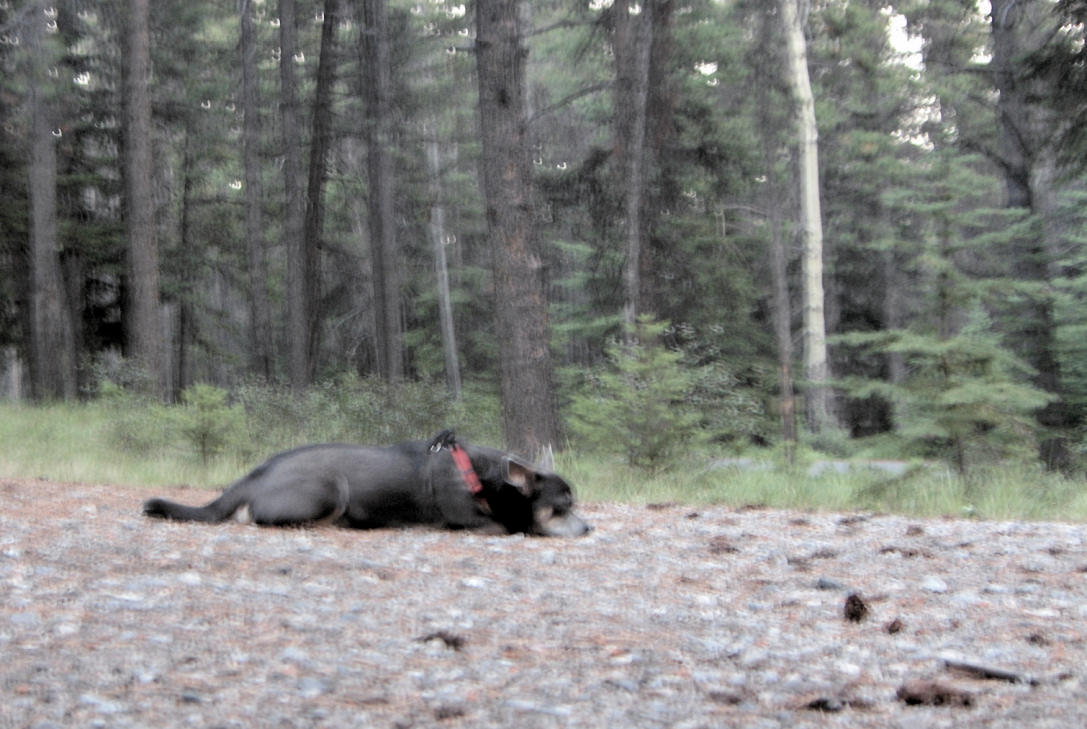
The next picture is kind of blurry because I was trying to hold the camera down just above the ground to get a picture of Mitzy.  She was pooped out from the hike and she liked to sit at the edge of the campsite so she could keep an eye on everything that went by.


These next two pictures were taken toward the end of the evening.  We started a camp fire and were just winding down.  We were heading off to bed fairly early because we had to get up early to pack up.  With all the stuff we have it takes about 2 1/2 hours to tear down and load the truck and we had to check out of the camp site by 11am.  It was a really mild evening - the night before I had to put on a sweater and sit close to the fire.


(as you can see I'm not very good at removing the green glow from pet eyes in the flash.  I'll have to find a tutorial to get better results.  She looks weird with really dark eyes).

That was our camping trip.  We were so tired the next day, we didn't even stop anywhere on our way home for a little sight seeing.  Its a lot of work, but we're looking forward to going again in a couple weeks.  I think this next time we're going to go in the opposite direction and see what there is around the Drumheller area. We'll go and see some hoodoos and dinosaur bones.

I didn't get to making any cards yesterday.  I have to do some today.  I have a ton of stuff to get ready for my craft show in a couple weeks.  I'm no where near where I should be at this point.

So, that's all for today.  Talk to you later...

Cat

Friday, July 30, 2010

Camping in the Rockies & My Unmounted stamp storage...

Well, I got back from camping last night.  It was too short a break.  The weather was absolutely perfect this time.  We were at the same campground last year for the Labour day weekend and it was sooooo cold.  It snowed on the mountain the day we were leaving last year.  It did rain the first night we were there, but it stopped just before 5am.  I know what time it was because I woke up having to go pee and didn't want to walk to the bathroom in the dark and rain, so I waited half sleeping and half listening to the rain for it to stop so I could go to the bathroom.  The mosquitoes were pretty bad this time.  I've lived in Alberta for 16 years and I haven't been bitten this many times since I lived in Manitoba.  We had to go and buy bug repellent the day after we got there.  Even that didn't really keep them away.  Poor Mitzy was tortured by the bugs.  I'm going to do some research to see if there is a dog safe bug repellent so she isn't bothered by them the next time we go.  The first day we got there we didn't do too much except take our time setting up the campsite.  It was so nice and quiet.  The camp grounds are very well kept and nicely wooded.  You can see your neighbours, but not so close that you can hear them. Here are a couple pictures of the campsite after we got everything set up:

Mitzy keeping watch and guarding the truck while we set up:


Our tent.  It has more living space than our dining room and living room combined in our house!


Our screen tent.  We set up our cooking stand in here so we don't get too many bugs in the food:


This was our "back yard" at the camp site:


As I mentioned, the weather was perfect.  I had to take a picture of the sky through the trees.  The sky was such a pretty blue with a few white puffy clouds here and there.


And lastly, this little guy was checking us out the whole time we were there.  A lot of the little creatures are quite comfortable around humans and they came right into the campsite.  He wasn't really that scared of Mitzy either.  He was cautious, but didn't run away when she was checking him out.  She got about 2 feet away before he took off down his hole.


We went for a hike to Johnson's Canyon the next day, so I'll post pictures of that tomorrow.  It's a beautiful little hike up to the lower falls and only took us about an hour (with the dog.  She has to smell everything.  Probably would have only taken us alone about 40 minutes there & back).

So, I had taken a bunch of pictures of my stamp storage system, and for some odd reason I deleted the folder off my sd card without thinking and deleted all my pictures.  I took a few today so I could show you how I store all my stamps.  This first picture shows the actual binder that the stamps are stored in.  I store my stamps on acetate sheets.  If they are stamps for which I didn't have preprinted index image (ie from the stamp packaging) then I stamped the image onto acetate with stazon, then scanned the images and printed off two copies of the index images - one for the stamp binder and one for the main index binder.  I put the stamps on the back of the acetate on their stamped image, and then put one of the index sheets and the acetate sheet into a page protector.  I write the binder and page # on both the index and acetate sheet so I know where to put them back (in the top right - that particular page is B2-7 - Binder 2 page 7).  If I still had the index image from the packaging, I just taped it to a sheet of paper, scanned the sheet, then printed that onto a transparency and another one onto paper.  I then put the stamps on the back of the transparency where their corresponding image is, put that and the printed paper in the page protector.  The original with the taped on index images goes into the index binder.  Here is a picture of one of the stamp storage binders:


This next picture is from the main index binder.  It better shows the images and how they're taped to the page for the ones I had kept them from the packaging.


The next part was the hard part.  After having scanned all the index images, I then started categorizing them.  All in all, I'd say this project took about 6 weeks from unmounting all my stamps to printing all the category pages for the binders.  I had to make a few "rules" to follow when categorizing my stamps.  Since I wanted to be able to find even the smallest stamp in whatever category it fit in, I decided that I would categorize each stamp in a set and that when I printed the image for a category index sheet, I would include the entire set.  My reasoning for that is for the most part, if I'm choosing an image for a theme, then there are more likely stamps in that set that I could use as well.  If an image fit into more than one category, for example the image above, there is an image of a woman in a bathing suit, I put the image into all categories it fit into.  It could fit into the people category, subcategory women - or it could fit into the category activities, subcategory beach & swimming.  So I put a printout of that set in both those categories.  That set would also be in the category toys because there is a ball in the set, and it would also go into the shoe category because there is a pair of flip flops.  This set fits into a whole bunch of categories, so I have the image of that set in all the categories it fits into.

The next picture just shows one of the category index binders (I have 2 right now and only 1 main index image binder).  I use coloured tab dividers to mark off the different categories and just write the subcategories on the divider page.


So, this first page is for the category "Activities" and listed are my sub categories beach, games, gardening, music & dance, school, & sports.  I can add more subcategories if I feel the need.

The next pictures show subcategory pages.  I put the category on the bottom right of each page and the page #.  I don't put how many pages in that subcategory (ie 1 of 5) because I will probably add to my collections and then I'd have to renumber all those pages.  You'll notice that each image has the binder # & page # the image is stored in.  I also included the manufacturer, the set name, and in a lot of cases whether the stamp is clear, bare rubber, or rubber on foam.


The last picture here shows all my binders.  I decided that I will store all my clear/unmounted stamps in red binders.  My main index image binder is blue and is basically an inventory of all my stamps.  The category binders are black.

I have two photo boxes of foam stamps.  I've stored these ones this way because they don't fit in the binders very well since they're pretty thick, but they are included in the index binder and categories.  They're just labelled in the main index binder as stored in either box1 or box2.  This one shelf, which is about 4 feet wide, stores all of my stamps - I estimate about 1200 individual stamps.


Well, hopefully, I was able to show you without it being too confusing how I've set up my stamp storage system.  I love the way this works and how well organized all my stamps are.  I'm able to quickly find - and even more important - put my stamps away where they are suppose to be.  It allows for expansion (which I already have a few stamps to unmount and add to indicies), yet is fairy simple to maintain.  If you have any questions about this system, you can always email me at catscrapfever@shaw.ca and I will try to answer your questions.

Well, that's all I have for today.  I'm going to go get my ticket for the $50million draw tonight and take my little Mitzy for a walk.  Hopefully, I'll have some time to work on a few cards tonight.

Talk to you later...

Cat

Monday, July 26, 2010

Busy, busy...

I'm heading off to Banff tomorrow morning to go camping for a couple days.  I wanted to get a few more prototypes done of cards for the craft show next month.  I made 2, but I may have to refine the first one.  I think the focal medallion is too big for the card.  I may take it down 1/2" and I think I'll stamp the sentiment parts separately - I tried to line them up on my block.  I think the little confetti stamps on the side kinda look lame too. I do like the image though - its cute.  The stamps are a clear set from Stampendous, the patterned paper is another free download from the Fuji flim website, the red paper is a digi freebie from the June 29/09 Colour Challenge kit by Jesse Edwards from Designer Digitals, the mint green cardstock is Recollections brand , and the white cardstock is Wausau 80#.  I used Stazon black ink and coloured the image in with pencil crayons & odourless mineral spirits and then added black stickles to the body and diamond dust stickles to the wings.  I used red stickles on the confetti designs.  The medallion is attached with pop dots.  Here is the card:


The next card I made is a very simple design.  I bought a couple Studio G stamps and wanted to try them out. The base is Domtar Cougar 130# cardstock, the green patterned paper is a free digi download from Designer Digitals (designed by Andrea Victoria), the second patterned paper is also a free digi download but I can't find which one right now on my computer (I have literally thousands of digi papers downloaded over the years), and finally the orange cardstock is SU! tangerine tango.  I stamped the sentiment stamp with SU! classic green galore ink, and the butterfly image is stamped with SU! classic tangerine tango ink.  I really like the clean lines of this card and I think I could change up the patterned papers and stamps to get a whole different look.  Here's what the card looks like:


So, the last card was an experiment and I think it looks like crap.  Last year I bought a block of rubber and some carving tools to see if I could carve my own logo stamp for my cards.  Well, needless to say, my carving skills leave a lot to be desired.  But I did make this bear stamp kind of in the Haida Indian style.  I just stamped it with Momento ink on the Cougar 130# card base (single layer card).  I then made a mask, and a template to look like snow mounds and one for clouds.  I used chalks on the background, then I mixed some irredescent perfect pearls in water in a little mister spray bottle, masked off the "ground" and the bear, and sprayed the sky so that it shimmers.  I then took frosted lace stickles and outlines the hills of the ground.  For the bear, I had originally coloured it in with chalks, but the colour wasn't deep enough, so I painted over top with gold perfect pearls and Future floor wax mixed together.  Here's what the card looks like.  Like I said, it looks like crap.


So finally, as I mentioned yesterday, I found a new solution for storing my ribbon.  I've been using a couple cd/dvd spindles and a lot of shoe boxes.  The cd spindes are ok since I can see through the cover and tell what ribbons are there.  BUT, the shoe box thing doesn't work at all.  I have to pull out all the boxes to find what I want.  Well, I went grocery shopping a few days ago at the Walmart super centre.  In the bakery section they have donuts - 6 for $1.  And they come in these cute little, clear clamshell type containers.  Well, I like to re-purpose/recycle containers.  I hate throwing stuff out.  I'm a pack rat.  So I was rinsing it out (cause we ate all the donuts - yummy) to put in the recycling bin and it struck me that the container would fit spools of ribbon perfectly.  Beautiful.  Now I'm going to have to buy donuts more often (like I really needed an excuse to begin with).  The one I have now, I was able to fit 10 spools of ribbon in it.  The max size of spool you fit in the container is about 3" in diameter and about 1" wide.  Here's a couple pictures of what it looks like:


They will stack nicely and fit nicely on a shelf in my bookcase and I will be see what ribbons I have without pulling everything apart.  I am really happy that I found these containers.  Too bad I couldn't just buy the containers.  I don't think my waist really needs all the donuts I'm going to have to eat to get enough containers for all the ribbon I have.  But for $1 a container, its a pretty good deal.

Anyway, long winded post.  I'll post pictures of my camping trip in the Rockies when I get back.

Have a nice day everyone!

Cat
Related Posts Plugin for WordPress, Blogger...