Hi everyone! I hope you all had a wonderful weekend. I'll be sending out my first newsletter on (or as close to it as possible) April 1st. I'll be including tips on different scrapbooking softwares, tutorials, and of course a freebie here and there. Needless to say, my grand kick off of the new store newsletter will include an EXCLUSIVE Cat Scrap Fever freebie. If you want in on the fun and what all else the newsletter will be delivering, you can sign up here. I hope you will.
Also, just wanted your opinion on my new logo:
What do you think? Too plain? Too much wording? I'd love to hear what you think.
That's everything for today.
Talk to you later...
Cat
Monday, March 25, 2013
Saturday, March 16, 2013
New Layouts
Hi everyone! So, do you have any green plans this weekend? I'm going to make some corned beef sandwiches, maybe. That's about as much St. Patrick's Day celebrating we do. I don't go in for all the green beer and "kiss me, I'm Irish" stuff, but I love all the green (one of my favourite colours) and all the cute little leprechauns. So, if you have plans and plan on taking a lot of pictures, I have the kit for you. My new kit to open my new store with is the Lucky Charm kit. Its full of lots of green (and a little pink and white thrown in) with lots of embellishments. Here is a preview of what's in the kit:
Its a fairly big kit, and not everything is shown in the preview. All together, there is over 50 pieces to the kit. You can purchase this kit here: Lucky Charm Kit.
There are some non-themed elements to this kit that make it very versatile and can be used for any occasion. Here are a few layouts I made with this kit just to give you an idea of how nicely the elements come together.
My beautiful cousin Angela with her 3 children (the 4th hadn't been born yet - whew! 4 kids).
My BFF's second grandson:
And, my cute little Mitzy. The light was refracted as it shone through the living room window and Mitzy just happened to be sleeping on her (my) woobie on the couch and the little rainbow fell across her face. It was so pretty and I'm glad she didn't hear the camera start up, otherwise she would have bolted. She doesn't like having her picture taken anymore.
So that's it for today. Come check out my new store. I'll be adding a lot more things as time goes by. I probably won't be posting as much on this blog since most of my stuff will be on the new store blog. You can also come and see what's happening there. My new blog has the same name, just a new place. You can find the new hang out here: Cat Scrap Fever Blog
Talk to you later...
Cat
There are some non-themed elements to this kit that make it very versatile and can be used for any occasion. Here are a few layouts I made with this kit just to give you an idea of how nicely the elements come together.
My beautiful cousin Angela with her 3 children (the 4th hadn't been born yet - whew! 4 kids).
My BFF's second grandson:
And, my cute little Mitzy. The light was refracted as it shone through the living room window and Mitzy just happened to be sleeping on her (my) woobie on the couch and the little rainbow fell across her face. It was so pretty and I'm glad she didn't hear the camera start up, otherwise she would have bolted. She doesn't like having her picture taken anymore.
Talk to you later...
Cat
Wednesday, March 06, 2013
Some really big news!!!!!!
Ok, so I hinted a couple times here and there about something (or a couple things) that I was working on over the last couple weeks. Well..... its done.... and ready to reveal!
Its taken awhile for me to get the courage up to do this. I know its a tough market, but really I'm not in it to make a fortune (because I know I won't). I really like designing and rather than have this stuff just sitting on my hard drive not doing anything for me, I thought now is the time to get back into a store. Then I thought, why not my own store. So the journey began. I really would love to see you all stop by and take a look. If you're intersted, you can even sign up for my newsletter. I'm hoping to have the first issue ready for press for the first of April. I have big plans for this new place. Another thing is I will be moving my blog to the one associated with the store and probably just keep this one for my personal stuff. So I will still be around, but all my craft stuff will be on the store blog now. I'll leave this blog up because there's a lot of stuff here that I people still access (like the Silhouette tutorials - those one's are my most popular posts).
So that's it. I'm wiped out. It was a long, long day yesterday loading the few things into the store. If you head over and take a look, there is also a freebie page. I have some new stuff there for you.
Hope to see you soon at the new place!
Cat
Monday, March 04, 2013
New Challenge Freebie
Hi everyone! Some of you might remember me mentioning a site I've been hanging out at lately. Its called Pixel Scrappers. I found it a couple years ago, but never really looked around to see what was happening. Well, I happened upon the site again, and I decided to take a look around. I'm glad I did. Its a great community with lots of digi freebies (personal use & commercial use). There are a lot of great tutorials and, what I've been involved in lately, are the challenges. Specifically, the designer challenges. I want to get back into designing again, and this has given me the little pick up I needed to get going. I've been working on getting a store set up, so you all can check that out, but I'll let you know when its ready and open for business. :) In the meantime, I played along with the latest designer challenge at Pixel Scrappers, which was to make an add-on element for the Spring Fields kit (I love the colours). Here is my addition to the kit:
I hope you like it and if you do use it, I would love to see what you did with it, so let me know. :)
That's all for today...
Cat
There are two files available (packed together). The first one is a sequin and glitter spray, and the second one is sponged background spray. The sponged spray is quite subtle and a little hard to see, so I suggest you click on the preview to make it bigger so you can see the detail. You can pick up this add-on here: CSF Spring Fields Add-on Freebie
I hope you like it and if you do use it, I would love to see what you did with it, so let me know. :)
That's all for today...
Cat
Friday, February 22, 2013
A New Paper Pack Freebie
I'm taking part in a design challenge at Pixel Scrappers and this week's challenge is to create a repeating pattern that you can use to make digital papers. I love making digital papers. I find it the easiest part of designing. I did these papers up last night for the challenge and I'm offering them up for you to download. I'm also offering the templates I created so you can play around with your own colour combinations and textures to see what you can create. :)
You can download these papers from here: Call Me Paper Pack.
Here are the templates:
You can download these papers from here: Call Me Paper Pack.
Here are the templates:
I'm offering these as CU, so if you make something you like and you want to sell it, your free to do so (you just can't sell the template as is or just recolouring it and selling it). You can download the Paper Makers from here: Call Me Paper Maker Pack.
Well, that's it for this post. I bet you're falling out of your chair to see that I've actually posted twice today eh? I'm on a roll...
Oh yeah, if you download, please leave a comment. I just like to know what you all think of my designs (your feedback will help me determine what kind of designs you all like) and I'd really, really love to see any projects you do using my designs - really...
Ok, talk to you later...
Cat
Another Layout with my new kit
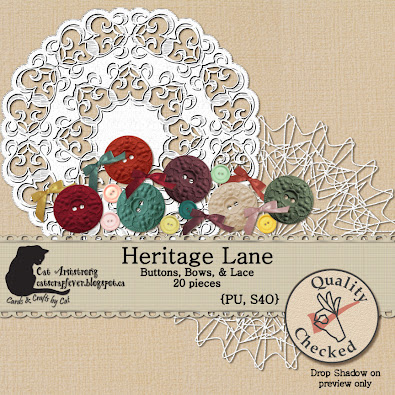
I was playing around with my Heritage Lane kit last night and surfing the web for freebies (what else are you suppose to do at 2am?) and I found this pretty layout template by Zoe Pearn Designs. I haven't used layerd templates until I used the one for the Persnicky Prints layout contest, and I tell ya, they are great. I can put together a layout in about 15 minutes and I don't have to think about where to put everything. My layout skills really leave something to be desired, so while I am using these tools as a quick and dirty way of getting out a layout, I consider them a learning tool as well. They help me understand how to put together a great layout using their scale of elements, placement, and shadowing. I know I'll be looking more into how to make these for myself in the near future. So here is the layout:
I think this better shows off the colours of the kit, plus I got to use that pretty doily.
So, that's all for today. I'm amazed there's still sunlight and I've posted. Usually, blogging is a late night activity for me. I need to get my schedule straightened out. I've been looking for work and I can't be up all night and expect to be engaged if I get called for an interview. We'll get there...
Talk to you later...
Cat
I think this better shows off the colours of the kit, plus I got to use that pretty doily.
So, that's all for today. I'm amazed there's still sunlight and I've posted. Usually, blogging is a late night activity for me. I need to get my schedule straightened out. I've been looking for work and I can't be up all night and expect to be engaged if I get called for an interview. We'll get there...
Talk to you later...
Cat
Wednesday, February 20, 2013
IMPORTANT UPDATE...
I'm so embarrassed!!! The buttons and bows files I uploaded the other night for you guys to download as part of my Heritage Lane kit were the wrong files. I think that when I was doing the batch process to resize my previews, I may have had these files open but didn't notice them (I think they were minimized) and the script I made resizes all open windows. Granted, I'm not very good with scripts in Photoshop, and in my own defense (copping out in other words) it was really late when I was doing all this. So, I've fixed the files, and its all good now. So if you were here yesterday (or earlier today) and downloaded the files, please delete it and download this new zip file:
*Sorry, this link has now expired*
I'm so sorry for the inconvenience to you all. I assure you this won't happen again! The link is also fixed on the previous post.
Cat
*Sorry, this link has now expired*
I'm so sorry for the inconvenience to you all. I assure you this won't happen again! The link is also fixed on the previous post.
Cat
Tuesday, February 19, 2013
I am so bad at blogging!! (Freebie to make up for it).
I really do have good intentions to keep this blog updated, but then I get side tracked or I'm just too lazy to post, and then a week goes by, 10 days, 2 weeks, with no post. I'm working on something pretty big (a couple of things actually) and its been taking up huge amounts of my time. Plus, I have to look for work on top of that, sooooo needless to say, this poor little blog gets neglected.
To make up for it, I have a huge digi scrapping kit for you all. Its over 70 pieces (over 80 if you grab my exclusive Facebook fan freebie). I wanted to participate in the February blog train with Pixel Scrappers, but didn't feel I had the time to do a mini kit justice when they were going live with it February 1st. So, I worked on this kit using the same colour scheme and theme on my own a little bit here and there and I think I've come up with something that's pretty cute. I hope you all like it. I did up a layout using the kit, just to give a quick example.
I've broken the kit up into 4 parts. Each part is linked to the preview image for that part.
*Sorry, these links have now expired*
As a special bonus, I have an exclusive fan freebie on my Facebook page. Here's a preview of it (preview is linked):
Just click on the big red heart to get into the download area.
If you download the kit, I would really love to hear what you think of it. I appreciate any and all feedback and constructive criticism you can offer on this project. I would also love to see what you create with it. Its always a thrill for a designer to see their goods in action.
Well, that's all for tonight. I will try to get back here sooner this time. I've been meaning to post some pictures I have of some cards I made. I just don't seem to get around to it. I think I need someone to give me a good boot in the butt to get me going again. :)
Talk to you later...
Cat
To make up for it, I have a huge digi scrapping kit for you all. Its over 70 pieces (over 80 if you grab my exclusive Facebook fan freebie). I wanted to participate in the February blog train with Pixel Scrappers, but didn't feel I had the time to do a mini kit justice when they were going live with it February 1st. So, I worked on this kit using the same colour scheme and theme on my own a little bit here and there and I think I've come up with something that's pretty cute. I hope you all like it. I did up a layout using the kit, just to give a quick example.
I've broken the kit up into 4 parts. Each part is linked to the preview image for that part.
*Sorry, these links have now expired*
As a special bonus, I have an exclusive fan freebie on my Facebook page. Here's a preview of it (preview is linked):
Just click on the big red heart to get into the download area.
If you download the kit, I would really love to hear what you think of it. I appreciate any and all feedback and constructive criticism you can offer on this project. I would also love to see what you create with it. Its always a thrill for a designer to see their goods in action.
Well, that's all for tonight. I will try to get back here sooner this time. I've been meaning to post some pictures I have of some cards I made. I just don't seem to get around to it. I think I need someone to give me a good boot in the butt to get me going again. :)
Talk to you later...
Cat
Labels:
Digi Kits,
Digital Scrapbooking,
Facebook freebie,
freebie
Sunday, February 10, 2013
Just a quickie...
I guess I've been MIA for a little while. I've been working on something and just haven't been able to get here. I have a little gift for you all today (or tonight as I'm writing this). I've been brushing up on some of my designing skills lately and have a paper sample pack for you. Just in time for Valentines day for those last minute layouts or cards. They are 12x12 papers at 300dpi so they are perfect for printing. Here's a preview:
I tried to include something that wasn't so girly for those guy cards you still have to make. :) For all you Silhouette Studio Designer Edition users out there, you can also import these to your library to use as fill patterns for your print & cuts. Hopefully, you can use them. If you do download them, please let me know what you think and also, I would love to see what you do with them. *sorry this link has now expired* Click here to download them.
Talk to later...
Cat
Saturday, January 12, 2013
Digital & Paper Layouts...
UPDATE: The contest officials opened up viewing and voting early!! You can vote for my layout here: Vote for Cat's Layout - Inspiration
Thanks! I need those votes!
Hi everyone! Well, I've recovered from the blow to my ego from the MFT contest. ha ha. I found another contest on Persnickety Prints to make a layout using a free digital scrap kit from Scrap Orchard. The kit is really beautiful and I've been wanting to do another layout for a long time. They are going to have open voting for the winner of the contest, so please go and vote for me. They are keeping the layouts a secret until voting starts on Monday, so I will post a link then. But in the meantime, I wanted to show you the digital layout I made for the contest:
So, I loved this layout so much that I wanted to see if I could re-create it in paper. So I printed out all the papers I used on the layout and fired up my CraftRobo. Here is the paper version of the layout:
I was having problems with the print & cut (of course - stupid Silhouette software screwed that up), so I had to make my own embellishments for the layout. I was, luckily, able to still cut shapes, so I found some files that I liked and cut and glued and glittered. As luck would have it, I even had some bottle caps in my stash, so I printed out the bottle cap from the digital kit and glued it to the top of my bottle cap and then put Dimensional Magic on top to give it a glassy finish.
I think the layouts look very similar. And as I look at it them right now, I just realized I forgot to put the little heart with the mini clothes peg on the paper layout. Darn! I even have the mini clothes pegs too. Oh well.
Well, that's it for today. Come back on Monday and I will have the link posted so you can see the other layouts for the contest, and of course vote for me. :)
Talk to you later...
Cat
Thanks! I need those votes!
Hi everyone! Well, I've recovered from the blow to my ego from the MFT contest. ha ha. I found another contest on Persnickety Prints to make a layout using a free digital scrap kit from Scrap Orchard. The kit is really beautiful and I've been wanting to do another layout for a long time. They are going to have open voting for the winner of the contest, so please go and vote for me. They are keeping the layouts a secret until voting starts on Monday, so I will post a link then. But in the meantime, I wanted to show you the digital layout I made for the contest:
The theme of the contest was to create a layout about what inspired you in 2012. Well, of course, it had to be my little Mitzy. We just love our little dog and dote on her. Rob and I were in our mid forties when we married, so it was too late for us to have children, which was ok. But, without having kids to focus on, its easy to become somewhat self-centred and only pay attention to what affects your own life on a day-to-day basis. She's made us look at life outside our own self and see there are people and creatures that need our care and attention. She has taught us to be more compassionate and patient. So, in essence, she has inspired us to be better people.
I was having problems with the print & cut (of course - stupid Silhouette software screwed that up), so I had to make my own embellishments for the layout. I was, luckily, able to still cut shapes, so I found some files that I liked and cut and glued and glittered. As luck would have it, I even had some bottle caps in my stash, so I printed out the bottle cap from the digital kit and glued it to the top of my bottle cap and then put Dimensional Magic on top to give it a glassy finish.
I think the layouts look very similar. And as I look at it them right now, I just realized I forgot to put the little heart with the mini clothes peg on the paper layout. Darn! I even have the mini clothes pegs too. Oh well.
Well, that's it for today. Come back on Monday and I will have the link posted so you can see the other layouts for the contest, and of course vote for me. :)
Talk to you later...
Cat
Tuesday, January 08, 2013
Christmas 2012 Cards
Hey everyone! Before I show you the cards I made for the Christmas card swap over at Scraptures, I wanted to let you know how the MFT contest went. Well, I wasn't chosen. :( I really didn't have my hopes up, but I do admit that I would have really liked to be on that DT just for the experience of being on a highly visible DT like that one. Oh well, I'll keep trying. They have a contest every month, so I'll keep at it. :) I've never been called a quitter.
So I found Sassy Cheryl's digi stamps a couple years ago, and I always thought they were really cute, but I just had so many digi stamps that I never got around to buying any of them. Then she had a sale on her stuff and I couldn't pass it up. The couple I bought were an absolute steal for 50¢ each. Her stuff is so cute and whimsical and I love the snowman images. I only used one of the stamps (saving the other one for next Christmas) and I used a free colouring page for the digi stamp on the other card. Here are the two cards I made:
Supplies Used:
Stamps: Play it Again Sam - Sassy Cheryl's digital stamp
Paper: Recollections cardstock, Recollection Christmas stack, watercolour paper
Tools: Watercolour pencils, Snowflake embossing folder, SU scallop border punch
I hadn't used my watercolour pencils in a really long time, so I thought it was time to put them to use. It took a bit of practice to get the shading the way I wanted it, but it worked out. I discovered that there was enough pigment in my rinse water that I could actually use it to paint the shadow around my image.
This next card was one that I had pictured in my head, and I even had printed the image out last Christmas, but I didn't end up using it. I really wanted to put this card together, so I thought it would be a nice one to use for the swap. Here it is:
Supplies used:
Stamps: Free downloaded colouring page, Michaels stamps - sentiment
Paper: Recollections cardstock, Daisy Dee 6x6 Christmas stack, Wausau Exact Index 110#
Tools: Colored pencils - Crayola/Prismacolor, oms, CraftRobo, Frosted Lace stickles, EK Success Morrocco Lace edge punch, EZ Cutter oval templates, EZ Cutter swivel knife, Versamark ink, gold embossing powder - Stampendous.
I love Christmas images. I don't know why, but I especially like snowman images. I just think they are so cute. This card is made with an older Stamps Happen stamp that I bought on clearance at Michaels a few years ago and this year was the first time it saw ink. I made it for the November One on One swap at Scraptures. Here's the card.
Supplies used:
Stamps: Festive Snowmen - Stamps Happen
Paper: Recollections cardstock, Recollections Christmas paper stack
Tools & Embellishments: Copic markers, Stampology Onyx black ink, Stardust stickles, ribbon - Michaels, Fiskars large and small scallop decorative scissors.
So that's everything for today. I've been working on a layout, but its just not gelling. I think I'm going to work on a digital one to see how that goes. I was playing around with some templates the other day, and boy, I can see that they would sure help a layout come together quickly. I've never used templates before (although I use to make them when I was designing) to put together layouts, but I may just start. They're even better than sketches - at least for digital scrapbooking they are.
I'll be back soon.
Talk to you later...
Cat
So I found Sassy Cheryl's digi stamps a couple years ago, and I always thought they were really cute, but I just had so many digi stamps that I never got around to buying any of them. Then she had a sale on her stuff and I couldn't pass it up. The couple I bought were an absolute steal for 50¢ each. Her stuff is so cute and whimsical and I love the snowman images. I only used one of the stamps (saving the other one for next Christmas) and I used a free colouring page for the digi stamp on the other card. Here are the two cards I made:
Supplies Used:
Stamps: Play it Again Sam - Sassy Cheryl's digital stamp
Paper: Recollections cardstock, Recollection Christmas stack, watercolour paper
Tools: Watercolour pencils, Snowflake embossing folder, SU scallop border punch
I hadn't used my watercolour pencils in a really long time, so I thought it was time to put them to use. It took a bit of practice to get the shading the way I wanted it, but it worked out. I discovered that there was enough pigment in my rinse water that I could actually use it to paint the shadow around my image.
This next card was one that I had pictured in my head, and I even had printed the image out last Christmas, but I didn't end up using it. I really wanted to put this card together, so I thought it would be a nice one to use for the swap. Here it is:
Supplies used:
Stamps: Free downloaded colouring page, Michaels stamps - sentiment
Paper: Recollections cardstock, Daisy Dee 6x6 Christmas stack, Wausau Exact Index 110#
Tools: Colored pencils - Crayola/Prismacolor, oms, CraftRobo, Frosted Lace stickles, EK Success Morrocco Lace edge punch, EZ Cutter oval templates, EZ Cutter swivel knife, Versamark ink, gold embossing powder - Stampendous.
I love Christmas images. I don't know why, but I especially like snowman images. I just think they are so cute. This card is made with an older Stamps Happen stamp that I bought on clearance at Michaels a few years ago and this year was the first time it saw ink. I made it for the November One on One swap at Scraptures. Here's the card.
Supplies used:
Stamps: Festive Snowmen - Stamps Happen
Paper: Recollections cardstock, Recollections Christmas paper stack
Tools & Embellishments: Copic markers, Stampology Onyx black ink, Stardust stickles, ribbon - Michaels, Fiskars large and small scallop decorative scissors.
So that's everything for today. I've been working on a layout, but its just not gelling. I think I'm going to work on a digital one to see how that goes. I was playing around with some templates the other day, and boy, I can see that they would sure help a layout come together quickly. I've never used templates before (although I use to make them when I was designing) to put together layouts, but I may just start. They're even better than sketches - at least for digital scrapbooking they are.
I'll be back soon.
Talk to you later...
Cat
Sunday, January 06, 2013
MFT DT Contest & My Entries...
Hi all! My Favorite Things is have a contest for a guest design team spot. I'm so excited by the chance to win a spot as a guest designer for MFT. I love their products, although I don't have very many of the dies. I do have quite a few of their stamps though. I debated whether I was going to submit anything for this contest because, lets face it, the girls on their design are like crafting geniuses. I love looking at all the things they create. I have made cards for their monthly contests, but never have time to finish them before they're due or chicken out and don't submit them. Well, damn it! This time I'm not going to chicken out. I think that if I were to win a spot on the DT, it would really push my creativity. And lets face it, I have been in a really big slump the last year or so. So I put together 3 cards to enter. My dear, sweet husband says they're really nice (and that I should put them up for sale). He always says that.
Here is the first card I made. I cut the label shapes with my CraftRobo and then stamped the image on the one label and coloured it with Copic markers. I also cut the tag with my CraftRobo and then stamped the sentiment onto it. It doesn't show up well in the picture, but the tag is quite a bit wider than the label, so I adhered the ends of the tag to the sides of the label so it would bow out from the image. It looks pretty cute in real life. :)
Papers: Shery K Designs - Penguins in Love (Digital Papers), Recollections cardstock, Wausau Exact Index 110#
Inks: Stampology - Onyx
Embellishments: Rhinestones (Michaels)
Tools: Copics - RV000,RV02, RV04, RV29, R29, C0, C3, C7, 100, 0, E00, E02, E33, E35, E37, Primsmacolor - Cool Grey 10%, Sharpie - Dark Grey, Magenta, Rose Red, Bic Mark Its - Rambunctious Red, Craft Robo, pop up squares (Michaels), ribbon (unknown - from my stash), Martha Stewart Lace Heart edge punch
I had to fiddle with the settings on my printer to get the papers to print the colours properly since I was using plain white cardstock. Once I got the intensity and the contrast set to where I liked how it was printing, I went to town and printed a whole bunch. I also used digi papers on this next card:
Papers: Aprilisa Designs - Funky Mama (Digital Papers), Recollections cardstock, Wausau Exact Index 110#
Ink: Stampology - Onyx, Cats Eye - Blue Lagoon
Embellishments: Dew Drops (Michaels)
Tools: Copics - E00, E02, E04, E33, C3, C7, 0, BG05, BG10, BG15, Primsmacolor - Cool Grey 10%, Sharpie - Dark Grey, Tan, Bic Mark Its - Cloud 9 Grey, MFT Designer Label 1 dies, pop up squares (Michaels), EK Success ZigZag Stitch edge punch, Martha Stewart Scallop with 2 dots edge punch, Stampin' Up Scallop edge punch, Stampin' Up Square Lattice embossing folder
This next card is a bit different for me. I almost never make square cards. I would have to say that 95% of my cards are A2 size and 4% are 5x7, just because the envelopes are readily available and I don't have to pay extra postage if I make them flat enough. This card is definitely a "hand deliver" card.
The card is pretty straight forward. I inked and distressed the edges of all the papers. I was going to use all three sizes of the flowers, but they were a little too big, so I just went with the two smaller layers. I think they have a good balance with the rest of the card. I left the inside fairly simple since there was so much going on on the front of the card:
Papers: Stampin' Up (Riding Hood Red, & White)
Ink: Stampin' Up - Riding Hood Red
Embellishments: Rhinestones (Michaels)
Tools: MFT Botanical Beauty dies, MFT Vertical Greetings die, pop up squares (Michaels), Fiskars Large Scallop decorative edge scissors, Heidi Swapp distresser tool
I know I'm going to be checking out what the other entries look like once I get these uploaded to the SCS gallery. I try not to look at the other submissions just so I don't get influenced by the other designs and can have something to enter that I created totally on my own. I'll be on pins and needles as well until they announce the winner.
That's all I have for now. I'm working on a couple layouts and I'm hoping I'll have those done by the middle of the week. So, check back then to see what I've been up to.
Talk to you later...
Cat
Here is the first card I made. I cut the label shapes with my CraftRobo and then stamped the image on the one label and coloured it with Copic markers. I also cut the tag with my CraftRobo and then stamped the sentiment onto it. It doesn't show up well in the picture, but the tag is quite a bit wider than the label, so I adhered the ends of the tag to the sides of the label so it would bow out from the image. It looks pretty cute in real life. :)
I also decorated the inside of the card. I've been trying to do this with all my cards now. I think it just makes it so much nicer and gives it a more professional finish. It also uses up my little scraps so I'm not wasting or storing a whack of tiny pieces of paper (I know I have a problem! I'm a pack rat.) Here's the inside:
Supplies used:
Stamps: MFT Key to my Heart setPapers: Shery K Designs - Penguins in Love (Digital Papers), Recollections cardstock, Wausau Exact Index 110#
Inks: Stampology - Onyx
Embellishments: Rhinestones (Michaels)
Tools: Copics - RV000,RV02, RV04, RV29, R29, C0, C3, C7, 100, 0, E00, E02, E33, E35, E37, Primsmacolor - Cool Grey 10%, Sharpie - Dark Grey, Magenta, Rose Red, Bic Mark Its - Rambunctious Red, Craft Robo, pop up squares (Michaels), ribbon (unknown - from my stash), Martha Stewart Lace Heart edge punch
I had to fiddle with the settings on my printer to get the papers to print the colours properly since I was using plain white cardstock. Once I got the intensity and the contrast set to where I liked how it was printing, I went to town and printed a whole bunch. I also used digi papers on this next card:
I used 3 different colours of copic markers to create the dotted background on the label that the main image sits on. I stamped one image on scrap and cut around that to use as a mask so I knew where to put the dots. Then, I cut out the image and popped it up over the dots. I stuck together the sentiments from two sets to get the sentiment I wanted - "Feel Better Soon" - for the panel running across the top of the card. I inked the edges of the cardstock and patterned papers as well as embossed the upper panel on the card. Again, I finished the inside of the card:
Supplies used:
Stamps: MFT Pure Innocence World's Best Doctor set. MFT Pure Innocence Girl Doctor setPapers: Aprilisa Designs - Funky Mama (Digital Papers), Recollections cardstock, Wausau Exact Index 110#
Ink: Stampology - Onyx, Cats Eye - Blue Lagoon
Embellishments: Dew Drops (Michaels)
Tools: Copics - E00, E02, E04, E33, C3, C7, 0, BG05, BG10, BG15, Primsmacolor - Cool Grey 10%, Sharpie - Dark Grey, Tan, Bic Mark Its - Cloud 9 Grey, MFT Designer Label 1 dies, pop up squares (Michaels), EK Success ZigZag Stitch edge punch, Martha Stewart Scallop with 2 dots edge punch, Stampin' Up Scallop edge punch, Stampin' Up Square Lattice embossing folder
This next card is a bit different for me. I almost never make square cards. I would have to say that 95% of my cards are A2 size and 4% are 5x7, just because the envelopes are readily available and I don't have to pay extra postage if I make them flat enough. This card is definitely a "hand deliver" card.
The card is pretty straight forward. I inked and distressed the edges of all the papers. I was going to use all three sizes of the flowers, but they were a little too big, so I just went with the two smaller layers. I think they have a good balance with the rest of the card. I left the inside fairly simple since there was so much going on on the front of the card:
Supplies used:
Stamps: MFT Vertical Greetings setPapers: Stampin' Up (Riding Hood Red, & White)
Ink: Stampin' Up - Riding Hood Red
Embellishments: Rhinestones (Michaels)
Tools: MFT Botanical Beauty dies, MFT Vertical Greetings die, pop up squares (Michaels), Fiskars Large Scallop decorative edge scissors, Heidi Swapp distresser tool
I know I'm going to be checking out what the other entries look like once I get these uploaded to the SCS gallery. I try not to look at the other submissions just so I don't get influenced by the other designs and can have something to enter that I created totally on my own. I'll be on pins and needles as well until they announce the winner.
That's all I have for now. I'm working on a couple layouts and I'm hoping I'll have those done by the middle of the week. So, check back then to see what I've been up to.
Talk to you later...
Cat
Labels:
Cards,
challenges and contests,
Craft Robo,
digi papers,
DT Calls,
MFT
Thursday, January 03, 2013
Another Video Tutorial!!
Hey everyone! I have another video tutorial for you. I'm having fun making these. Its like I get to actually talk to you. Its also so much easier for me to just show you how to do something than taking a bunch of screen shots and trying to get all the images uploaded.
Kathy from Magnolia Designs blog stopped by and was checking out my How to "Export" Silhouette Studio Files to SVG files tutorial and asked how to do this using Illustrator instead of Inkscape. I'm not all that familiar with Illustrator, but I do know how to get svg files from an image file, so I thought I would just do a little video. For those of you who don't already have Illustrator, don't go out and get it. Illustrator is really expensive to buy and Inkscape is free and does just as good a job as Illustrator in my opinion. I'm lucky that I happen to have Illustrator from when I was designing.
Well, without further ado, her is my second video tutorial:
If you have any questions, you can always contact me using the contact form to the right, or by leaving a comment. If you leave a comment, though, I'll need your email address if you don't have a google/blogger profile with an email address attached to it.
That's it for today. I'm cleaning up some pictures of a couple cards that I'll show you tomorrow, so pop back over to check that out.
Talk to you later...
Cat
Kathy from Magnolia Designs blog stopped by and was checking out my How to "Export" Silhouette Studio Files to SVG files tutorial and asked how to do this using Illustrator instead of Inkscape. I'm not all that familiar with Illustrator, but I do know how to get svg files from an image file, so I thought I would just do a little video. For those of you who don't already have Illustrator, don't go out and get it. Illustrator is really expensive to buy and Inkscape is free and does just as good a job as Illustrator in my opinion. I'm lucky that I happen to have Illustrator from when I was designing.
Well, without further ado, her is my second video tutorial:
If you have any questions, you can always contact me using the contact form to the right, or by leaving a comment. If you leave a comment, though, I'll need your email address if you don't have a google/blogger profile with an email address attached to it.
That's it for today. I'm cleaning up some pictures of a couple cards that I'll show you tomorrow, so pop back over to check that out.
Talk to you later...
Cat
Wednesday, January 02, 2013
Fiskars' Fuse Giveaway from Spoonflower
Spoonflower is giving away a Fuse! I've read the rules and guess what! This contest is open to everyone! Yay! Most of the time these contest are limited to US citizens only which really sucks. But this one is open to everyone! So if you want to enter to win one of these babies, use this link: Spoonflower's Fiskar Fuse Giveaway
Good luck!
Cat
Good luck!
Cat
Monday, December 31, 2012
Happy New Year! and a Silhouette Studio tutorial...
It's getting close to the midnight hour! We don't have any plans. Hubby had to work, so he just got home about 20 minutes ago. I doubt that I'd be able to keep my eyes open that late anyway. But for all you young whipper snappers out there, I hope you all have a blast. I use to love getting all dressed up and going out to a big dinner and dance on New Year's eve. But that seems like a life time ago.
I have a something new to share with you. I have a little video tutorial. My first one ever! Danielle had asked a question about perforation lines in Silhouette Studio, so I thought what a better way to dip my toe in the waters and do a short tutorial to answer her question. I hope you find it helpful.
That's it for now. I'll talk to you again in 2013!
HAPPY NEW YEAR!
Cat
I have a something new to share with you. I have a little video tutorial. My first one ever! Danielle had asked a question about perforation lines in Silhouette Studio, so I thought what a better way to dip my toe in the waters and do a short tutorial to answer her question. I hope you find it helpful.
That's it for now. I'll talk to you again in 2013!
HAPPY NEW YEAR!
Cat
Friday, December 28, 2012
Halloween Cards & a layout
I know Halloween is long gone, but I wanted to show you the cards I made. I'm so behind on organizing my posts & my pictures. I'm working on it.
So anyway, I think these cards turned out pretty cute. I made one for my brother and one for my niece. I love these digi images by Sassy Studio which I coloured with my Copic markers. The tag is a graphic I found on the internet a couple years ago, so I don't have the details of where it came from. All the shapes were cut using my CraftRobo and I used my scallop edge punch from SU. The patterned papers are from a Halloween mat stack by K & Co. I bought at Michaels 2 years ago. I love using the mat stacks for my cards because the scale of the design is perfect, and there's very little waste when cutting into a sheet. Here are the cards:
The layout I want to show you are of pictures of my husband. He's probably not going to like it that I'm putting these pictures up on my blog. I think they're cute. They were taken on his birthday a few years ago and he was listening to some music with the headphones on. All the cardstock is Recollections brand and I don't remember if the patterned paper is My Mind's Eye or SEI. Again, I cut the shapes for the embellishments, the journal tag, and the title all with my Craft Robo. This layout was made for the October tag layout challenge over at the Scrapture site. Here's my layout:
I also used my loopy border punch and a pair of Fiskars deco scissors on the patterned papers. That line of music was a bugger to get on there straight with those skinny strips of paper. It was fun to make though.
Well, that's all for today. I'm working on getting myself organized and trying to get caught up on deciding which projects I want to post. I have quite a few I want to share here, so check back soon. I'll probably have a few posts over the next week or so.
Talk to you later...
Cat
So anyway, I think these cards turned out pretty cute. I made one for my brother and one for my niece. I love these digi images by Sassy Studio which I coloured with my Copic markers. The tag is a graphic I found on the internet a couple years ago, so I don't have the details of where it came from. All the shapes were cut using my CraftRobo and I used my scallop edge punch from SU. The patterned papers are from a Halloween mat stack by K & Co. I bought at Michaels 2 years ago. I love using the mat stacks for my cards because the scale of the design is perfect, and there's very little waste when cutting into a sheet. Here are the cards:
The layout I want to show you are of pictures of my husband. He's probably not going to like it that I'm putting these pictures up on my blog. I think they're cute. They were taken on his birthday a few years ago and he was listening to some music with the headphones on. All the cardstock is Recollections brand and I don't remember if the patterned paper is My Mind's Eye or SEI. Again, I cut the shapes for the embellishments, the journal tag, and the title all with my Craft Robo. This layout was made for the October tag layout challenge over at the Scrapture site. Here's my layout:
I also used my loopy border punch and a pair of Fiskars deco scissors on the patterned papers. That line of music was a bugger to get on there straight with those skinny strips of paper. It was fun to make though.
Well, that's all for today. I'm working on getting myself organized and trying to get caught up on deciding which projects I want to post. I have quite a few I want to share here, so check back soon. I'll probably have a few posts over the next week or so.
Talk to you later...
Cat
Sunday, December 23, 2012
Ok, So I fibbed...
When I said I wouldn't post again till after Christmas. I haven't wanted to do to much but sleep and just laze around with this cold. So I was playing with the SS software again. I created this cute little reindeer and want to offer it to you guys out there. I realize that its probably a little late for any of your holiday projects, but hopefully if you download it, you can use it for the next holiday season's projects. Here he is:
In the zip file there is this preview .png file, a digi stamp .png file, a .studio cutting file, and a .studio print & cut file. If you take the file, please leave me a comment. I'd really like some feedback on these little drawing/files and I'd like to know if you're using the files. If you do make a project with it, I'd love to see it. You can leave me a link in the comment section of any post on this blog to let me know, or use the contact form in the sidebar to the right. Either way works. :) You can download the files HERE.
Thats all for today. I won't promise to be back before Christmas - or even New Year's if this cold gets any worse - so if I don't see you again before then, have a great Christmas everyone!
Talk to you later...
Cat
In the zip file there is this preview .png file, a digi stamp .png file, a .studio cutting file, and a .studio print & cut file. If you take the file, please leave me a comment. I'd really like some feedback on these little drawing/files and I'd like to know if you're using the files. If you do make a project with it, I'd love to see it. You can leave me a link in the comment section of any post on this blog to let me know, or use the contact form in the sidebar to the right. Either way works. :) You can download the files HERE.
Thats all for today. I won't promise to be back before Christmas - or even New Year's if this cold gets any worse - so if I don't see you again before then, have a great Christmas everyone!
Talk to you later...
Cat
Saturday, December 22, 2012
Its looking a lot more like Christmas...
Its turned cold here and we got a little bit of snow, so now we will have a "real" Christmas instead of the brown grass Christmases we've had in the past. And, just because I have a bunch of stuff I wanted to get done before Christmas day, I woke up with a cold this morning. Great...
Well, anyway, I've been playing with the SS software again today and I made this digi stamp for you.
I doubt that I will be able to post before Christmas, so you all have a wonderful day with your family and friends. I'll talk to you after the big day...
Take care
Cat
Well, anyway, I've been playing with the SS software again today and I made this digi stamp for you.
Its a little rudimentary, so I need to brush up on my drawing skills, but I thought someone might be able to use it. The file contains the preview you see above and a blank file. You can download the files from HERE.
I doubt that I will be able to post before Christmas, so you all have a wonderful day with your family and friends. I'll talk to you after the big day...
Take care
Cat
Tuesday, December 18, 2012
Just a quick post
Well, I can't sleep again. Here it is 4am and I'm wide awake. I think I've been going into menopause for about 2 years now. My body just isn't acting the same way anymore and I don't like it one bit. This getting old thing really isn't my cup of tea. I guess it wouldn't be so bad if I would get my fat ass out of this computer chair and do some exercise. I usually didn't have a problem getting to sleep at night the last say 15 years, but these last couple years, I could stay awake all night. Mind you I would sleep until noon the next day. Like today. I was up until 5 this morning and got up at 11:30. You would think I'd be tired. But I'm not. And my husband is sawing logs, so I know he'll just keep me awake if I try to go to bed.
Anyway, this leads me to why I'm here. To pass the time, I was playing around in the Silhouette Studio software testing out some of the upgraded features in the Designer Edition. Oh yeah, did I tell you I won a copy of the designer edition software. I did! From the Bargain Shopper Mom! I made up a couple things I want to share with you. They're not much really, but I thought they were kind of cute.
First, here is a digi stamp I made with the software of, what else, but a cat. :) I'll do up a tutorial after the New Year on how to create digi stamps with your Silhouette software (I have a new video capture software I want to try out courtesy of a recommendation from Bird on her new forum). Here she is (just click on the picture to make it bigger and then save the image to your computer):
Second, I made a cutting file of some lamps. I know its nothing spectacular, but I have a card in mind and didn't want to go hunting for a file on the internet. I also want to become more self-sufficient and make more of my own stuff so I don't have to worry about credits and where I got stuff from, and whether I can use it to make stuff to sell or not, and so on. So here is a picture of the lamp shapes:
They are .rar files and will open with winzip or you can download a trial version of winrar (it never expires, but just keeps popping up a reminder to purchase a full license version). I've included the .studio file as well as an .svg file. Please read my TOU that I've included too. These are for personal use only and may not be shared. If you think someone might like to have the file, please send them to my blog to get it. Here's the link: CatScrapFever Lamp cutting files I should also mention that they are blank shapes. I only filled in the shapes so I could show you what they would look like using patterend paper and cardstock.
I'm using MediaFire now for my downloads. I don't have that many files that I've been giving out, but I want to change that in the new year. I want to try to get back into designing and offering some free digi scrap stuff and digi stamps here and there as well as the occasional cutting file. I'd also like to see how many times the files are being downloaded. I wasn't able to do that with the other methods of delivery I was using, so I think this will be the way to go.
Well, I think I should try to get to bed now. Its getting on towards 5am and I don't want to waste the day tomorrow sleeping. Hubby is on his days off, so I want to spend a little time with him and get some baking done.
Let me know if you use the files and I would really love to see anything you create with them. Just drop me a line using the contact form in the right sidebar.
Talk to you later...
Cat
Anyway, this leads me to why I'm here. To pass the time, I was playing around in the Silhouette Studio software testing out some of the upgraded features in the Designer Edition. Oh yeah, did I tell you I won a copy of the designer edition software. I did! From the Bargain Shopper Mom! I made up a couple things I want to share with you. They're not much really, but I thought they were kind of cute.
First, here is a digi stamp I made with the software of, what else, but a cat. :) I'll do up a tutorial after the New Year on how to create digi stamps with your Silhouette software (I have a new video capture software I want to try out courtesy of a recommendation from Bird on her new forum). Here she is (just click on the picture to make it bigger and then save the image to your computer):
Second, I made a cutting file of some lamps. I know its nothing spectacular, but I have a card in mind and didn't want to go hunting for a file on the internet. I also want to become more self-sufficient and make more of my own stuff so I don't have to worry about credits and where I got stuff from, and whether I can use it to make stuff to sell or not, and so on. So here is a picture of the lamp shapes:
They are .rar files and will open with winzip or you can download a trial version of winrar (it never expires, but just keeps popping up a reminder to purchase a full license version). I've included the .studio file as well as an .svg file. Please read my TOU that I've included too. These are for personal use only and may not be shared. If you think someone might like to have the file, please send them to my blog to get it. Here's the link: CatScrapFever Lamp cutting files I should also mention that they are blank shapes. I only filled in the shapes so I could show you what they would look like using patterend paper and cardstock.
I'm using MediaFire now for my downloads. I don't have that many files that I've been giving out, but I want to change that in the new year. I want to try to get back into designing and offering some free digi scrap stuff and digi stamps here and there as well as the occasional cutting file. I'd also like to see how many times the files are being downloaded. I wasn't able to do that with the other methods of delivery I was using, so I think this will be the way to go.
Well, I think I should try to get to bed now. Its getting on towards 5am and I don't want to waste the day tomorrow sleeping. Hubby is on his days off, so I want to spend a little time with him and get some baking done.
Let me know if you use the files and I would really love to see anything you create with them. Just drop me a line using the contact form in the right sidebar.
Talk to you later...
Cat
Thursday, December 13, 2012
Where do you go when you go off your diet??
Ok, so this totally not anything about crafting of any sort, but it is so funny I had to share it with you all. My husband and I were shopping today. First off, my husband NEVER, EVER, in a million years, goes shopping with me. But today he did and even offered to go into the stores with me. So I wanted to go to the dollar store because they sell the kind of hot chocolate he likes (Carnation) for only $2 a box where its about $3.50 a box at Walmart. We're walking down the food aisle and he's looking at all the stuff commenting on how he didn't realize how much stuff they actually carried. Then he spies this bottle of salad dressing, picks it up and starts laughing. He's holds it out to me and says "Fuck it island!" I'm like "What?? Watch what you're saying, there's kids in the store!". Then he says "no look at the bottle!". Well, there it is... Here's a picture to prove it:
I bought it just so I had proof. :) No wonder this product is at the dollar store with a name like that. We're going to try it tomorrow with our salad for dinner. I'll let you know how it tastes.
Talk to you later...
Cat
I bought it just so I had proof. :) No wonder this product is at the dollar store with a name like that. We're going to try it tomorrow with our salad for dinner. I'll let you know how it tastes.
Talk to you later...
Cat
Subscribe to:
Posts (Atom)