About Me

I am a techno/gadget freak. I love almost anything that has to do with computers and software. I have an engineering background, but I haven't worked in that field for over 10 years. I married my wonderful husband in September 2004 and look forward to spending every single day of the rest of my life with him. I love cats and even call myself "Cat".

Followers

Sunday, October 14, 2012

How to "Export" Silhouette Studio Files to SVG files

Update 06/02/2014:  Wow!  I posted this 1.5 yrs ago and its still my most popular post.  I also still get a lot of questions about "exporting" your files.  If you would like an answer to your question, please, please use the contact form on the right hand side of this blog.  I can put answers in the comments section, but usually people don't come back to check for the answer.

Back to our regular scheduled program...


Hello again!  What a shocker eh?  Two posts in as many days.  I'm tellin' ya, I'm on a roll. :) Well, I promised that I would be back today with a tutorial on how to get your Silhouette Studio files into svg format. I'll show you the process, but also note here that, programs like MTC or SCAL can import jpg and png file, so you may not need to go all the way to the end of the process.  I'm not completely familiar with MTC, and even less familiar with SCAL, so I'm not certain at this point if there is an advantage to importing the svg rather than just a jpg.  My only observation right now is that, at least, with a svg file, the tracing is already done for you and ready to put into different layers (if you choose).  Not sure how much of a time saver that is...

So, I think I mentioned that I am going to buy a new KNK Zing cutter early next year. The reason I want to export my Studio files is so I can cut them using the Zing. The Zing come with MTC, which is totally a different file type and can't import the proprietary Silhouette Studio files. Silhouette Studio will allow you to export their files as svg files, but only if you have an older version (v1.9 or v2.0) of their Designer Edition software. I'm a cheap ass and don't want to spend the $50 just so I can export when I can get free programs to do it for me. May be a few more steps, but it works.

Ok, so to begin, there are a couple programs you need.  All of them free.  You need to have Inkscape and Bullzip PDF printer installed.  Here are the links for these:

http://sourceforge.net/projects/inkscape/files/
click on: Looking for the latest version? Download Inkscape-0.48.2-1-win32.exe (35.7 MB)

http://www.bullzip.com/download.php
click on: PDF Printer    4.5 MB    Free    Freeware (up to 10 users)    Download | Donate

Of course, I'm assuming you have Silhouette Studio installed, otherwise why would you want to do this tutorial??  Ok, let's start.  Here's what I do:

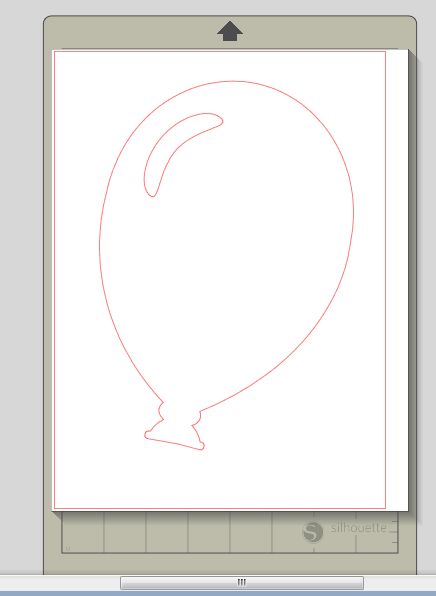
1.  Open up Silhouette Studio and open up the file you want to "export".  In this case I opened the balloon file that comes with SS:


2. Use Ctrl A to select all images. You could put more than one file on the page, but I wouldn't do too many - maybe 3 or 4 at a time.  Just remember if you do more than 1, they will all be part of one file and you will need to save the final converted files separately, and manually.

3. Right click and select ungroup:


4. Select the inner shapes that are cut out.  Go to the Fill screen and fill these shapes with white:


5. Now select all the outer shapes and fill these shapes with black:


I chose to use black & white since this will give a really good contrast and make it easier for find the edges of the image.  You can choose any colours you want, but I think b&w is probably the best.  Also, if your entire image turns black when you fill the outside shapes, you need to "move it to the back" so that the inside shapes are on top and visible.

6. Go to the Lines setup and make sure that the "print cut lines" checkbox is NOT checked:


This is so that when we "export" the image, you won't have the red cutting lines showing (or whatever your default colour is).

7. Now go into your preferences, and then to the output preferences and change the output dpi to whatever you prefer and click the "ok" button.  I chose 600 just so I could have a good quality image.  I think 300 is probably good enough (that's what most digital scrapbookers use and it gives good resolution for printing, plus your file size will be smaller and load quicker).


8. Now go to File -> Print:


9.  Select BullZip PDF Printer and click print (don't worry its not going to actually print a hard copy to your printer):


10.  A screen will pop up where you can set the output options for the file.  Choose either png or jpeg from the drop down list.  I prefer png because they can have a transparent background, but either will work.


11. Click on the Image tab on the pop up window.  Here you can change the dpi of the output image.  I changed mine to 600, but again, 300 would probably be sufficient.  You will change both horizontal and vertical to the same number.


12. Click the Save button and navigate to the folder where you want to save your file.


13. Start Inkscape and open the file you just created.


14.  Use Ctrl A to select all your image.  Little black arrows will show up around the image.  Then go to Path -> Trace Bitmap.


15.  A pop up window will open.  In the window, change the brightness cutoff setting to 0.500 and then click the ok button.  Close the window by clicking the red x in the top right hand corner.


16. Go File -> Save As:


17.  Select Inkscape SVG in the drop down list below the name field and then, go to the folder you want to save your svg in and type in the name you want to give the file.


That's all there is to convert your Studio file to svg.  The next steps I'm showing are for importing the svg into MTC since that is what I will be using when I get my new Zing. :)

19.  Start MTC and go File -> Import -> SVG/SVGZ file


20.  Navigate to the folder where you saved your svg file and click on the file.  A preview will show up in the preview window if all went well with the export process.  Click the open button.


21.  This will bring the svg into MTC, but it will be a very, very large image.  You will probably have to lower the zoom all the way down to 10% to see it.  At this point, you can shrink down the image so that it fits onto your page.


That's it.  You can now manipulate the file as you please.

I hope it all made sense and you were able to follow along.  As I mentioned earlier, actually converting the file to svg isn't absolutely necessary for MTC or SCAL, so this may be over kill, and you can just use the jpg/png file you created from SS.  If you notice any errors, or something doesn't seem right, please contact me using the contact form on the right-hand side of my blog.  I'll get back to you with an answer as quickly as I can.

Well, I think I'll try and take some pictures of a few scrapbook pages I made over the last couple months and show them to you in a day or so.  I had gotten to the point where I wasn't enjoying blogging for a quite a while, but I've enjoyed doing these last two, so maybe I'll be able to keep it up for a little while.  We'll see. I do have a few things I want to show.

That's all for today.  See you soon...

Cat

12/21/12:  Nicole posted a comment and a question.  Nicole, I don't have any way to contact you, so hopefully you see this reply:

You are obviously using the designer edition of Silhouette Studio.  You can go into the View menu and turn off the grid so that it doesn't show when you print to pdf.

03/08/14:  I've had some questions about the grid marks showing up even though they have been turned off in Silhouette Studio.  I've tried to re-create this and can't seem to do it.  I'm not sure if its happening with the free version or the DE version since I'm now working in the DE version.  I haven't had time to install the free version on a different computer to see if it happening there.  The only thing I can tell you at this point is to check to make sure the grid lines are turned off.  When I get time to install all the programs on a different computer, I'll report back to let you know if I've been able to duplicate the problem and if I've been able to find a solution.

Cat

Saturday, October 13, 2012

How to Compensate for Silhouette Print & Cut Inaccuracey

Hello!  I have some exciting news for Silhouette Studio users that have been pulling their hair out, like me, and can't get the print & cut to work properly. Silhouette Studio's calibration doesn't work worth beans. For almost a year now, I haven't been able to use my Craft Robo for print & cut because the cut never lines up with the printed image. See here in this image (click images to see them full size):


As the cut gets deeper into the page, the cuts get further away from the printed image in the length, but is fine in the width.  I tried using the software's calibration tool, but it didn't solve the issue.  So, seeing that the scale is off, I developed this method to compensate and I now get almost perfect cut & prints.  I've prepared this tutorial for you so you can get your print & cuts to line up too.  I will note that I'm not going to go into detail about where things are in the program.  I am assuming you know how to use the Silhouette Studio software and I won't be giving you the path or button locations to activate the various functions we'll be using.  Also, I am using 8.5" x 11" paper for those of you trying to follow with a Cameo.  My cutter only takes up to an 8.5" wide paper. I also suggest you use regular copy paper and print in draft mode.  You don't want to waste cardstock or ink.

The first step is to find out what percentage your cut image is out compared to the actual printed image.

1. Open a new blank document in SS with the registration marks showing.
2. Go into your preferences, then to measurements, and select  "dimensions on".
3. Make a 2"x2" square and fill it in with a colour (your choice - I used grey). Use the Scale setup to get your square exactly 2"x2".


4. Go to the line style setup and make sure that the print cut lines is not checked (at the bottom).


5. Use the fill page to duplicate the squares and fill up the page (for some reason mine doesn't show up on the screen, but its at the very bottom of the Replicate setup screen).  You must do this so you can get a better measurement of how much you need to shrink/stretch your print image.


5.  This is now your "cut file".  Use file -> save as and save it in a folder you'll be able to find easily and put "cut file" at the end of the file name (eg. SS calibration - cut file).  This will make it easier to differentiate this file from the next one we're going to create.

6. Now use Ctrl A to select all the shapes and group them together. If your page is in portrait (like mine) write down the height of the shapes (along the left side).  If your page is in landscape, write down the width (along the bottom).

7. Send this to your cutter using the print & cut and follow the prompts on the screen. Don't take it off the mat when its finished cutting.

8. Once cut, take a ruler and measure the actual cut length of the images.  I actually measured mine in millimeters because I could get a more precise measurement that way and just converted it back to inches (to 3 decimal places).  SS said my image was 9.315" tall but when I cut it, the final cut was 9.251" tall.

9. Now, we're going to calculate, what I call the "shrink factor".  Here's the formula:
           actual cut height divided by SS image height.
           So mine is 9.251 divided by 9.315 = .994***

*** keep this number handy - I have it on a sticky on my monitor.  This is the only time you'll have to calculate this number***

10. With your all your squares still grouped, go into the Move screen and write down the W & H numbers under "Move corner to". (You may have to either close your cut file and re-open it or shut down SS and restart it at this point.  For some reason, mine just had a big blue square over where the numbers were, but it worked on other files I tested).

Once you have your cut height measured, you can take your paper off your cutting mat.

11. Now go to the Scale screen and under "specify dimensions" type in your cut length in the field beside "H" (height) and click the "apply" button.  This will shift your image slightly on the screen.  Leave everything still grouped.

12. Go into the Move screen again, and type in the W & H numbers you wrote down in step 10 and then click the "apply" button.

13. Go File -> save as and save this file with the changes in the same folder you saved the previous folder and put "print file" at the end (eg. SS calibration - print file).

Ok now we are going to check to make sure our measurements and calculations are right and see if our cut lines up with our printed image.

14. Send the "print file" to the printer using the print button (or File -> print) and NOT the send to cutter button.  Once its printed, close the file and put your paper on your cutting mat.

15. Open up the "cut file" and send it to your cutter.  Skip printing and continue with the screen prompts for the rest of the print & cut.

If everything went well your cut should look like this:


Its pretty much dead on.

So now, if you want to print & cut images other than these squares :), you just follow these steps:

1. Open the file(s) you want to print & cut
2. Arrange on the page making sure they all fit within the cut area
3. Group all the images together & make a note of what SS says the height is.
4. Make a note of the "move to corner" H & W measurements.
5. Save this file as your "cut file"
7. Multiply your SS height by your "shrink factor"
8. Go into scale and change the height to your new calculated number
9. Go into move and change the H number back to the number your noted down in step 4.
10. (optional) File -> save as your "print file"
11. Print it with the print button (not send to cutter).
12. Close the print file, open the "cut file", load your print out, and send it to your cutter, skipping the print part.

You could copy and paste the images/cut lines onto another open document, but personally, I find it easier to keep track of what page I'm on by saving the files with the "cut file" & "print file" in the names because this shows up on the tabs of the open screens.  That way I'm less likely to get the files mixed up and cut the print file and print the cut file - know what I mean?? :)

Well, I hope you were able to follow along with this tutorial.  I know I'm delighted with the results I'm getting now that I know what my "shrink factor" is and won't be wasting anymore cardstock & ink or going bald from pulling my hair out.

If you come back tomorrow, I'll have another tutorial on how to "export" your Studio files to svg files so that you can use them in other software, like Make The Cut or Sure Cuts A Lot.  I will be buying a Zing cutter (yay!) early next year and it uses MTC, so I want to still be able to use my Silhouette files to cut out of the heavier materials the Zing is capable of handling.

So that's all for today.  Let me know what you think of the tutorial.  And if you notice or find any glitches, please use the contact me form on the right-hand side of my blog to let me know.

Talk to you later...

Cat
Related Posts Plugin for WordPress, Blogger...