I decided to put these cards together at the last minute. I had the ideas in my head and the images already coloured so I decided I would throw my name into the hat for the Bugaboo DT call. Here's the first card using the "Santa Called" image. I thought it was too funny.
Supplies:
Stamps: Santa Called & sentiment - Bugaboo Digital Stamps
Paper: Bazill card stock (red), SU card stock (Kiwi Kiss), Wausau Exact Index 80# white, Base 130# Domtar coated card stock, Provo Craft paper stack (patterned paper)
Tools & embellishments: Copic markers, twill ribbon (Michaels), organza ribbon (dollar store), silver & gold stickles, Fleur de Lis edge punch (EK Success), Craft Robo (frame)
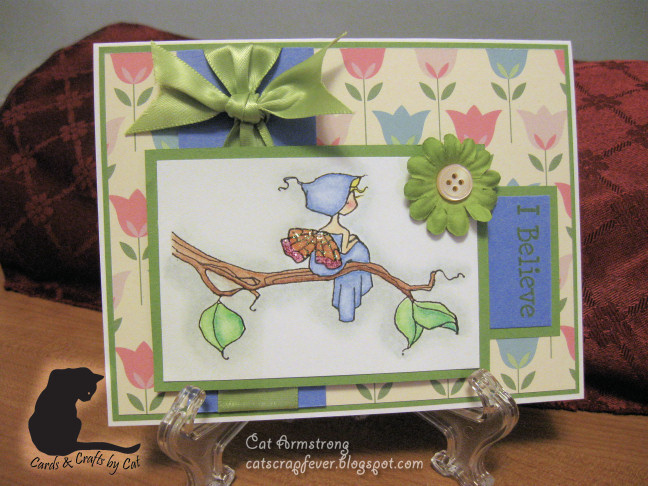
The next card is done with the Bride Sunbonnet image. I did alter the image and removed the veil part since I wasn't making this as a wedding card.
Supplies:
Stamps: Bride Sunbonnet - Bugaboo Digital stamps, sentiment (Inkadinkado)
Paper: Mother's Flowers Digital papers - Delicious Scraps (printed on HP glossy presentation paper), Wausau Exact Index 80#
Ink: Studio G
Tools & embellishements: Copic markers, yellow glitter glue (Michaels), ribbon (Dollar store), buttons (unknown), Lacy Doily edge punch (Martha Stewart)
The next card is fairly plain. I wanted the image and the sentiment to be the focus on this card. The sentiment is probably meant to be for a baby card, but I think its also appropriate for the Christmas season.
Supplies
Stamps: Mary & Joseph - Bugaboo Digital stamps, sentiment (Inky Antics)
Paper: patterned paper (unknown), cardstock - Recollections & DCWV, Wausau Exact Index 80#
Ink: Versa Mark embossing ink, walnut stain distress ink (Tim Holtz)
Tools & embellishments: gold detail embossing powder (Stampendous), button (unknown), rafia
I really like the way these cards came out. I have so many Bugaboo images, but I haven't used them very much. I hope you like them too.
Talk to you later...
Cat
Wednesday, November 10, 2010
Saturday, November 06, 2010
A Few More Cards...
I finally got my room cleaned up to the point that I felt I could make something again. Unfortunately, I'll have to clean it again. I don't know what it is about me, but every time I do something in my craft room, it looks like a tornado went through the room. Well, I'm hoping its a sign of a creative person because if I try to keep it tidy, then I can't seem to create anything at all and it all just falls apart. So anyway, I couldn't sleep again last night, and I had this image from ADFD called Can't Sleep, so I though why not try to use it to get my creative thought process going again. This is such a cute image. Here's a picture of the card I made with this image:
Supplies:
Stamp: A Day For Daisies - Can't Sleep, Inky Antics (sentiment)
Papers: SU Tempting Turqoise, DCWV paper stack, Glitter paper (unknown), Wausau Exact Index 80#
Ribbon: Dollar store
Ink: Studio G
Tools & Other: MS Swirling Lace border punch, MS Hydrangea Trio punch, Frosted White Liquid Pearls
Copic Markers: Y02, Y17, G00, BG15, RV02,E00, E33, E37, C5, C0
The next image is such a beautiful image and I hope I did it justice. I had originally intended to use this image on the current challenge at ADFD (check out my side bar for the link). It was a real toss up between this image and the Leaf Girl image, but I ended up using Leaf Girl for the challenge. So, I had to use this image, just because it is so pretty. The image is called Wind in my Hair. Here's a picture of the card I created with it:
Supplies:
Stamp: A Day For Daisies - Wind in my Hair
Papers: Recollections cardstock, patterned paper (unknown), Wausau Exact Index 80#
Tools & Other: SU Scallop Trim border punch, Waterfall stickles
Copic Markers: BV00, E33, E35, E37, C0, 0
Bic Mark It markers: pastel purple
Sharpie Markers: medium purple, dark purple, medium red brown, dark red brown
I made the card very plain because I really wanted the image to be the focal point. Since I didn't have any pale shades of the Bics & Sharpies, I used the Copic colourless blender to remove some of the ink to create highlights on her dress and her hair.
TIP: Did you know that the Ranger alcohol blending solution will work in your Copic colourless blender? The solution is virtually identical in composition. I've been using it and it works beautifully in my blender pen. I think its a little more expensive than the blender refill, but its what I had on hand.
The last card I made last night is a little late in coming. I had the Spooky Fall Tree image and just couldn't think of what I wanted to do with it. And, some of the cards I've seen done with this image left me thinking that I probably couldn't do anything that hadn't already been done - and done well. So I was finally getting tired around 2:00 this morning and for some reason, that's when ideas come to me. Not that this card is all that unique in the layout, but its a design that I thought would look good so I went with it. Here's how it turned out:
Supplies:
Stamp: A Day For Daisies - Spooky Fall Tree
Papers: SU Kiwi Kiss, Black cardstock, patterned paper (unknown), Wausau Exact Index 80#
Tools & Other: MS Arch Lattice border punch, Green, Orange, & Black stickles, Olive Green Studio G glitter glue, EZ Cutter circle templates & swivel knife
Copic Markers: E43, E47, E49, YR02, YR04, YR07, C5, C3, C0, 0
Sharpie Markers: medium green, olive green, black fine tip
Ribbon: Michaels
I wanted the scene to come out darker, so I used the C5 Copic as my first line of shading around the image, then I widened out with C3, then C0, and then finally the blender to fade to white. The sentiment is hand written with a black fine point sharpie marker.
Well, I hope you like my cards. I also hope you'll be able to use my little tip about the alcohol blending solution. Its come in handy for me.
Don't forget to get in on the ADFD challenge going on right now. Its a lot of fun, there's a cute free image for you to use, and some other great rewards up for one lucky person. :)
Talk to you later...
Cat
Supplies:
Stamp: A Day For Daisies - Can't Sleep, Inky Antics (sentiment)
Papers: SU Tempting Turqoise, DCWV paper stack, Glitter paper (unknown), Wausau Exact Index 80#
Ribbon: Dollar store
Ink: Studio G
Tools & Other: MS Swirling Lace border punch, MS Hydrangea Trio punch, Frosted White Liquid Pearls
Copic Markers: Y02, Y17, G00, BG15, RV02,E00, E33, E37, C5, C0
The next image is such a beautiful image and I hope I did it justice. I had originally intended to use this image on the current challenge at ADFD (check out my side bar for the link). It was a real toss up between this image and the Leaf Girl image, but I ended up using Leaf Girl for the challenge. So, I had to use this image, just because it is so pretty. The image is called Wind in my Hair. Here's a picture of the card I created with it:
Supplies:
Stamp: A Day For Daisies - Wind in my Hair
Papers: Recollections cardstock, patterned paper (unknown), Wausau Exact Index 80#
Tools & Other: SU Scallop Trim border punch, Waterfall stickles
Copic Markers: BV00, E33, E35, E37, C0, 0
Bic Mark It markers: pastel purple
Sharpie Markers: medium purple, dark purple, medium red brown, dark red brown
I made the card very plain because I really wanted the image to be the focal point. Since I didn't have any pale shades of the Bics & Sharpies, I used the Copic colourless blender to remove some of the ink to create highlights on her dress and her hair.
TIP: Did you know that the Ranger alcohol blending solution will work in your Copic colourless blender? The solution is virtually identical in composition. I've been using it and it works beautifully in my blender pen. I think its a little more expensive than the blender refill, but its what I had on hand.
The last card I made last night is a little late in coming. I had the Spooky Fall Tree image and just couldn't think of what I wanted to do with it. And, some of the cards I've seen done with this image left me thinking that I probably couldn't do anything that hadn't already been done - and done well. So I was finally getting tired around 2:00 this morning and for some reason, that's when ideas come to me. Not that this card is all that unique in the layout, but its a design that I thought would look good so I went with it. Here's how it turned out:
Supplies:
Stamp: A Day For Daisies - Spooky Fall Tree
Papers: SU Kiwi Kiss, Black cardstock, patterned paper (unknown), Wausau Exact Index 80#
Tools & Other: MS Arch Lattice border punch, Green, Orange, & Black stickles, Olive Green Studio G glitter glue, EZ Cutter circle templates & swivel knife
Copic Markers: E43, E47, E49, YR02, YR04, YR07, C5, C3, C0, 0
Sharpie Markers: medium green, olive green, black fine tip
Ribbon: Michaels
I wanted the scene to come out darker, so I used the C5 Copic as my first line of shading around the image, then I widened out with C3, then C0, and then finally the blender to fade to white. The sentiment is hand written with a black fine point sharpie marker.
Well, I hope you like my cards. I also hope you'll be able to use my little tip about the alcohol blending solution. Its come in handy for me.
Don't forget to get in on the ADFD challenge going on right now. Its a lot of fun, there's a cute free image for you to use, and some other great rewards up for one lucky person. :)
Talk to you later...
Cat
Friday, November 05, 2010
ADFD Challenge #5 - Please Pass the Traditions
A new challenge has started on the A Day For Daisies site. This one was a real treat to work on. I got to brush up on some of my digital graphics design skills. The challenge is to create a project with, of course, one of the ADFD images, and your favourite recipe. I saw a couple of Tammy's images that just invoked this sort of remembrance of my heritage. It was a real toss up as to which image I was going to use for this challenge, but in the end "Leaf Girl" won out. I love the look on her face and the leafs in her hair reminded me of feathers a young indian princess would wear. I was quite involved in the Aboriginal community for a long time. Unfortunately, I haven't been in about the last 10 years. I really enjoyed my work with the non-profit organization I use to be involved with. The organization was called CASTS - Canadian Aboriginal Science & Technology Society - and I sat on the Board of Directors as Chairperson for a few years. The goal of the organization is to promote education in the Aboriginal communities, and in particular, in the science fields. Sadly, I have lost contact with the people I worked with on the board and involved with the organization, which I must admit is my doing and had nothing to do with the fine and hardworking people involved in CASTS.
But I digress, back to what this post is about - ADFD challenge #5. I started this whole paper crafting thing when I started on digital scrapbooking. I still love using digital elements in my crafting. One thing I really love doing is making my own patterned papers. For this challenge I needed something that was more uniquely "Canadian Aboriginal" than southwestern or "US Native American", so I had to design it myself. I created a design that reminded me of a dream catcher. Then I had to choose colours that are prevalent in the aboriginal arts - a deep red, almost blood colour, tan, and turquise. Once I coloured the digital image, and put my design together, I realized I needed another element, so what better than to create an actual dream catcher for the project. So, it finally all came together and this is the results - a digital scrapbook page with my recipe:
Supplies:
Stamp Image: A Day For Daisies - Leaf Girl
Font on recipe card: Bradley Hand
Leaf image on recipe card from Ask a Biologist website
All other elements created by CatScrapFever Designs (background paper, dream catcher, recipe card)
This recipe is the one my mother taught me. Bannock was a real treat when I was younger, especially with hamburger soup. When I was little, I loved it with butter and jam when it was still hot and the butter and jam would melt and make my fingers and face all sticky. Once in a while, my Mom would fry the bannock, and then when it was still hot, roll it in sugar, or sugar and cinnamon. Kind of like Indian donuts. :) This bread is very very easy and quick. I often will make a bannock if I'm out of bread and too lazy to go to the store. I hope you try it. Its really good.
And, of course, I hope you enter into the ADFD challenge. It is running from today, November 5th through to November 18th. You can find the links on the right hand side in my side bar. Show us your favourite recipes.
I'm hungry!
Before I sign off, I just want to say:
HAPPY BIRTHDAY MOM! Wish I could be with you to celebrate!
Talk to you later...
Cat
But I digress, back to what this post is about - ADFD challenge #5. I started this whole paper crafting thing when I started on digital scrapbooking. I still love using digital elements in my crafting. One thing I really love doing is making my own patterned papers. For this challenge I needed something that was more uniquely "Canadian Aboriginal" than southwestern or "US Native American", so I had to design it myself. I created a design that reminded me of a dream catcher. Then I had to choose colours that are prevalent in the aboriginal arts - a deep red, almost blood colour, tan, and turquise. Once I coloured the digital image, and put my design together, I realized I needed another element, so what better than to create an actual dream catcher for the project. So, it finally all came together and this is the results - a digital scrapbook page with my recipe:
Supplies:
Stamp Image: A Day For Daisies - Leaf Girl
Font on recipe card: Bradley Hand
Leaf image on recipe card from Ask a Biologist website
All other elements created by CatScrapFever Designs (background paper, dream catcher, recipe card)
This recipe is the one my mother taught me. Bannock was a real treat when I was younger, especially with hamburger soup. When I was little, I loved it with butter and jam when it was still hot and the butter and jam would melt and make my fingers and face all sticky. Once in a while, my Mom would fry the bannock, and then when it was still hot, roll it in sugar, or sugar and cinnamon. Kind of like Indian donuts. :) This bread is very very easy and quick. I often will make a bannock if I'm out of bread and too lazy to go to the store. I hope you try it. Its really good.
And, of course, I hope you enter into the ADFD challenge. It is running from today, November 5th through to November 18th. You can find the links on the right hand side in my side bar. Show us your favourite recipes.
I'm hungry!
Before I sign off, I just want to say:
HAPPY BIRTHDAY MOM! Wish I could be with you to celebrate!
Talk to you later...
Cat
Wednesday, November 03, 2010
Cards from Jasmine
I received a very pleasant package in the mail the other day. My niece sent me a couple cards she made with the loot I sent her for her birthday this summer. The first card is really cute and I think she is on to a new trend. Where about 99% of the cards we create and see in the on line galleries have most of the decoration on the outside of the card, Jasmine decided to decorate and put the surprise on the inside of the card. Very clever little girl! Here's a couple pictures of it for you to see:
The front:
and the inside:
I'd like to point out the little ghosts in the corners. She drew them herself. :)
The next card is very a simple, and clean card. She used an image that I drew last year at Christmas for the focal point.
I think she's well on her way to becoming a fabulous card maker. What do you think? Please leave her a comment. I know she would absolutely love to read your comments.
Thanks for looking. Talk to you later...
Cat
The front:
and the inside:
I'd like to point out the little ghosts in the corners. She drew them herself. :)
The next card is very a simple, and clean card. She used an image that I drew last year at Christmas for the focal point.
I think she's well on her way to becoming a fabulous card maker. What do you think? Please leave her a comment. I know she would absolutely love to read your comments.
Thanks for looking. Talk to you later...
Cat
Paper Romance DT Call
If you haven't heard, Paper Romance currently has a DT call running. Its a great opportunity, so if you're in the market for showcasing your talents as well as the excellent products that Paper Romance carries, check out this post on their blog: Paper Romance DT Call. Check out their challenges as well (here). It looks like its a lot of fun.
Take care & talk to you later...
Cat
Take care & talk to you later...
Cat
Sunday, October 31, 2010
Can You Tell the Difference?
I was making some clear ornaments the day before and I was using my polar white Flower Soft inside to make it look like there was snow inside the balls. All I had on hand was the one little container and I ran out of Flower Soft. Luckily I had bought a package of the white foam balls to test out making my own Flower Soft. If you haven't heard of this before, you take the foam balls and rub them together to grate them, and it looks and feels just like Flower Soft. You need to use the foam that's hard and looks sparkly - not the styrofoam one like the stuff styrofoam cups are made out of. Here's a picture of the foam balls I used:
Here's a picture of one of the ornaments with the Flower Soft inside. I put the container from the Flower soft beside it in case you haven't seen this product yet. Its actually filled with the grated foam and not Flower Soft.
For the ornaments, you cut a circle of acetate just slightly smaller than the diameter of your ornament (just a hair smaller). Stamp your image with Stazon ink, and then colour on the reverse side with Sharpies, Bics, or Copics. If you colour on the same side as you stamp with the Stazon ink, your maker inks will wipe away the Stazon. Once the inks have dried, you roll your acetate into a tube small enough to fit through the opening at the top of the ornament. Push the acetate through and it will unroll, going across the inside of the ornament. You can put your Flower Soft, or glitter, or confetti in before or after you put your acetate in there, either way works. I used long nose tweezers to position the image inside.
Now here's a picture of some Flower Soft and foam gratings side by side (click on the picture to open it up full size to get a good look at it). Can you tell which one is which? If I didn't know, I don't think I would be able to tell the difference...
Since both look pretty much exactly a like, I think I'll be using the foam balls from now on. You can also use re-inker to custom dye the foam. I do have one other pot of Flower Soft - Sweet Pea - which is multi-coloured, but I think you could also just make your own custom colour mixes as well. The little pot of Polar White Flower Soft cost me $9.99 ($10.49 with tax). My little pot of the Sweet Pea was $8.99 ($9.44 with tax). I was able to get 6 foam balls for $4.99 ($5.24 with tax) at Walmart. Out of 3 - 2.5" balls I got enough "Flower Soft" to fill 3 Flower Soft containers - so basically one container for every 2.5" foam ball. That works out to about 87cents in total for a container. Sure a lot cheaper than $10 a container... Now, I'm not saying we shouldn't support the craft companies and buy their products. But, this is a much more economical way to achieve the same results as Flower Soft and is great for the people with very limited budgets.
So, do you want to know which one is which? The one on the right is the Flower Soft. If I didn't tell you, I don't think you would be able to tell the difference. Am I right?
That's it for today.
Talk to you later...
Cat
Here's a picture of one of the ornaments with the Flower Soft inside. I put the container from the Flower soft beside it in case you haven't seen this product yet. Its actually filled with the grated foam and not Flower Soft.
For the ornaments, you cut a circle of acetate just slightly smaller than the diameter of your ornament (just a hair smaller). Stamp your image with Stazon ink, and then colour on the reverse side with Sharpies, Bics, or Copics. If you colour on the same side as you stamp with the Stazon ink, your maker inks will wipe away the Stazon. Once the inks have dried, you roll your acetate into a tube small enough to fit through the opening at the top of the ornament. Push the acetate through and it will unroll, going across the inside of the ornament. You can put your Flower Soft, or glitter, or confetti in before or after you put your acetate in there, either way works. I used long nose tweezers to position the image inside.
Now here's a picture of some Flower Soft and foam gratings side by side (click on the picture to open it up full size to get a good look at it). Can you tell which one is which? If I didn't know, I don't think I would be able to tell the difference...
Since both look pretty much exactly a like, I think I'll be using the foam balls from now on. You can also use re-inker to custom dye the foam. I do have one other pot of Flower Soft - Sweet Pea - which is multi-coloured, but I think you could also just make your own custom colour mixes as well. The little pot of Polar White Flower Soft cost me $9.99 ($10.49 with tax). My little pot of the Sweet Pea was $8.99 ($9.44 with tax). I was able to get 6 foam balls for $4.99 ($5.24 with tax) at Walmart. Out of 3 - 2.5" balls I got enough "Flower Soft" to fill 3 Flower Soft containers - so basically one container for every 2.5" foam ball. That works out to about 87cents in total for a container. Sure a lot cheaper than $10 a container... Now, I'm not saying we shouldn't support the craft companies and buy their products. But, this is a much more economical way to achieve the same results as Flower Soft and is great for the people with very limited budgets.
So, do you want to know which one is which? The one on the right is the Flower Soft. If I didn't tell you, I don't think you would be able to tell the difference. Am I right?
That's it for today.
Talk to you later...
Cat
Monday, October 25, 2010
Fruits of My Labour...
Pun intended! I have a couple pictures I wanted to show you of the canning I did with the fruits I picked from around my neighbourhood. My first batch was from all the apples I picked. I made apple sauce and apple syrup. The only reason I ended up with apple syrup is because I tried making apple jelly that didn't set. I wanted to use the natural pectin of the apples, but I guess the apples weren't fresh enough (they sat for a couple days before I could do anything with them) and lost their pectin. I boiled that applejuice for hours and it still wouldn't set, but made very nice apple syrup. The apple sauce is so good. Absolutely no sugar was needed for it. All I added was a little bit of cinnamon and a dash of nutmeg. Here's a picture of the applesauce & the syrup:
I had a lot of apple peelings left still after trying the first batch of apple jelly, so I figured I would add powdered pectin since I didn't need a lot of apple syrup. The jelly came out beautiful. I stewed up all the apple peels and cores for about two hours - until they were just mush. Then I strained them through a jelly bag and let that drip over night. Most of the articles/blog posts I read about making jelly said not to squeeze the bag or you would get cloudy juice. It really didn't make a difference to me, so I put a pot full of water on top of the jelly bag to add weight to press more juice out of it. I don't know how much more juice it really squeezed out though. Once I did as many full batches of jelly as I could from the juice I had, I had 2 cups of juice left over. I didn't want it to go to waste, so I added pomegrante juice to make up 5 cups of juice and made another batch of jelly. This jelly is really good! It has a very nice flavour. And I love the colour it has in the jar. The apple jelly is so good too. I'm looking forward to using it (and the apple syrup) as a glaze for some ham or pork chops.
If you recall, I posted a little while ago about one of my neighbours growing grapes in their back yard. Well, I had picked about 2 pounds of grapes from them. I made juice out of the grapes (they were really small - about the size of large-ish blueberries) and from the 2 pounds I made 5 cups of juice - exactly enough for a batch of jelly. The jelly turned out great. I had about 1/2 a jar too much, so I just let that set up in the fridge over night in a small plastic container. Rob and I finished that off the next night with PB&J sandwiches for dinner.
So, once I finished with all the fruit I had picked in my neighbourhood, I was still hyped up about canning. I decided I would try my hand at making marmelade. I was on the hunt to find directions on how to make marmalade. As a kid, my parents used to eat marmalade all the time. I didn't like it - it was too bitter for my young palette. I have tried a few store bought ones and always found them bitter, except for one brand (which I don't remember the name of anymore). It was sweet and orangey and so delicious. I read the ingredients and too my surprise, it wasn't just orange peel in the marmalade, but also had lemon peel and lime peel. In my research, I found that what makes the marmalade bitter is the pith. With this information in mind, I bought a couple oranges, a lemon, and a little bag of key limes (I used 6 limes for my marmalade). The trick I found to not getting any pith on the rind when you're peeling it is to use a potato peeler on the thick rind fruit - the oranges and the lemons. The little key limes, however, were too small and the skin seemed to be very tough, almost leathery. Luckily, I have a good zester and used that to get as much rind off those little wee limes. I took all the peel and chopped it into as fine slivers as I could, then boiled that for about 20 minutes in 1 1/2 cups of water so that they would soften and extract the essential oils.
The second important thing about marmalade making is to not get any of the tough skin around the flesh segments into the mix. I peeled off all the pith from the oranges and the lemons, then cut the segments away. I managed to only get 3 or 4 pieces of skin in there, but was able to see them when I was cooking the fruit and fished them out. I had this big juicy mess left in my hands from the skin and what was left of the pulp I couldn't get out. I just used my hands and squeezed it over a strainer to get as much juice as I could from the fruit. The limes were another story though. They were so small and the pith was so tough that I wouldn't be able to cut it away with out sacrificing all the pulp, so I just cut them in half and squeezed as much juice as I could out of them over a strainer to catch the seeds. Oh yeah, another important point to remember when making marmalade is to not get any seeds in there or they will make your marmalade bitter too.
I added this to the pot and let the fruit boil for about 20 minutes. Once it was cooked I measured out enough of the fruit and peel and added enough water to make 5 cups and then added 2 tsp vanilla extract. This seems to be the magic number for 1 package of pectin - 5 cups juice/fruit, 5 cups sugar, 1 package pectin crystals. After it was all cooked with the sugar and pectin, I put it into jars. I couldn't wait until it was cooled and set so that we could try it. Finally, the next day it was ready to try. It was loosely set which was ok. I didn't want it really set hard like jello, but it was a little softer than I would have liked. Hopefully, the other jars will set up a little more as they age a bit. Now, the taste, however, unbelievable. It is soooooooo good. It tasted even better than what the one I liked from the store tasted (from what I can remember). I think what put it over the top is the vanilla. I've been having this on toast almost every morning. I will definitely make this again. Its a little more work than jelly, but so worth the effort. Here's a picture of the jellies I made:
You can't tell from the pictures, but they look so pretty in the sunlight. The colours are so deep and rich - almost jewel like.
Well, thats all I have for today about my canning escapades. If you haven't tried making jelly you should. Its really quite simple and all you need is some juice (but not juice from concentrate). You can pick up real fruit juice at the grocery store really cheap. After I slaved over the stove making my own apple juice, I found a litre of apple juice (not from concentrate) at Walmart for about 90 cents. Its not the same as making it from scratch, but it will work if you want apple jelly and no apples. :)
Ok, so talk to you later...
Cat
I had a lot of apple peelings left still after trying the first batch of apple jelly, so I figured I would add powdered pectin since I didn't need a lot of apple syrup. The jelly came out beautiful. I stewed up all the apple peels and cores for about two hours - until they were just mush. Then I strained them through a jelly bag and let that drip over night. Most of the articles/blog posts I read about making jelly said not to squeeze the bag or you would get cloudy juice. It really didn't make a difference to me, so I put a pot full of water on top of the jelly bag to add weight to press more juice out of it. I don't know how much more juice it really squeezed out though. Once I did as many full batches of jelly as I could from the juice I had, I had 2 cups of juice left over. I didn't want it to go to waste, so I added pomegrante juice to make up 5 cups of juice and made another batch of jelly. This jelly is really good! It has a very nice flavour. And I love the colour it has in the jar. The apple jelly is so good too. I'm looking forward to using it (and the apple syrup) as a glaze for some ham or pork chops.
If you recall, I posted a little while ago about one of my neighbours growing grapes in their back yard. Well, I had picked about 2 pounds of grapes from them. I made juice out of the grapes (they were really small - about the size of large-ish blueberries) and from the 2 pounds I made 5 cups of juice - exactly enough for a batch of jelly. The jelly turned out great. I had about 1/2 a jar too much, so I just let that set up in the fridge over night in a small plastic container. Rob and I finished that off the next night with PB&J sandwiches for dinner.
So, once I finished with all the fruit I had picked in my neighbourhood, I was still hyped up about canning. I decided I would try my hand at making marmelade. I was on the hunt to find directions on how to make marmalade. As a kid, my parents used to eat marmalade all the time. I didn't like it - it was too bitter for my young palette. I have tried a few store bought ones and always found them bitter, except for one brand (which I don't remember the name of anymore). It was sweet and orangey and so delicious. I read the ingredients and too my surprise, it wasn't just orange peel in the marmalade, but also had lemon peel and lime peel. In my research, I found that what makes the marmalade bitter is the pith. With this information in mind, I bought a couple oranges, a lemon, and a little bag of key limes (I used 6 limes for my marmalade). The trick I found to not getting any pith on the rind when you're peeling it is to use a potato peeler on the thick rind fruit - the oranges and the lemons. The little key limes, however, were too small and the skin seemed to be very tough, almost leathery. Luckily, I have a good zester and used that to get as much rind off those little wee limes. I took all the peel and chopped it into as fine slivers as I could, then boiled that for about 20 minutes in 1 1/2 cups of water so that they would soften and extract the essential oils.
The second important thing about marmalade making is to not get any of the tough skin around the flesh segments into the mix. I peeled off all the pith from the oranges and the lemons, then cut the segments away. I managed to only get 3 or 4 pieces of skin in there, but was able to see them when I was cooking the fruit and fished them out. I had this big juicy mess left in my hands from the skin and what was left of the pulp I couldn't get out. I just used my hands and squeezed it over a strainer to get as much juice as I could from the fruit. The limes were another story though. They were so small and the pith was so tough that I wouldn't be able to cut it away with out sacrificing all the pulp, so I just cut them in half and squeezed as much juice as I could out of them over a strainer to catch the seeds. Oh yeah, another important point to remember when making marmalade is to not get any seeds in there or they will make your marmalade bitter too.
I added this to the pot and let the fruit boil for about 20 minutes. Once it was cooked I measured out enough of the fruit and peel and added enough water to make 5 cups and then added 2 tsp vanilla extract. This seems to be the magic number for 1 package of pectin - 5 cups juice/fruit, 5 cups sugar, 1 package pectin crystals. After it was all cooked with the sugar and pectin, I put it into jars. I couldn't wait until it was cooled and set so that we could try it. Finally, the next day it was ready to try. It was loosely set which was ok. I didn't want it really set hard like jello, but it was a little softer than I would have liked. Hopefully, the other jars will set up a little more as they age a bit. Now, the taste, however, unbelievable. It is soooooooo good. It tasted even better than what the one I liked from the store tasted (from what I can remember). I think what put it over the top is the vanilla. I've been having this on toast almost every morning. I will definitely make this again. Its a little more work than jelly, but so worth the effort. Here's a picture of the jellies I made:
You can't tell from the pictures, but they look so pretty in the sunlight. The colours are so deep and rich - almost jewel like.
Well, thats all I have for today about my canning escapades. If you haven't tried making jelly you should. Its really quite simple and all you need is some juice (but not juice from concentrate). You can pick up real fruit juice at the grocery store really cheap. After I slaved over the stove making my own apple juice, I found a litre of apple juice (not from concentrate) at Walmart for about 90 cents. Its not the same as making it from scratch, but it will work if you want apple jelly and no apples. :)
Ok, so talk to you later...
Cat
Monday, October 18, 2010
Terrible, Terrible news...
I'm absolutely devastated this morning. I can't believe this. Its so tragic. MY DISHWASHER BROKE LAST NIGHT!!!! I have a full load of dishes and now I'm going to have to wash them by hand. Ugh! And to add insult to injury, the parts place has to order the part in and that will take 2 weeks to get here. My husband wasn't all that understanding either. He told the clerk I didn't know how to wash dishes by hand. Its not that I don't know how... I just don't like doing it. That also means I'll have to do most of the cooking because when Rob cooks, he dirties every pot & dish in the house and if I'm the one having to do the dishes, he's not going to step foot near the stove. Other than whining because I don't like doing dishes, there is the fact that when I stand in one place for more than about 10 minutes, my hips start to scream at me. And, my back hurts because I'm taller than the average person and I have to be bent over to reach into the sink. I guess I better stock up on my NSAIDs until my dishwasher gets fixed.
Ok, that's enough self-pity for one day. I'll have something better to post about next time.
Talk to you later...
Cat
Ok, that's enough self-pity for one day. I'll have something better to post about next time.
Talk to you later...
Cat
Sunday, October 17, 2010
A Little Gift For You...
I have these images I drew that I never got around to using. I thought I would offer them to you. Hopefully, you can use them. Please, if you download them, do not share them. If someone asks you for the images, please send them here for the link. Also, these images are for personal use only. I would appreciate a little note back with a link if you use the images. I would love to see what you make with them. :) Here are previews of the images. The link to download will be at the end of this post. Enjoy & create!
And here is the link to download the non-watermarked, full-sized images: CatScrapFever Digi Stamps
Talk to you later...
Cat
And here is the link to download the non-watermarked, full-sized images: CatScrapFever Digi Stamps
Talk to you later...
Cat
Friday, October 15, 2010
ADFD Challenge #4 - Black Out
The new challenge at A Day for Daisies starts today! The challenge this time is to use black. Lots of black. In keeping with Halloween coming at the end of the month. All the kids I know can't wait until Halloween gets here. They love all the candy they get. Well, there is a little piece of "candy" for you over at ADFD website. Tammy is offereing a very cute little witch for this challenge. Its so cute - and along with the rest of the prize package, this challenge will be so much fun.
I don't normally work with a lot of black except at this time of year. Don't get me wrong. I love black. The majority of my wardrobe is black (it very slimming you know). It can make a project look very elegant. Thats the reason I love doing these challenges. It pushes me outside of my creative comfort zone. Here is a picture of the project I made for this current challenge:
Supplies:
stamps: Wildflowers digital stamp - ADFD
card stock: SU! Black, Wausau Exact Index 110#
Flowers: unknown
Brads: Michaels
Rhinestones: Michaels
Inks: Versamark
Tools/other products: Pencil crayons, oms, Stampendous black sparkle embossing powder, black copic marker, stickles (black, silver, white), CraftRobo
For this chest of drawers, I first cut the bracket shape thats the bottom and top on my CraftRobo. I made them two layers thick and I also cut one extra for the top to prop up the image. I made 3 tubes, just slightly bigger than 3" x 3" x 1" and stacked them - these were the sliders for my drawers. I them made 3 box bottoms 3" x 3" x 1". I cut a swirl pattern on my CraftRobo, used xyron adhesive on the back and covered the front with Versamark ink and embossed the swirl with sparkle black embossing powder. The big black rhinestones on the drawers didn't start out as black rhinestones. I didn't have any black ones that were big enough for the project, so I used clear rhinestones and coloured them with a black copic marker. Once the ink was dry, I glued them to the front of the drawer on top of the swirls. For the top, I scored the bracket shape in half and then at the quarter mark. I folded it and then adhered it to the top only putting glue on half, so that the folded flap was free. I then attached the coloured image with pop dots to the part of the folded bracket shape that was upright so that the image would stand up and then tacked down the little point with some glue so the image would stay upright. I then glued paper flowers with brad centres to the top for a little more embellishment.
I think I'm going to fill the drawers up with little embellishments, like buttons, rhinestones, & brads and send this along as a little gift for my niece. I know she'll love it and it will help out build up her craft stash too.
So check out the challenge at ADFD. Don't be shy - its all fun and good people. The link to the challenge is in my sidebar, but just in case here it is for you again: ADFD Challenge #4 - Black Out
Talk to you later...
Cat
I don't normally work with a lot of black except at this time of year. Don't get me wrong. I love black. The majority of my wardrobe is black (it very slimming you know). It can make a project look very elegant. Thats the reason I love doing these challenges. It pushes me outside of my creative comfort zone. Here is a picture of the project I made for this current challenge:
Supplies:
stamps: Wildflowers digital stamp - ADFD
card stock: SU! Black, Wausau Exact Index 110#
Flowers: unknown
Brads: Michaels
Rhinestones: Michaels
Inks: Versamark
Tools/other products: Pencil crayons, oms, Stampendous black sparkle embossing powder, black copic marker, stickles (black, silver, white), CraftRobo
For this chest of drawers, I first cut the bracket shape thats the bottom and top on my CraftRobo. I made them two layers thick and I also cut one extra for the top to prop up the image. I made 3 tubes, just slightly bigger than 3" x 3" x 1" and stacked them - these were the sliders for my drawers. I them made 3 box bottoms 3" x 3" x 1". I cut a swirl pattern on my CraftRobo, used xyron adhesive on the back and covered the front with Versamark ink and embossed the swirl with sparkle black embossing powder. The big black rhinestones on the drawers didn't start out as black rhinestones. I didn't have any black ones that were big enough for the project, so I used clear rhinestones and coloured them with a black copic marker. Once the ink was dry, I glued them to the front of the drawer on top of the swirls. For the top, I scored the bracket shape in half and then at the quarter mark. I folded it and then adhered it to the top only putting glue on half, so that the folded flap was free. I then attached the coloured image with pop dots to the part of the folded bracket shape that was upright so that the image would stand up and then tacked down the little point with some glue so the image would stay upright. I then glued paper flowers with brad centres to the top for a little more embellishment.
I think I'm going to fill the drawers up with little embellishments, like buttons, rhinestones, & brads and send this along as a little gift for my niece. I know she'll love it and it will help out build up her craft stash too.
So check out the challenge at ADFD. Don't be shy - its all fun and good people. The link to the challenge is in my sidebar, but just in case here it is for you again: ADFD Challenge #4 - Black Out
Talk to you later...
Cat
Sunday, October 10, 2010
Thanksgiving & A Bounty of Local Fruit
Its Thanksgiving here in Canada tomorrow. While I haven't been working for the last 7 months, I've been trying to learn to do a few new things - like this year I wanted to learn how to can fruit & vegetables. I decided to see what fruits grow locally, within my neighbourhood. You would be surprised at the variety of apples grown in Calgary. There are two trees in my neighbourhood in particular that have beautiful apples. The one tree (my favourite) has big sweet apples about the size of a red delicious with crisp white flesh. The other tree is a crabapple tree with large apples about the size of small macintosh apples. The flesh was a lot like a macintosh apple as well. From all the apples I picked, I canned a dozen 1/2 ltr jars of unsweetened applesauce. The apples were sweet enough that I didn't need any sugar. I also made and froze some apple pie filling - probably enough for about 4 large pies. I saved all the peelings and cores and attempted to make apple jelly, but it didn't set. But, I do have some very yummy apple syrup for my pancakes this winter. Its also quite delicious drizzled over vanilla icecream. There are two plum trees in the neighbourhood also. One tree is wild red plums - which makes beautiful jams. The other is the nice round blue plums which would make nice prunes and stewed plums. I didn't ask to pick any plums this year because I didn't want to overwhelm myself. Also, I want to make sure I have the process down so that I don't risk poisoning myself or wasting all the ingredients. The last thing I'm really surprised to find growing in the back yard of one of our neighbours are grapes. I noticed them the other day when I was walking Mitzy. I didn't think we had a long enough growing season here to grow grapes. Then I thought they must be just an ornamental variety. Well, today as I was walking Mitzy again, the neighbours were out in their yard, so I stopped and asked them what kind of grapes they were. They're concord grapes. They're very very small and at first I though they would have been champagne grapes. Here's a picture of one cluster:
You'll notice a few missing from the cluster. I tried them. They're very tart, but very flavourful. However, they have a couple of seeds in the berry that make them almost impossible to eat as a snack. I have about 2lbs of the fruit that I will juice and make into jelly.
I'm so happy that I decided to ask my neighbours if I could pick these fruits. They were more than willing for me to take it away. I think most of the time, they don't want to be bothered to clean it up when it falls to the ground and starts to rot. All it cost me so far was the cost for some canning jars and a 10lb bag of sugar for the jelly. So, look around your neighbourhood. I'll bet there is lots of "free" fruit if you just ask.
Talk to you later...
Cat
I'm so happy that I decided to ask my neighbours if I could pick these fruits. They were more than willing for me to take it away. I think most of the time, they don't want to be bothered to clean it up when it falls to the ground and starts to rot. All it cost me so far was the cost for some canning jars and a 10lb bag of sugar for the jelly. So, look around your neighbourhood. I'll bet there is lots of "free" fruit if you just ask.
Talk to you later...
Cat
Saturday, October 09, 2010
So, I Caved Today....
I had a 50% off coupon for Michaels, so I used it to get:
Its not as heavy as I thought it was. I tried a couple different ones before (a big yellow clunker) and they were really heavy and hurt my wrists when they flopped over to the side. It could be that my wrists aren't as bad with carpal tunnel as they were before since I've been off work for so long now. There are a couple of Michaels stores within about 15 minutes driving between stores and my house, so I think I'll take a couple more 50% off coupons and get some refills while I have the coupons. I can't believe how much more they charge at Michaels in Canada for these things. This gun is about $30 in the states, but was $54.99 here. That's why I never buy anything at Michaels (except the $1.50 stuff) without a coupon. I think I'll try to limit myself now to when they offer 50% off coupons. I had tried to put off my purchases before to when they were offering the 50% off coupons, but it seemed just as I decided to do that, they didn't have one for months and months and all they were offering were the 40% coupons. Really, I have soooo much stuff I should be ashamed of myself for wanting to buy more and thinking I can't make another thing unless I go shopping. Oh yeah, I bought some more card stock. Like I need that like I need another hole in my head. :) I've been using Tombow dry adhesive runners and, honestly, that stuff sucks the big one. I have a card here that I made only about a month ago with the Tombow and its already fallen apart. I had to go and re-glue a couple albums of scrapbook pages I put together using that glue. It was getting expensive cause I had to use so much of it to get things to stick.
Well, anyway. Wanted to share my new toy with you all. I'll post a picture of something as soon as I use it to make something.
Talk to you later...
Cat
P.S. Have you checked out the sketch challenge at CDAC that A Day for Daisies is sponsoring. You have until the 20th to join in and you get a free image to work with. Go check it out: CDAC You'll need to register - but that's free, then just look under the Challenges to find it. See ya there!
Its not as heavy as I thought it was. I tried a couple different ones before (a big yellow clunker) and they were really heavy and hurt my wrists when they flopped over to the side. It could be that my wrists aren't as bad with carpal tunnel as they were before since I've been off work for so long now. There are a couple of Michaels stores within about 15 minutes driving between stores and my house, so I think I'll take a couple more 50% off coupons and get some refills while I have the coupons. I can't believe how much more they charge at Michaels in Canada for these things. This gun is about $30 in the states, but was $54.99 here. That's why I never buy anything at Michaels (except the $1.50 stuff) without a coupon. I think I'll try to limit myself now to when they offer 50% off coupons. I had tried to put off my purchases before to when they were offering the 50% off coupons, but it seemed just as I decided to do that, they didn't have one for months and months and all they were offering were the 40% coupons. Really, I have soooo much stuff I should be ashamed of myself for wanting to buy more and thinking I can't make another thing unless I go shopping. Oh yeah, I bought some more card stock. Like I need that like I need another hole in my head. :) I've been using Tombow dry adhesive runners and, honestly, that stuff sucks the big one. I have a card here that I made only about a month ago with the Tombow and its already fallen apart. I had to go and re-glue a couple albums of scrapbook pages I put together using that glue. It was getting expensive cause I had to use so much of it to get things to stick.
Well, anyway. Wanted to share my new toy with you all. I'll post a picture of something as soon as I use it to make something.
Talk to you later...
Cat
P.S. Have you checked out the sketch challenge at CDAC that A Day for Daisies is sponsoring. You have until the 20th to join in and you get a free image to work with. Go check it out: CDAC You'll need to register - but that's free, then just look under the Challenges to find it. See ya there!
Friday, October 08, 2010
Jasmine's Crafts
My niece is a talented little girl and she loves doing crafts. Every once in a while I send her a bunch of craft stuff that I pick up for her, or stuff that I'm not using. I usually have a box under my table that I keep the stuff in and when it gets full, or its a special occasion like her birthday I send her the box. Well, for her birthday this past summer, I sent her a bunch of stamping stuff. I bought a stamp kit at Walmart and it was really nice. There were I think 8 stamps sets and a few other things. I pulled out a bunch of paper from my huge stash and sent her a whole whack of patterned paper and card stock and some ribbon, embellies, and ink pads I wasn't using. She loves it. So now, we have crafting dates over the internet via Skype (my family uses Skype a lot to keep in touch). So, I told Jasmine that I would post her projects on my blog so she can show the world her creations too - just like her aunty.
This is Jasmine's first project we did together over Skype. Its a little gift bag/box. I think she did amazingly well with it considering I was giving her verbal instructions and trying to show her over the webcam how to do it.
Front:
Back:
She used a stamp I had sent her on the front (the teddy bear - from the dollar store) and she coloured in a stamped image I sent her.
I think she did a fabulous job. If you have a minute, please leave her a comment. She's only 9 and I know it will thrill her to death to know people are looking at her crafts.
Have a great day!
Cat
UPDATE: Here is what Jasmine wrote in an email to me:
something amazing
today i cheked your blog and seen the comments they where AMAZING. i am so so so happy about the nice comments that people said about my crafts
from jasmine
Thanks everyone who commented on Jasmine's crafts. I'll be posting more in the future.
This is Jasmine's first project we did together over Skype. Its a little gift bag/box. I think she did amazingly well with it considering I was giving her verbal instructions and trying to show her over the webcam how to do it.
Front:
Back:
She used a stamp I had sent her on the front (the teddy bear - from the dollar store) and she coloured in a stamped image I sent her.
I think she did a fabulous job. If you have a minute, please leave her a comment. She's only 9 and I know it will thrill her to death to know people are looking at her crafts.
Have a great day!
Cat
UPDATE: Here is what Jasmine wrote in an email to me:
something amazing
today i cheked your blog and seen the comments they where AMAZING. i am so so so happy about the nice comments that people said about my crafts
from jasmine
Thanks everyone who commented on Jasmine's crafts. I'll be posting more in the future.
Thursday, October 07, 2010
Blog background change...
Just a quick note. I meant to do this at the beginning of the month but I kept getting side tracked and kept forgetting, so I made myself do it tonight. I changed the background to pink in honour of Breast Cancer Awareness month. My family has been affected by cancer too many times as I'm sure so many other families have been also. My prayers go out to those families dealing with this right now and to those of you who have lost loved ones to this horrible disease.
Wednesday, October 06, 2010
A Couple Cards & a Product Review
Hi all. I want to show you some cards I made for a challenge over at Crafter's Digital Art Centre being sponsored by A Day for Daisies. The challenge starts tomorrow, so don't miss it. It is a sketch challenge that is quite easy to work with (if I can do it, you all can do it I'm sure). You will also get an amazing free image to work with. How great is that eh? Here are the cards I made. The first one is using the Fall Fun image (this will be the image Tammy is offering for the challenge - its so fun!).
Supplies
Stamps: Fall Fun - A Day for Daisies digital stamp (main image), Inky Antics (sentiments)
Papers: Wausau 80# Exact Index cardstock, Recollections, Cat Scrap Fever Designs (me - patterned paper)
Inks: Studio G pigment ink
Embellishments: Paper flower, brads, rafia, & silk leaves - dollar store, button & ribbon - Michaels
Tools: Craft Robo, pencil crayons (prisma & crayola), oms
I used pencil crayons & oms to colour the main image. I also used my Craft Robo to design and cut the pumpkin and leaves. The little tendrils are created by putting some scrap cardstock in the cutter and then cutting very thin slivers of the cardstock. They will curl on their own, but I wrapped these ones around a pencil and shaped them. I don't think they'll stay nice and springy once they've been in an envelope and gone through the mail. Its a shame because they look so cute.
This next picture is another card using the same sketch, but in a Halloween theme.
Supplies
Stamps: Pretty Witch by A Day for Daisies (digital stamp - focal image), Studio G (sentiments)
Papers: Wausau 80# Exact Index cardstock, Recollections, K&Company (patterned paper)
Inks: Studio G pigment ink
Embellishments: Paper flower, rhinestones, & brads - dollar store, buttons - Michaels, black & green stickles
Tools: pencil crayons (prisma & crayola), oms
This card is pretty straight forward. I coloured the image with pencil crayons & oms. Other than that, the only thing "special" is that I glued rhinestones into the buttons because I couldn't find my black embroidery floss to thread into the holes. I also put glitter glue on the hat ribbon & black stickles on the cat on the witch's lap.
I really like this next card because the image is so cute. Again, I really didn't do anything spectacular for this card, but I did add glitter glue to the wings because all fairies wings sparkle. :)
Supplies
Stamps: Little Nimph by A Day for Daisies (digital stamp - focal image), Studio G (sentiments)
Papers: Wausau 80# Exact Index cardstock, Recollections, S.E.I. (patterned paper)
Inks: Studio G pigment ink
Embellishments: Paper flower, ribbon, & button - Michaels, pink & orange glitter glue - Studio G
Tools: pencil crayons (prisma & crayola), oms
PRODUCT REVIEW - STUDIO G CRAFT INK
So, I found a new ink that I'm really liking for my clear stamps - especially the cheap Studio G stamps. A lot of people have problems getting these stamps to ink up properly and problems getting a good image from them. I haven't had too much of a problem myself, but sometimes the image isn't just so. I bought some Studio G ink cubes quite a while ago and just used them the other day - on the cards I just showed you and some Halloween cards I made for my craft show (I didn't have time to take pics before the craft show, but I have one left that I'll post later - maybe tomorrow). Since my Halloween cards have a lot of black cardstock, I thought I would try out the white Studio G ink cube. This ink is really really good for a white ink. If you look at the Halloween card I posted above, the white is bright and crisp. Most any other white ink I've tried soaks into the paper and doesn't stay nice and bright unless you emboss it. Also, what is so great about this ink is that it dries completely! Yes, within minutes I was able to rub my finger over the stamped image without smearing it. A lot of the other craft inks I've tried always take forever to dry (if they ever even dry) and once they're dry they will still smear. Another thing that I like about these is the price - $1.50 in Canada (they'll be in the $1 bins in the US). Plus, they have $1.50 glitter glue to match the ink colours. Aaaannnd, (I know - it keeps going) it also matches some of the new recollections card stocks. If you look at the first card, the ink I used for the sentiment matches the rusty coloured cardstock, and on the last card the ink for the sentiment matches the green cardstock (although its hard to tell since I stamped it on blue cards stock - but I did test it out to see how closely it matched). The only thing is that I haven't seen a black ink cube yet. If I ever do, I'll be snatching up one of those too. I'm contemplating going back and picking up a couple more white cubes I like it that much. So if you see these at a Michaels store near you, give them a try. I don't think you'll be disappointed - especially at this price point. Just so you know what you're looking for, here's a picture of what the cubes look like:
Well, that's it for today. Make sure you get over to CDAC and check out the sketch challenge ADFD is sponsoring tomorrow. It will be fun and you get a great image to boot!
Talk to you later...
Cat
Supplies
Stamps: Fall Fun - A Day for Daisies digital stamp (main image), Inky Antics (sentiments)
Papers: Wausau 80# Exact Index cardstock, Recollections, Cat Scrap Fever Designs (me - patterned paper)
Inks: Studio G pigment ink
Embellishments: Paper flower, brads, rafia, & silk leaves - dollar store, button & ribbon - Michaels
Tools: Craft Robo, pencil crayons (prisma & crayola), oms
I used pencil crayons & oms to colour the main image. I also used my Craft Robo to design and cut the pumpkin and leaves. The little tendrils are created by putting some scrap cardstock in the cutter and then cutting very thin slivers of the cardstock. They will curl on their own, but I wrapped these ones around a pencil and shaped them. I don't think they'll stay nice and springy once they've been in an envelope and gone through the mail. Its a shame because they look so cute.
This next picture is another card using the same sketch, but in a Halloween theme.
Supplies
Stamps: Pretty Witch by A Day for Daisies (digital stamp - focal image), Studio G (sentiments)
Papers: Wausau 80# Exact Index cardstock, Recollections, K&Company (patterned paper)
Inks: Studio G pigment ink
Embellishments: Paper flower, rhinestones, & brads - dollar store, buttons - Michaels, black & green stickles
Tools: pencil crayons (prisma & crayola), oms
This card is pretty straight forward. I coloured the image with pencil crayons & oms. Other than that, the only thing "special" is that I glued rhinestones into the buttons because I couldn't find my black embroidery floss to thread into the holes. I also put glitter glue on the hat ribbon & black stickles on the cat on the witch's lap.
I really like this next card because the image is so cute. Again, I really didn't do anything spectacular for this card, but I did add glitter glue to the wings because all fairies wings sparkle. :)
Supplies
Stamps: Little Nimph by A Day for Daisies (digital stamp - focal image), Studio G (sentiments)
Papers: Wausau 80# Exact Index cardstock, Recollections, S.E.I. (patterned paper)
Inks: Studio G pigment ink
Embellishments: Paper flower, ribbon, & button - Michaels, pink & orange glitter glue - Studio G
Tools: pencil crayons (prisma & crayola), oms
PRODUCT REVIEW - STUDIO G CRAFT INK
So, I found a new ink that I'm really liking for my clear stamps - especially the cheap Studio G stamps. A lot of people have problems getting these stamps to ink up properly and problems getting a good image from them. I haven't had too much of a problem myself, but sometimes the image isn't just so. I bought some Studio G ink cubes quite a while ago and just used them the other day - on the cards I just showed you and some Halloween cards I made for my craft show (I didn't have time to take pics before the craft show, but I have one left that I'll post later - maybe tomorrow). Since my Halloween cards have a lot of black cardstock, I thought I would try out the white Studio G ink cube. This ink is really really good for a white ink. If you look at the Halloween card I posted above, the white is bright and crisp. Most any other white ink I've tried soaks into the paper and doesn't stay nice and bright unless you emboss it. Also, what is so great about this ink is that it dries completely! Yes, within minutes I was able to rub my finger over the stamped image without smearing it. A lot of the other craft inks I've tried always take forever to dry (if they ever even dry) and once they're dry they will still smear. Another thing that I like about these is the price - $1.50 in Canada (they'll be in the $1 bins in the US). Plus, they have $1.50 glitter glue to match the ink colours. Aaaannnd, (I know - it keeps going) it also matches some of the new recollections card stocks. If you look at the first card, the ink I used for the sentiment matches the rusty coloured cardstock, and on the last card the ink for the sentiment matches the green cardstock (although its hard to tell since I stamped it on blue cards stock - but I did test it out to see how closely it matched). The only thing is that I haven't seen a black ink cube yet. If I ever do, I'll be snatching up one of those too. I'm contemplating going back and picking up a couple more white cubes I like it that much. So if you see these at a Michaels store near you, give them a try. I don't think you'll be disappointed - especially at this price point. Just so you know what you're looking for, here's a picture of what the cubes look like:
Well, that's it for today. Make sure you get over to CDAC and check out the sketch challenge ADFD is sponsoring tomorrow. It will be fun and you get a great image to boot!
Talk to you later...
Cat
Friday, October 01, 2010
ADFD Challenge #3 - Layers
Well, I'm back. Things are still up in the air as far as the health issue I've been dealing with, but I'm not going to let it get to me any more. Worrying about it isn't going to make things better - will probably aggravate it if anything. So, thank you to everyone for sending their well wishes. I really appreciate it.
Today is the start of the A Day for Daisies Challenge #3. The theme this time is Layers - lot of layers. I usually don't use a whole bunch of layers so this was going to be a stretch for me - but I guess that's why its called a Challenge huh? I really wanted to use the Babe Basket image. It is so cute. I also wanted to use it on a scrapbook page. I had the perfect image for the layout - a picture of my niece I took only 12 hours after she was born. I took artistic liberties with interpreting the challenge and decided to use "layers" (= shades) of a colour. I have layers of purples and pinks in this project. Here is the layout I came up with for the challenge plus a few close up shots of some of the elements:
Supplies:
Image: Babe Basket - A Day for Daisies (printed on a Canon MP560)
Cardstock: Recollections, Wausau Exact Index 80# white
Patterned Paper: unknown
Flowers: Michaels (large pink silk flowers), unknown (paper flowers)
Buttons: Dollar Store
Brads: Unknown
Ribbon: Michaels
Studio G glitter glue, Stickles, Liquid Pearls, Tattered Angels Sherbert Glimmer Mist
EK Success Tulips Large Edger Punch, Copic Markers, Sharpie Markers , Cats Eye ink
Velum tag: Deja View
I printed the image 3 times and then cut out the various layers and popped them up on pop-dots so that the blanket and flowers would have some dimension. I used my CraftRobo to cut the butterflies and glued little rhinestones to the wings and put purple stickles on the body. I also used my CraftRobo to cut the title from the patterned paper and then used pink cardstock and cut the matting for the words. It doesn't show up in the photo, but I used glimmer mist on the purple cardstock. Once that was dry, with a pencil I lightly drew some large swirls and then used stickles, glitter glue, & liquid pearls to create some "bling" swirls on the background. I've had the vellum tag for a really long time so I thought it was time to use it. I tore the edges and then inked them with purple Cats Eye ink. Assembling the layout was pretty straight forward. The only thing I had to do was mount the layout onto a heavier piece of Domtar 130# card stock. After using the glimmer mist, the purple card stock warped a little. I cut a piece 11.75" x 11.75" and glued the layout to it so that it will lay flat.
I didn't get this next project completed on time, but want to show you a really pretty image from ADFD. I'm such a sucker for Christmas images and this one is so cute I just had to have it. Its the Christmas Elf image and its a great image to work with - so many colour possibilities. Here is a card I made with it:
Supplies:
Image: ADFD Christmas Elf A (printed on a Canon MP560)
Stamps: Studio G (sentiments)
Ink: Marvy markers, Copic markers, Sharpie markers
Cardstock: Wausau Exact Index 80# white, SU! Whisper White, Recollections
Patterned Paper: DCWV
Punches: Martha Stewart Branch, EK Success Snowflake Edge, Marvy Uchida Snowflake, Marvy Uchida
Southwestern corner punch
Ribbon: Dollar Store, DMC floss
ProvoCraft Snowflake embossing folder, stickles, glitter glue
I coloured the image with Copics and Sharpies. I then put stickles and glitter glue on the hat and pompoms to jazz it up a bit. I used the Southwestern corner punch after I double matted the image and wrapped embroidery floss around the edges through the punched corners. I punch both sides of a strip of Christmas patterned paper to make it look sort of like lace and adhered that over the embossed whisper white card stock. I punched a few branches with the Martha Stewart punch and glued them into a "swag" and glued that to the card and then glued a punch snowflake on top to hide all the glue. I put stickles and glitter glue on the swag and snowflake as well.
That's all I have for today. You should head over to ADFD and enter into the challenge (the link is in my sidebar). There is a great prize offered to one of the lucky participants of the challenge. I have another craft show this weekend and have a couple things I want to prepare for it so I will post pictures of the new items next week.
Take care & talk to you later...
Cat
Today is the start of the A Day for Daisies Challenge #3. The theme this time is Layers - lot of layers. I usually don't use a whole bunch of layers so this was going to be a stretch for me - but I guess that's why its called a Challenge huh? I really wanted to use the Babe Basket image. It is so cute. I also wanted to use it on a scrapbook page. I had the perfect image for the layout - a picture of my niece I took only 12 hours after she was born. I took artistic liberties with interpreting the challenge and decided to use "layers" (= shades) of a colour. I have layers of purples and pinks in this project. Here is the layout I came up with for the challenge plus a few close up shots of some of the elements:
Supplies:
Image: Babe Basket - A Day for Daisies (printed on a Canon MP560)
Cardstock: Recollections, Wausau Exact Index 80# white
Patterned Paper: unknown
Flowers: Michaels (large pink silk flowers), unknown (paper flowers)
Buttons: Dollar Store
Brads: Unknown
Ribbon: Michaels
Studio G glitter glue, Stickles, Liquid Pearls, Tattered Angels Sherbert Glimmer Mist
EK Success Tulips Large Edger Punch, Copic Markers, Sharpie Markers , Cats Eye ink
Velum tag: Deja View
I printed the image 3 times and then cut out the various layers and popped them up on pop-dots so that the blanket and flowers would have some dimension. I used my CraftRobo to cut the butterflies and glued little rhinestones to the wings and put purple stickles on the body. I also used my CraftRobo to cut the title from the patterned paper and then used pink cardstock and cut the matting for the words. It doesn't show up in the photo, but I used glimmer mist on the purple cardstock. Once that was dry, with a pencil I lightly drew some large swirls and then used stickles, glitter glue, & liquid pearls to create some "bling" swirls on the background. I've had the vellum tag for a really long time so I thought it was time to use it. I tore the edges and then inked them with purple Cats Eye ink. Assembling the layout was pretty straight forward. The only thing I had to do was mount the layout onto a heavier piece of Domtar 130# card stock. After using the glimmer mist, the purple card stock warped a little. I cut a piece 11.75" x 11.75" and glued the layout to it so that it will lay flat.
I didn't get this next project completed on time, but want to show you a really pretty image from ADFD. I'm such a sucker for Christmas images and this one is so cute I just had to have it. Its the Christmas Elf image and its a great image to work with - so many colour possibilities. Here is a card I made with it:
Supplies:
Image: ADFD Christmas Elf A (printed on a Canon MP560)
Stamps: Studio G (sentiments)
Ink: Marvy markers, Copic markers, Sharpie markers
Cardstock: Wausau Exact Index 80# white, SU! Whisper White, Recollections
Patterned Paper: DCWV
Punches: Martha Stewart Branch, EK Success Snowflake Edge, Marvy Uchida Snowflake, Marvy Uchida
Southwestern corner punch
Ribbon: Dollar Store, DMC floss
ProvoCraft Snowflake embossing folder, stickles, glitter glue
I coloured the image with Copics and Sharpies. I then put stickles and glitter glue on the hat and pompoms to jazz it up a bit. I used the Southwestern corner punch after I double matted the image and wrapped embroidery floss around the edges through the punched corners. I punch both sides of a strip of Christmas patterned paper to make it look sort of like lace and adhered that over the embossed whisper white card stock. I punched a few branches with the Martha Stewart punch and glued them into a "swag" and glued that to the card and then glued a punch snowflake on top to hide all the glue. I put stickles and glitter glue on the swag and snowflake as well.
That's all I have for today. You should head over to ADFD and enter into the challenge (the link is in my sidebar). There is a great prize offered to one of the lucky participants of the challenge. I have another craft show this weekend and have a couple things I want to prepare for it so I will post pictures of the new items next week.
Take care & talk to you later...
Cat
Saturday, September 25, 2010
I'll be back soon...
I just wanted to post a little something to let you all know I'm still around. I've been going through some personal/health issues for the last few weeks. So with doctor's appointments, ultrasounds, and just plain emotional turmoil, I haven't done much creating lately. I will be back - soon - and uploading my projects. So don't quit coming to see me, k?
Talk to you later...
Cat
Talk to you later...
Cat
Sunday, September 19, 2010
ADFD Flower Basket Challenge #2
A Day for Daisies is having their 2nd challenge. Its running now through to the 30th of September. The theme is "Let's Celebrate" so anything goes. You can use any of the images Tammy has for sale in her store. She also has sneek peek freebies every week on Thursday, but they're only available for a very limited time, so you need to hurry over to the A Day for Daisies group on Crafters Digital Art Centre to grab the freebies. You can use the freebies if you like for the challenges as well. One lucky person will be chosen at the end of the challenge and will win a fabulous prize. You can get all the details on the prize and information where/how to upload your submissions for the challenge HERE (click to go to the challenge blog). The link to the challenge blog is also located on the right side panel if you ever need it. There are also some links to other fun places for ADFD. So let's see some of that wonderful art that I know you all do. I'll be back to post mine. I want something really special, so I need to plan it out, but I'll post soon....
Talk to you later...
Cat
Talk to you later...
Cat
Saturday, September 18, 2010
Craft Show stuff & other ramblings...
I have another craft show tomorrow that I've been trying to get things sorted out for tomorrow. I really wanted to play with my new images from ADFD. I don't even want to go to my craft show tomorrow, but its already paid for and I'd loose the table fees. I had so much to do today and it seems I didn't get anything done. I did finish off a couple necklaces and a pair of earings for the craft show that I started a little while ago. I saw something similar last year and thought these would be nice for for the craft show. They're bead spiders. Now, I seriously have arachnophobia, and even holding these creeps me out, but I thought they would go over well for Halloween. Here's a picture of the necklace:
Its about 2"x2" and I just used some plain beads I had on hand. I have some nice Swarofsky crystals that I might make a few special ones for the next craft show in a couple weeks.
Here are the earings:
They're about 1.5"x1.5". I didn't feel like doing them black, and I really like pink, so they don't creep me out as much as the necklace does. They're not the highest quality beeds or findings, but they look cute for costume jewelry and I suppose that kids will probably buy them, so that's why I didn't use my swarofsky stuff right away. I want to see if they'll even sell.
Well, craft show tomorrow and then I'll have lots of time to catch up and play with my new A Day for Daisies images and start fulfilling my commitment to the DT. I keep telling my husband that I can't believe I've been chosen. I'm so happy today. :)
Talk to you later...
Cat
Its about 2"x2" and I just used some plain beads I had on hand. I have some nice Swarofsky crystals that I might make a few special ones for the next craft show in a couple weeks.
Here are the earings:
They're about 1.5"x1.5". I didn't feel like doing them black, and I really like pink, so they don't creep me out as much as the necklace does. They're not the highest quality beeds or findings, but they look cute for costume jewelry and I suppose that kids will probably buy them, so that's why I didn't use my swarofsky stuff right away. I want to see if they'll even sell.
Well, craft show tomorrow and then I'll have lots of time to catch up and play with my new A Day for Daisies images and start fulfilling my commitment to the DT. I keep telling my husband that I can't believe I've been chosen. I'm so happy today. :)
Talk to you later...
Cat
Friday, September 17, 2010
Awsome News!
I am so excited about this! I've been accepted onto the design team for A Day for Daisies. I stumbled upon this site and just loved the images Tammy Thompson created for her digital stamps. I took a chance and sent in my submission for her DT call and was accepted. I'm totally blown away. This is my first time serving on a DT and I'm soooo looking foward to being a part of the A Day for Daisies team. Its going to be really fun. There is a challenge running right now so why don't you all head over there and join in. It'll be fun! Here's the link: A Day for Daisies Challenges. There is also a group on Crafters Digital Art Centre (CDAC) that will be a great place to hang out and Tammy will be posting freebies every now and then. Here's a link to the group: A Day for Daisies CDAC Group.
Things have been little hectic on the home front, but I just wanted to put up a quick note to share my fabulous news and I'll be back later to post more.
Talk to you later...
Cat
Things have been little hectic on the home front, but I just wanted to put up a quick note to share my fabulous news and I'll be back later to post more.
Talk to you later...
Cat
Thursday, September 02, 2010
Sleeping in the tent & Baby Afghan card..
My husband is crazy for camping. We probably won't be able to get out camping again this year since my husband has to cover off for the people taking vacation at work and someone is on vacation through this next long weekend. So he set the tent up in our back yard last night. We had bought a new air mattress this last camping trip and the stupid thing leaked like crazy. We practically ended up sleeping on the hard ground by morning, so Rob took it back last night and bought a big new queen size, double high air mattress. We tested it out last night. With the 3" foam pad we have over it, that thing is more comfortable than my bed. Its quick and easy to pump up with the electric pump that comes with it. It will work very well if we have guests - our hide-a-bed is horribly uncomfortable. It was way more than I would have paid for an air mattress (over $100 for this one), but its guaranteed not to leak. We'll see....
I wanted to quickly post the card I made today to send out with the afghan I made for my cousin's new little baby boy. The image is by Inkadinkado and is coloured with copics. I saw the designer papers online by My Mind's Eye (Lush collection). I didn't have time to go out to see if I could find these papers, so I designed some myself to recreate the one's I saw (the checked & striped - easy enough to do quickly). The sentiment is a free digi stamp from Create with TLC. Here's my card:
Well, that's all for today. Take care and talk to you later...
Cat
I wanted to quickly post the card I made today to send out with the afghan I made for my cousin's new little baby boy. The image is by Inkadinkado and is coloured with copics. I saw the designer papers online by My Mind's Eye (Lush collection). I didn't have time to go out to see if I could find these papers, so I designed some myself to recreate the one's I saw (the checked & striped - easy enough to do quickly). The sentiment is a free digi stamp from Create with TLC. Here's my card:
Well, that's all for today. Take care and talk to you later...
Cat
Wednesday, September 01, 2010
Finally finished...
I finally finished a baby afghan my mother asked me to make for my cousin and his wife. I started it in April, but only worked on it here and there. My mom had wanted me to get it done before they had the baby, but I really wasn't into it, so I only could work on it for about an hour at a time before I got bored with it and put it away. Well, they had the baby, so I had to force myself to get it done. Well, its done. Not that I begrudge doing it for my cousin, but it was so tedious. I don't know how I made so many of these when I was in my 20's and all my friends were having kids. For all you crotchet-ers out there, all it is, is one big granny square. I crotchet 8 rounds of white, and then 4 rounds of whatever colour you want. I always start and finish with a white section and then add a knotted fringe all around. They're always a big hit. All I have left to do now is make a baby card, wrap it up and send it out. Here's a picture of the finished afghan:
My next "textile" project is going to be a shrug for my niece. I bought some beautiful pink yarn and some hot pink fun fur yarn for the trim to make it. I was looking through the Lion Brand yarn website in the free patterns section the other night for inspiration. I seldom use a pattern anymore for any of my plain knitted or crotcheted stuff anymore. I've been doing it for about 40 years - my Gramma taught me when I was a little kid - so I can figure it out by myself. I do use a pattern for "guidance" if its a complicated stitch though.
That's all I have for today. Take care and talk to you later....
Cat
My next "textile" project is going to be a shrug for my niece. I bought some beautiful pink yarn and some hot pink fun fur yarn for the trim to make it. I was looking through the Lion Brand yarn website in the free patterns section the other night for inspiration. I seldom use a pattern anymore for any of my plain knitted or crotcheted stuff anymore. I've been doing it for about 40 years - my Gramma taught me when I was a little kid - so I can figure it out by myself. I do use a pattern for "guidance" if its a complicated stitch though.
That's all I have for today. Take care and talk to you later....
Cat
Saturday, August 28, 2010
Back from Camping...
We were away camping again this past week. We were going to go out to the Drumheller area this time, but Rob really loves camping in Banff so we went to the same campground again. We didn't do a blessed thing this time. We lazed around the campsite the whole time we were there. The weather was absolutely perfect. It did get a little chilly at night, but we have a honkin' big hunting heater so that kept the tent really warm. I didn't take any pictures this time because I forgot my camera. So part of the reason we didn't do anything and just stayed at the campsite is for that reason. Rob said that there's no reason to go see any new sites if we can't take pictures. I think he was quite content to nap and eat the whole time and didn't really want to admit that's all he wanted to do. I didn't mind either. I was completely wiped out after getting ready for my craft sale.
Now, the craft sale. It wasn't as successful as I had hoped. I did sell a couple things, but only a couple things. I sold $41 worth of stuff and my table fees were $35. I haven't figured out what my material costs were yet for the stuff I sold (I do have all the info to do - just haven't yet), but I'd say I probably just broke even for the stuff I sold. Now, all I have to do is sell the stuff I have left to make back the money I spent on supplies. I think there was probably only about 100 people (and probably 40 of them were kids and men - they don't buy stuff at these things). For the first couple hours, I was the only one who sold anything. That was fun. The only other thing that sold were home dec items. One lady had a table with sofa pillows and pillow covers and she was really the only other person who sold things. I was talking to a couple other vendors at the craft sale and they said that this particular one doesn't do that well because of the location, but that there are two others in the south end that do well. So I will be booking tables for those ones for next month. I'll do up some Halloween and Thanksgiving items and see how well it goes.
So, here are a couple more pictures of some of the things I had up at the craft sale. This first card is one of my favourites I made this last month. Its a free colouring page I downloaded and coloured with copics. I added glitter to the tail feathers. The background cardstock is embossed using a Fiskars texture plate with a feather design. Its a fairly simple card, but its very vibrant IRL.
Supplies:
Cardstock: Recollections brand
Ribbon: Dollar store
Glitter: Craft Decor brand
Copic Markers
Fiskars feather texture plate
This next card is a variation on the previous one. Its the same image, but I wanted something different than the typical blue/green peacock. In person, this card is actually really nice if I do say so myself.
Supplies:
Cardstock: Recollections and Bazzil
Pattern paper: paper stack from Michaels
Stamps: Darcey Collection - Anna Griffin
Glitter: Craft Decor brand
Copic Markers
Another card design that I really like how it turned out is this next card. Again, its a downloaded colouring page. I tried to make a lot of masculine cards since most of my cards tend to be very feminine. I think this one really hit that target.
Supplies:
Cardstock: DCWV (brown), Dollar store (foil), Office Depot (cream & white)
Pattern paper: Graphic 45
Stamps: Studio G, SU!, Downloaded colouring page
Copic Markers
Fiskars Threading Water border punch
I did make a few altered items, but not that many. Here is one of the altered journals I made (I made 6 altogether). There is a matching pen, but I didn't take a picture of it. Again, I tried to make it more masculine. What is interesting about the stamp I used on this item is that the stamp is actually a soap stamp. I've been making soap for about 5 years and I was checking out the soap making supplies at Michaels one day and saw this stamp. It works excellent as a rubber stamp. What is also nice is that it was part of a set of 8 stamps for about $8.50. With their usual 40% off coupon you can get it for about $5. They have two different soap stamp sets and they both work great for stamping.
Supplies:
Cardstock: Stampin' Up
Pattern paper: DCWV
Stamps: Life of the Party soap embossing stamps
Ink: Colourbox black pigment ink
Stampendous black detail embossing powder
Martha Stewart Arch Lattice border punch
Fiskars Threading Water border punch
Ribbon: Michaels
The next cards are sets that I made using a 6"x6" One Sheet Wonder template from Verve Stamps. I made them very simple so that I could price them reasonably in a set. I made 4 sets in different colours, but I like this set the best:
Supplies:
Cardstock: Stampin' Up
Pattern paper: unknown
Stamps: Studio G
Ink: Stazon black
These two next card sets were made with another 6x6 OSW template by Susan Roberts. I only made two sets, but I made them a little more elaborate than the other ones.
Supplies:
Cardstock: Recollections
Pattern paper: paper stack from Michaels
Stamps: Lots of Thoughts - SU!
Ink: SU! Creamy Caramel
Ribbon: Walmart
Supplies:
Cardstock: Stampin' Up
Pattern paper: Daisy D
Stamps: Lots of Thoughts - SU!
Ink: SU! Not Quite Navy
Ribbon: Walmart
The next altered item I made were coasters. I made round and square. I wanted to make tile coasters, but I didn't make it to Home Depot to see if they had the tumbled marble tiles, so I used cork ones I bought at the Dollar store and covered them with 130# coated cardstock (Domtar paper). These are the one's I like the best. I'm surprised at how well they actually turned out. I used the Adirondack alcohol inks to make the background (I've never used these inks before). I wasn't sure I'd like this colour combination, but it really looks like stone in real life.
Supplies:
Cardstock: Domtar 130# coated
Stamps: Garden Delight - Inkadinkado
Ink: Stazon black, Adirondack Alcohol inks (Butterscotch, Meadow, Slate)
Mod Podge
These next coasters are done using the same technique with the alcohol inks, but the colours came out way more intense than I had anticipated. Even using the blending solution didn't tone them down that much. You can just barely make it out in the picture, but I stamped dragonflies with gold ink over the background. They're kind of almost holographic looking. It looks cool in person.
Supplies:
Cardstock: Domtar 130# coated
Stamps: Life of the Party soap embossing stamps
Ink: Colourbox gold pigment ink, Adirondack Alcohol inks (Wild Plum, Stream, Currant)
Mod Podge
This next item was one of the items that sold at the craft sale. I actually sold two of these (to one of the other vendors). I made 6 of these altered note pads with a matching pen. I think they turned out really well. I created the cover from ideas I saw on various blogs to suit what I had for the note pads and dimensions.
Supplies:
Cardstock: Recollections
Patterned paper: paper stack from Costco
Ribbon: Michaels
RSVP pens
Sentiment is computer generated
Medallion designed & cut with my Craft Robo
This last item (you're probably getting bored by now) is an altered coaster/sticky note holder. I've seen these all over the place so I just adapted my design to what I had. I used the 130# coated cardstock as the base. I just cut squares and used my corner rounder, then covered the base with pp and decorated; attached the sticky notes and added a big paper clip. They were pretty easy to make and very quick, plus as an added bonus they use up your paper scraps.
I tried taking pictures of the beaded RSVP pens I made, but the patterned paper doesn't show up very well through the beads so I'm not going to bother posting a picture right now until I can get one that shows up well. Could be that I didn't use pp with a strong/dark enough pattern.
So that's all I have for now. I'm going to work on some Halloween & Thanksgiving stuff over the next couple weeks. I'll post pics as I go along.
Take care & talk to you later...
Cat
Now, the craft sale. It wasn't as successful as I had hoped. I did sell a couple things, but only a couple things. I sold $41 worth of stuff and my table fees were $35. I haven't figured out what my material costs were yet for the stuff I sold (I do have all the info to do - just haven't yet), but I'd say I probably just broke even for the stuff I sold. Now, all I have to do is sell the stuff I have left to make back the money I spent on supplies. I think there was probably only about 100 people (and probably 40 of them were kids and men - they don't buy stuff at these things). For the first couple hours, I was the only one who sold anything. That was fun. The only other thing that sold were home dec items. One lady had a table with sofa pillows and pillow covers and she was really the only other person who sold things. I was talking to a couple other vendors at the craft sale and they said that this particular one doesn't do that well because of the location, but that there are two others in the south end that do well. So I will be booking tables for those ones for next month. I'll do up some Halloween and Thanksgiving items and see how well it goes.
So, here are a couple more pictures of some of the things I had up at the craft sale. This first card is one of my favourites I made this last month. Its a free colouring page I downloaded and coloured with copics. I added glitter to the tail feathers. The background cardstock is embossed using a Fiskars texture plate with a feather design. Its a fairly simple card, but its very vibrant IRL.
Supplies:
Cardstock: Recollections brand
Ribbon: Dollar store
Glitter: Craft Decor brand
Copic Markers
Fiskars feather texture plate
This next card is a variation on the previous one. Its the same image, but I wanted something different than the typical blue/green peacock. In person, this card is actually really nice if I do say so myself.
Supplies:
Cardstock: Recollections and Bazzil
Pattern paper: paper stack from Michaels
Stamps: Darcey Collection - Anna Griffin
Glitter: Craft Decor brand
Copic Markers
Another card design that I really like how it turned out is this next card. Again, its a downloaded colouring page. I tried to make a lot of masculine cards since most of my cards tend to be very feminine. I think this one really hit that target.
Supplies:
Cardstock: DCWV (brown), Dollar store (foil), Office Depot (cream & white)
Pattern paper: Graphic 45
Stamps: Studio G, SU!, Downloaded colouring page
Copic Markers
Fiskars Threading Water border punch
I did make a few altered items, but not that many. Here is one of the altered journals I made (I made 6 altogether). There is a matching pen, but I didn't take a picture of it. Again, I tried to make it more masculine. What is interesting about the stamp I used on this item is that the stamp is actually a soap stamp. I've been making soap for about 5 years and I was checking out the soap making supplies at Michaels one day and saw this stamp. It works excellent as a rubber stamp. What is also nice is that it was part of a set of 8 stamps for about $8.50. With their usual 40% off coupon you can get it for about $5. They have two different soap stamp sets and they both work great for stamping.
Supplies:
Cardstock: Stampin' Up
Pattern paper: DCWV
Stamps: Life of the Party soap embossing stamps
Ink: Colourbox black pigment ink
Stampendous black detail embossing powder
Martha Stewart Arch Lattice border punch
Fiskars Threading Water border punch
Ribbon: Michaels
The next cards are sets that I made using a 6"x6" One Sheet Wonder template from Verve Stamps. I made them very simple so that I could price them reasonably in a set. I made 4 sets in different colours, but I like this set the best:
Supplies:
Cardstock: Stampin' Up
Pattern paper: unknown
Stamps: Studio G
Ink: Stazon black
These two next card sets were made with another 6x6 OSW template by Susan Roberts. I only made two sets, but I made them a little more elaborate than the other ones.
Supplies:
Cardstock: Recollections
Pattern paper: paper stack from Michaels
Stamps: Lots of Thoughts - SU!
Ink: SU! Creamy Caramel
Ribbon: Walmart
Supplies:
Cardstock: Stampin' Up
Pattern paper: Daisy D
Stamps: Lots of Thoughts - SU!
Ink: SU! Not Quite Navy
Ribbon: Walmart
The next altered item I made were coasters. I made round and square. I wanted to make tile coasters, but I didn't make it to Home Depot to see if they had the tumbled marble tiles, so I used cork ones I bought at the Dollar store and covered them with 130# coated cardstock (Domtar paper). These are the one's I like the best. I'm surprised at how well they actually turned out. I used the Adirondack alcohol inks to make the background (I've never used these inks before). I wasn't sure I'd like this colour combination, but it really looks like stone in real life.
Supplies:
Cardstock: Domtar 130# coated
Stamps: Garden Delight - Inkadinkado
Ink: Stazon black, Adirondack Alcohol inks (Butterscotch, Meadow, Slate)
Mod Podge
These next coasters are done using the same technique with the alcohol inks, but the colours came out way more intense than I had anticipated. Even using the blending solution didn't tone them down that much. You can just barely make it out in the picture, but I stamped dragonflies with gold ink over the background. They're kind of almost holographic looking. It looks cool in person.
Supplies:
Cardstock: Domtar 130# coated
Stamps: Life of the Party soap embossing stamps
Ink: Colourbox gold pigment ink, Adirondack Alcohol inks (Wild Plum, Stream, Currant)
Mod Podge
This next item was one of the items that sold at the craft sale. I actually sold two of these (to one of the other vendors). I made 6 of these altered note pads with a matching pen. I think they turned out really well. I created the cover from ideas I saw on various blogs to suit what I had for the note pads and dimensions.
Supplies:
Cardstock: Recollections
Patterned paper: paper stack from Costco
Ribbon: Michaels
RSVP pens
Sentiment is computer generated
Medallion designed & cut with my Craft Robo
This last item (you're probably getting bored by now) is an altered coaster/sticky note holder. I've seen these all over the place so I just adapted my design to what I had. I used the 130# coated cardstock as the base. I just cut squares and used my corner rounder, then covered the base with pp and decorated; attached the sticky notes and added a big paper clip. They were pretty easy to make and very quick, plus as an added bonus they use up your paper scraps.
I tried taking pictures of the beaded RSVP pens I made, but the patterned paper doesn't show up very well through the beads so I'm not going to bother posting a picture right now until I can get one that shows up well. Could be that I didn't use pp with a strong/dark enough pattern.
So that's all I have for now. I'm going to work on some Halloween & Thanksgiving stuff over the next couple weeks. I'll post pics as I go along.
Take care & talk to you later...
Cat
Tuesday, August 17, 2010
Sugar Bead Disaster...
I'm really po'd at myself. I've had that jar of sugar beads for at least 6 or 7 months. I take it out yesterday to work with and don't put it back where I got it from, so what happens? I was getting something off the shelf where I put it and knocked it down on the floor - from the top shelf - about 5 feet. The jar broke and I had sugar beads all over the place. So there I was at 1 o'clock in the morning vacuuming! I lost about 1/2 the jar. Not that they're that expensive and I can't replace them. Not that I use them all the time. I just need to learn to put things away in their proper place when I'm done and quit being so damn lazy. Oh well, at least I got into the corners and around the mouldings with the vacuum - its been a while - and got the dust bunnies that I've been ignoring. My, how they grow....
Talk to you later...
Cat
Talk to you later...
Cat
Subscribe to:
Posts (Atom)